Gut Hook Knife: The Honest Guide to a Blade Half of Hunters Swear By (and Half Quietly Ignore)
Table of Contents
Walk into any sporting goods store and you’ll find a wall of gut hook knives, each one promising to make field dressing faster, cleaner, and idiot-proof. Walk into a deer camp full of people who’ve actually dressed a hundred animals, and you’ll find half of them have never used the little hook on their blade, and the other half wouldn’t hunt without it.
That gap between the marketing and the camp is what this guide is about. We’ll cover what a gut hook blade actually is, how the geometry works, how to use one without ruining your meat, how to sharpen the one part of the knife nobody can keep sharp, and the question every other guide skips: whether you genuinely need one at all. No overselling, just the honest version. New to blade shapes? Start with our master guide to knife blade types and come back.
What Is a Gut Hook Knife?
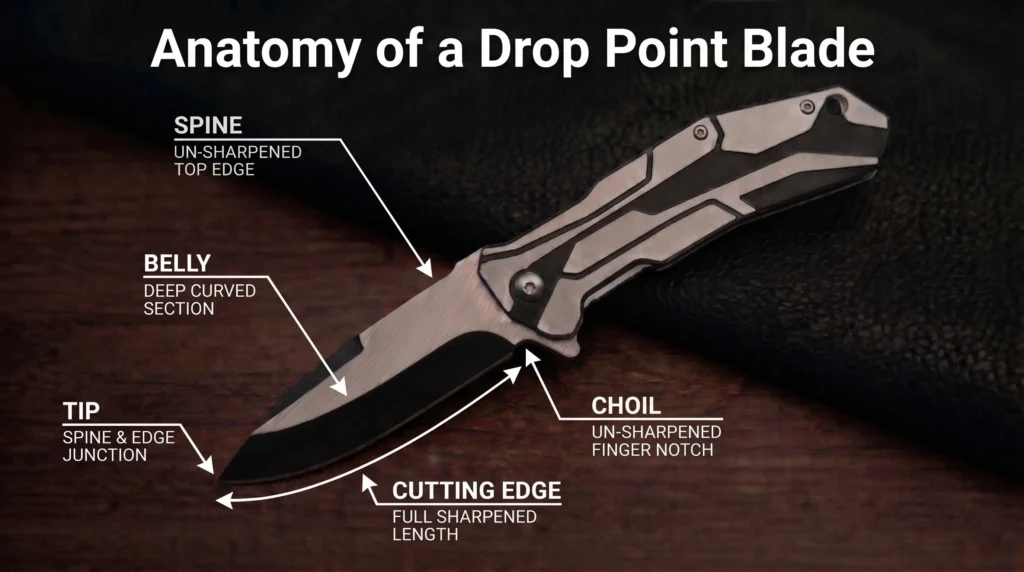
A gut hook knife is a hunting knife with a small, sharpened, hook-shaped notch ground into the spine near the tip. The inside curve of that hook is the cutting edge. It’s designed for one job: opening the abdominal wall of a downed animal cleanly, like a zipper, without driving the main point into the organs underneath.
That’s the snippet-friendly version. The longer truth is that a guthook knife is really two tools sharing one piece of steel: a conventional belly for skinning and slicing, plus a specialized hook for that single unzipping motion. Everything good and bad about these knives comes from trying to do both jobs well at once. The hook is brilliant at its narrow task and slightly annoying everywhere else, which is why opinions on it run so hot.
Gut Hook Anatomy: The Geometry Nobody Explains
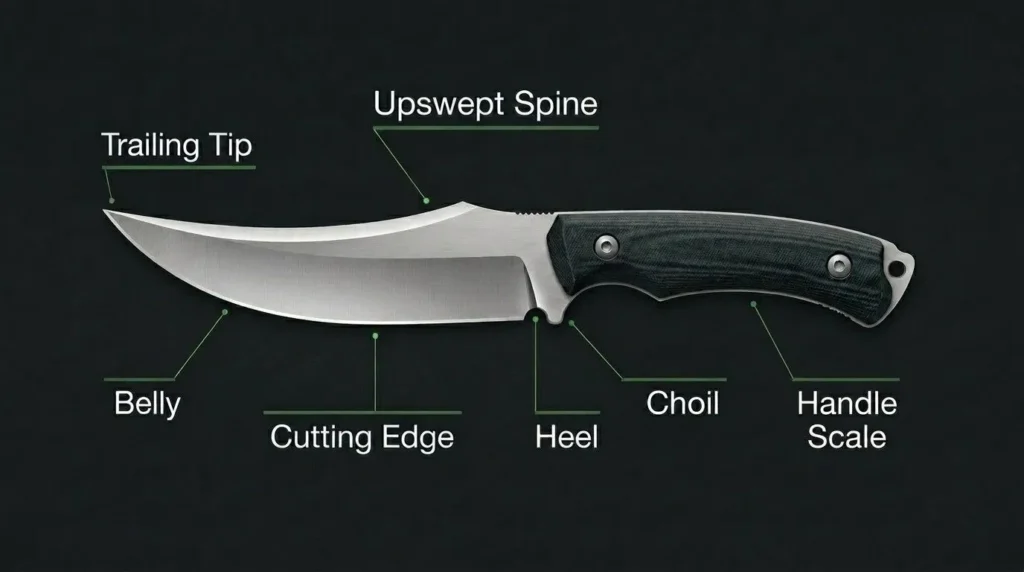
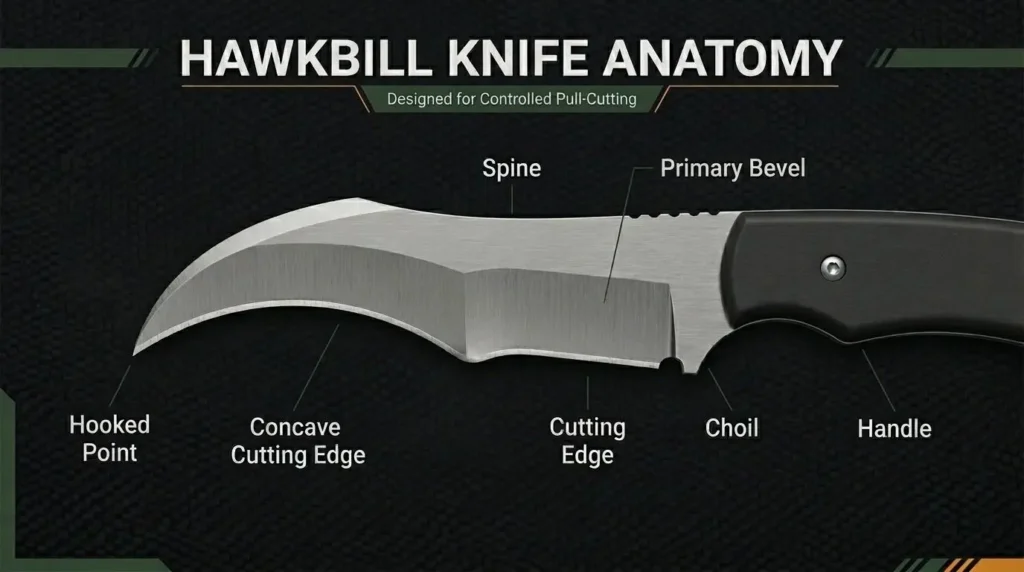
Most guides show you a photo and move on. If you want to use, sharpen, or buy one of these intelligently, you need to understand the shape, so here are the parts that matter, in plain terms.
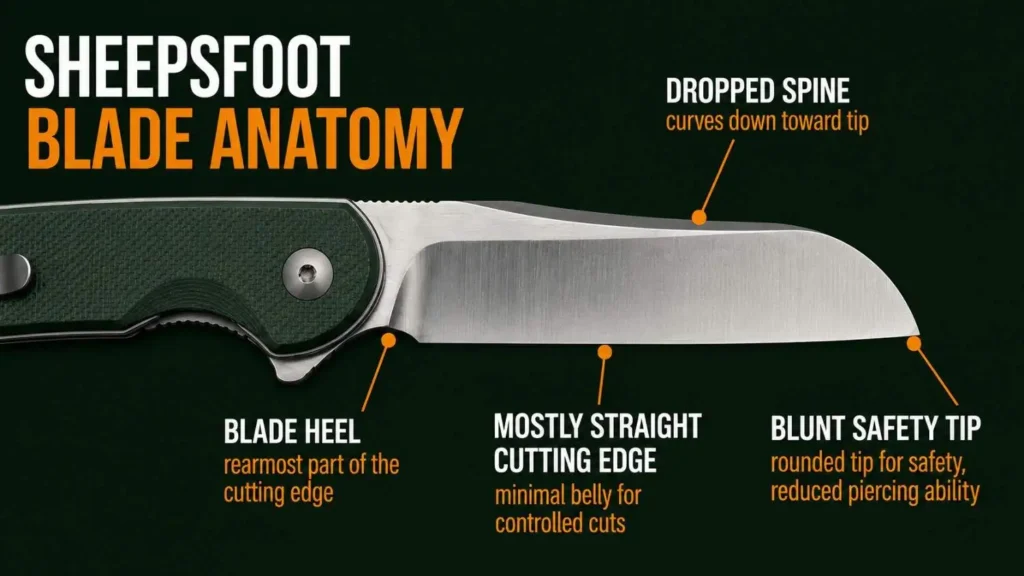
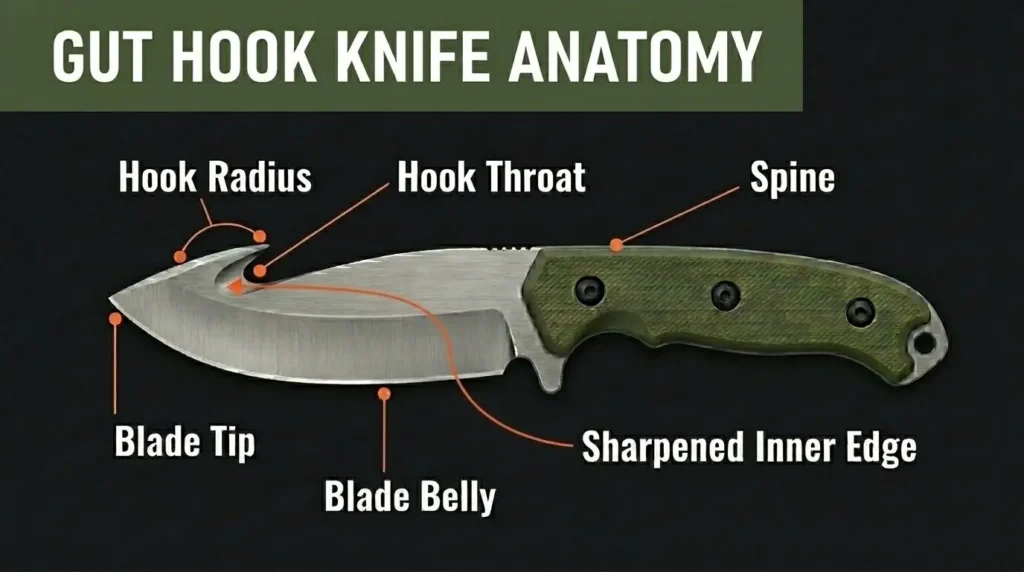
The gut hook itself is the curved notch cut into the blade spine, usually within an inch or two of the tip. Its working dimension is the hook radius, which is how tight the curve is. A tight radius bites aggressively and is murder to sharpen; a more open radius is gentler and far easier to maintain. This single spec separates a hook you’ll love from one you’ll resent.
Inside that curve lives the sharpened inner edge, the concave cutting surface. This is the part that does the work, and critically, it is the only edge on the knife that faces inward and upward. That orientation is why a standard flat stone is useless on it (more on that later).
The mouth of the hook is the hook throat, the opening where hide and fur enter. A wide throat catches material easily but is more prone to snagging; a narrow throat is more controlled but fussier to feed.
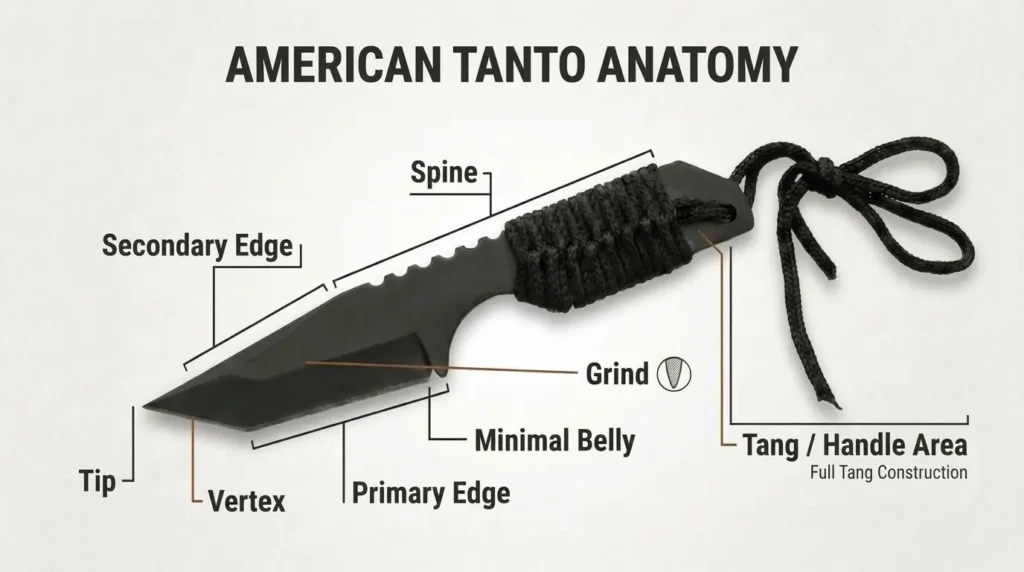
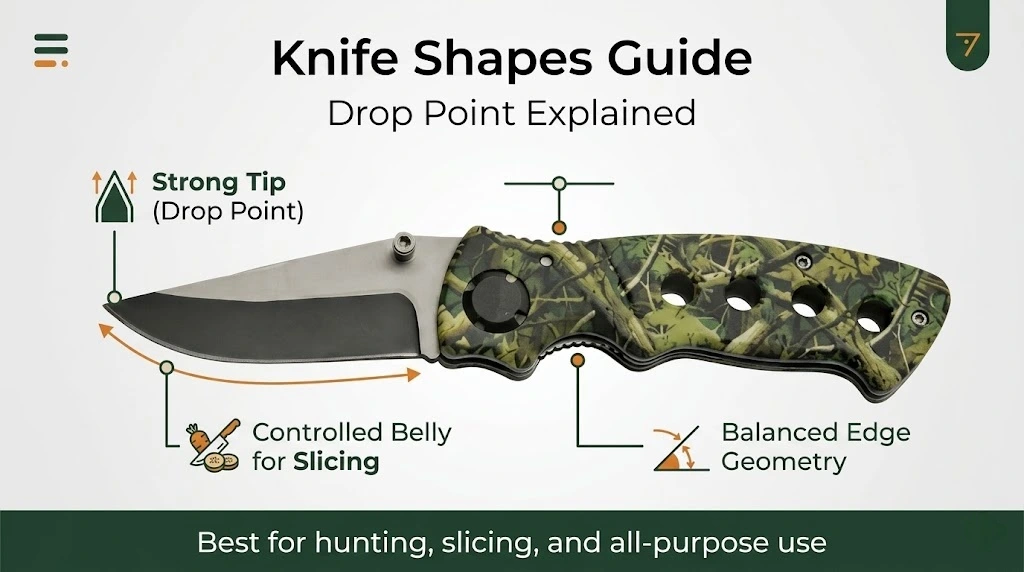
Below all of this sits the rest of the knife: typically a drop point profile with a generous blade belly for skinning, often a full tang for strength, and sometimes a serrated spine section for rope and tough fibrous material. The handle usually carries finger grooves and a guard, because you’re working with bloody, slick hands and a blade pointed back toward you.
[INFOGRAPHIC: Labeled gut hook anatomy diagram showing hook radius, sharpened inner edge, hook throat, spine placement, blade belly, and tip | ALT: “Gut hook knife anatomy diagram labeling the hook radius, sharpened concave inner edge, hook throat, spine, and drop point blade belly”]
Understanding the gut hook design this way pays off immediately: when someone says a hook “snags” or “won’t stay sharp,” you’ll know they’re describing a tight radius and a narrow throat, not a defective knife.
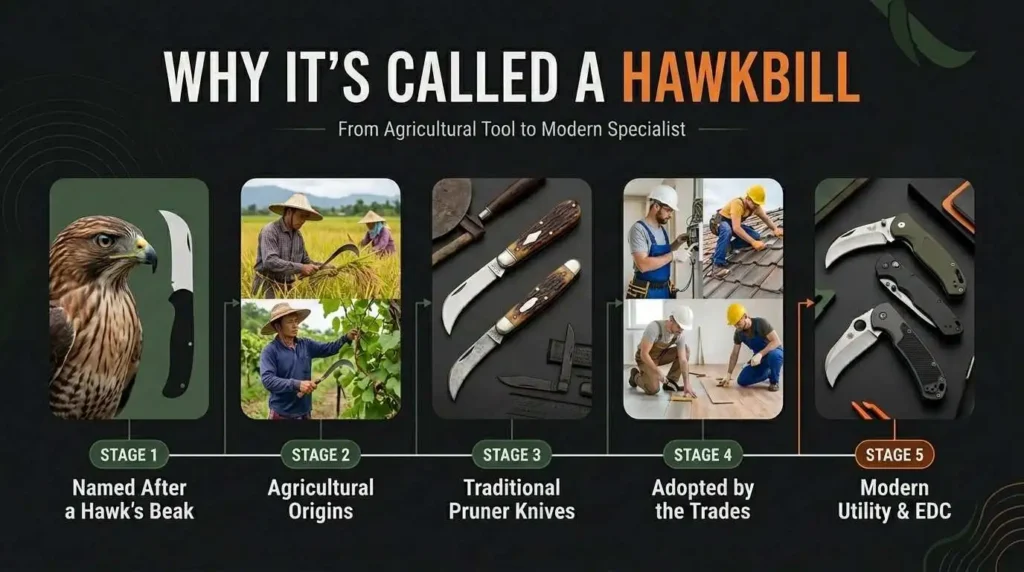
Why Is It Called a Gut Hook? (A Short, Strange History)
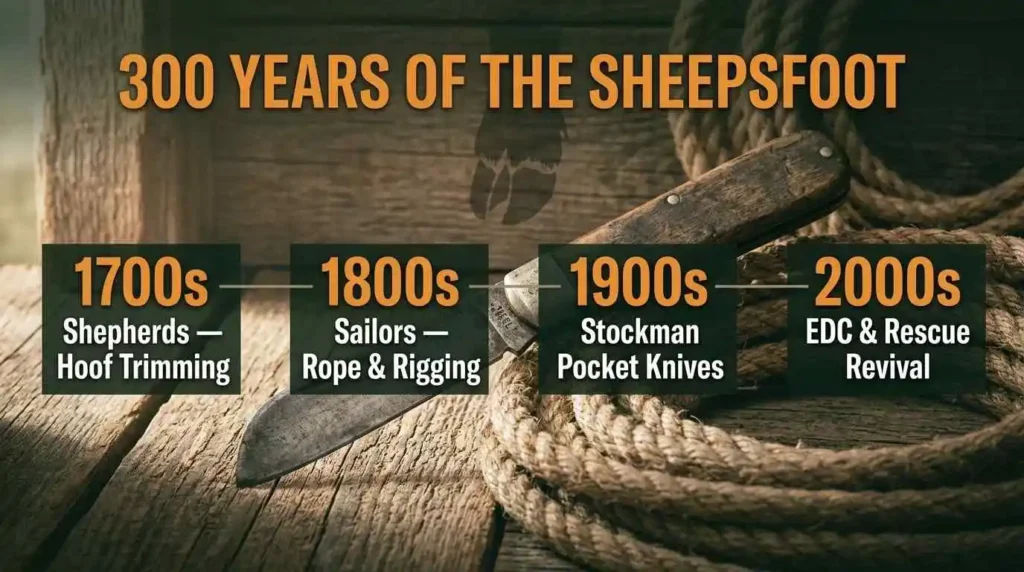
The name is almost too literal: it’s a hook, and it’s for guts. But the origin story is better than the name suggests.
The most repeated account is that the feature didn’t start as a gutting tool at all. A custom knifemaker is said to have forged a hook onto the back of a blade in the mid-20th century so he could lift a hot pot off a campfire without burning himself. Later, he sharpened that hook and realized it was perfect for opening game. Whether or not that exact story is true, it captures something real: the gut hook was a clever repurposing, not a from-scratch invention, and it spread through custom makers before the big brands standardized it in the 1980s and ’90s.
So “gut hook” is descriptive of the job it eventually settled into, not a poetic name, just an honest one.
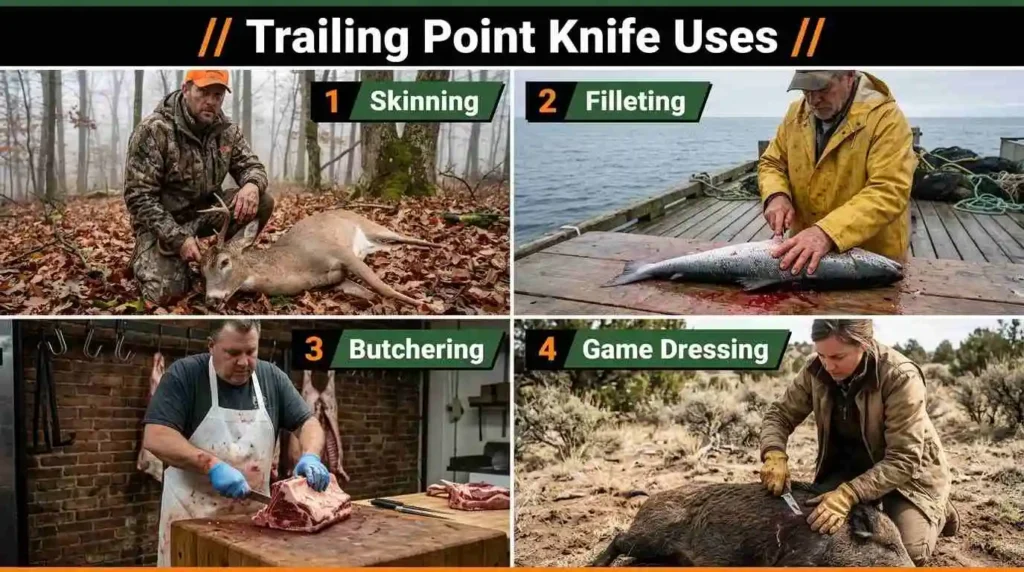
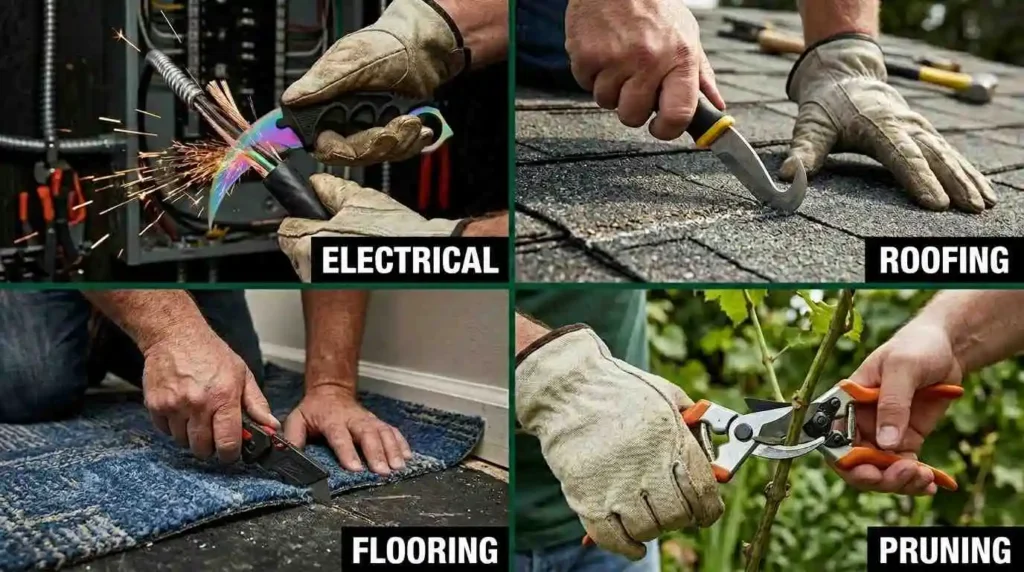
What Is a Gut Hook Knife Used For?
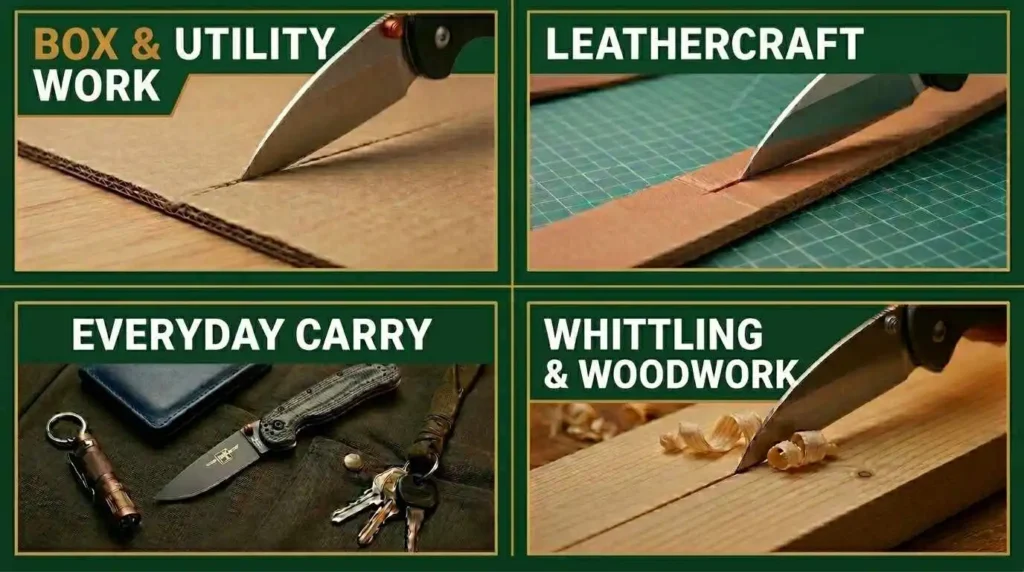
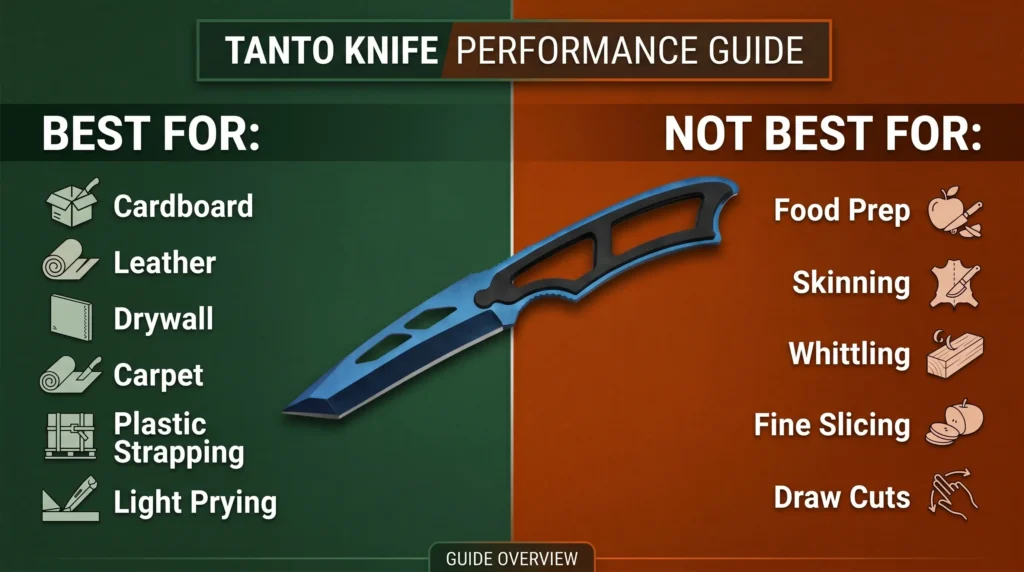
The primary answer is field dressing big game, but the gut hook knife uses list is longer than most hunters assume:
- Opening the abdominal cavity of deer, elk, and similar game without puncturing the stomach or intestines.
- Unzipping the hide along a limb during skinning, separating skin from muscle with a controlled pull.
- Caping assistance, making clean directional cuts when preparing a trophy mount.
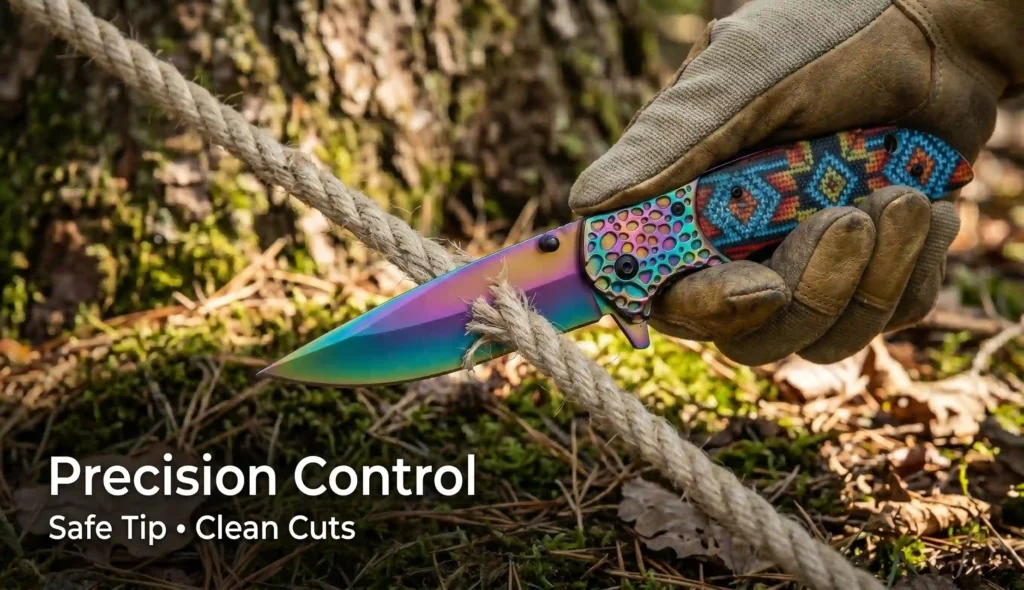
- Cutting rope, cordage, or webbing in a pinch; the protected edge pulls through material safely.
- Cutting fishing line or opening bait on fishing-specific models.
- Emergency cutting: the same shape that protects intestines also makes a decent seatbelt or strap cutter, which is why a cousin of the gut hook shows up on rescue knives.
The thread running through all of these is controlled, edge-protected pulling cuts: situations where you want to slice through a surface layer without the tip diving into whatever is underneath. That’s the gut hook’s whole personality.
How to Use a Gut Hook Knife (Step by Step)
This is where almost every guide fails you. They say “use it like a zipper” and stop, as if that explains anything. It doesn’t. Here’s the actual mechanics, for a whitetail-sized animal, with the carcass on its back.
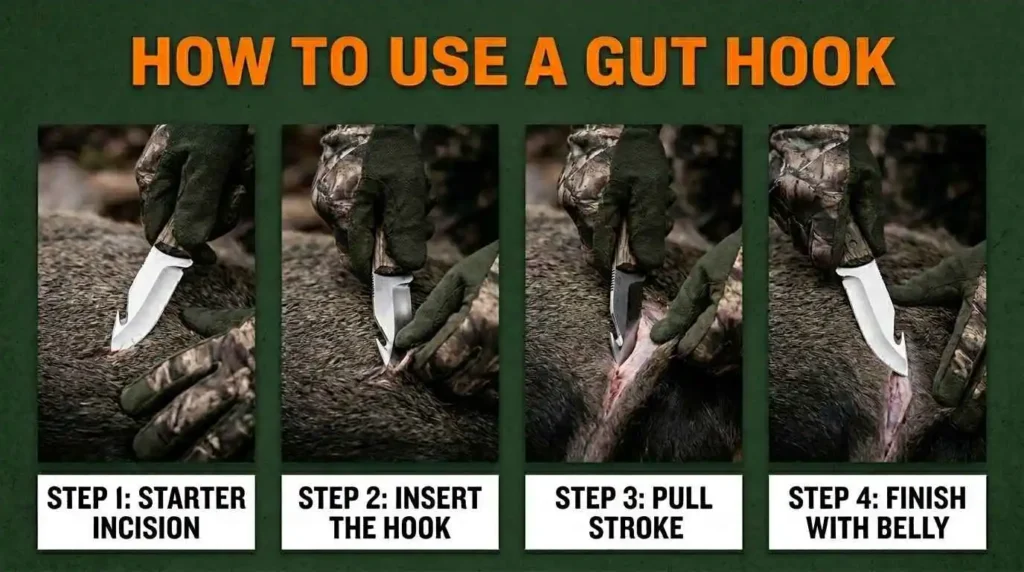
1. Make the starter incision with the main blade, not the hook. Pinch and lift the skin low on the belly, and use the point of your knife to open a small slit through the hide and abdominal wall, just big enough to insert the hook. This first cut is shallow and deliberate; you are cutting the wall, not the guts.
2. Insert the hook, edge facing up. Slide the sharpened inner edge into that slit so the hook is hooked under the abdominal wall, blade spine down against the skin, cutting edge facing up and away from the organs. Two fingers of your free hand can ride just ahead of the hook, between the hide and the entrails, as a guide and a guard.
3. Pull, don’t push. Draw the knife toward the sternum in one smooth motion. The hook’s geometry does the work: it catches the wall and slices it open from the inside, while the rounded back of the hook glides along without biting into anything below. Pull strokes only. A gut hook is built to cut on the pull; pushing it accomplishes nothing but frustration.
4. Control your depth. The reason the hook exists is depth control. Because the cutting edge sits inside the curve and the spine rides against the skin, the blade physically can’t plunge deep the way a point can. Let the tool do that job; don’t muscle it.
5. Switch back to the belly for the rest. Once the cavity is open, the hook’s job is essentially done. Use the main drop point edge, the same profile we cover in our drop point knife guide, for the heavier cutting, the diaphragm, and the rest of the process.
[INFOGRAPHIC: Four-panel sequence: starter incision, hook insertion with fingers as guide, pull stroke up the belly, switch to main blade | ALT: “Step-by-step how to use a gut hook knife for field dressing: starter incision, hook insertion, pull stroke, and finishing with the main blade”]
For the full field-dressing process beyond the opening cut, including organ removal, cooling, and food-safety steps, the National Deer Association’s field-dressing guide is a genuinely good, biologist-written walkthrough. The gut hook only owns the first cut; everything after is general technique.
Do You Actually Need a Gut Hook? The Honest Verdict
Here’s the section the marketing wants buried.
Are gut hooks worth it? It depends entirely on who you are, and pretending otherwise is how every other guide loses credibility. So let’s be honest about who benefits and who should skip it.
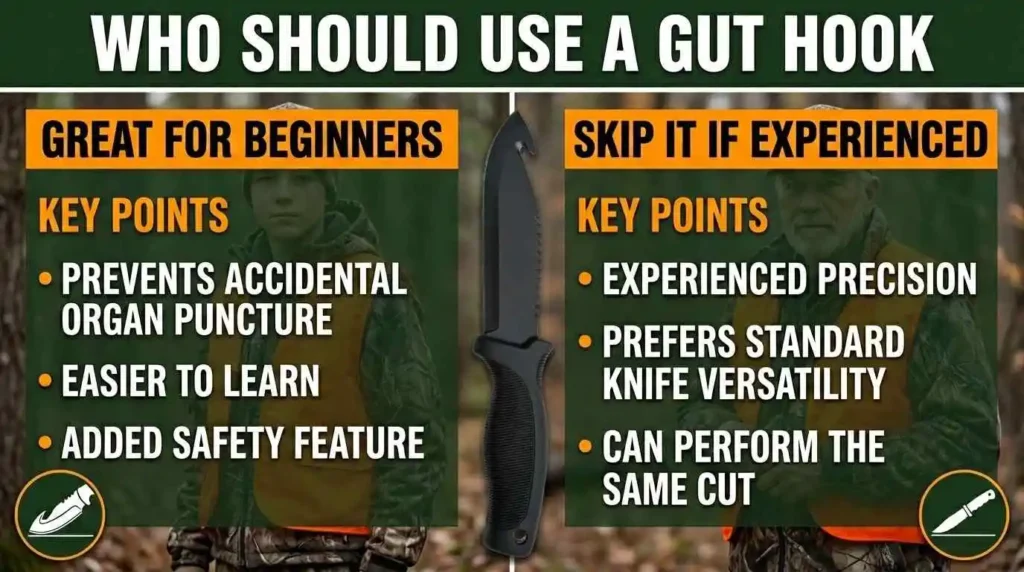
You’ll probably love a gut hook if:
- You’re a newer hunter who hasn’t built the muscle memory to open a cavity by feel. The hook is training wheels in the best sense: it makes a clean opening hard to screw up.
- You field-dress solo, often in poor light or cold, tired conditions where a controlled, low-risk cut matters more than speed.
- You process a lot of deer-sized game and want to shave time off the one cut you repeat every single time.
You can comfortably skip it if:
- You’re an experienced hunter with a steady hand. Plenty of veterans open a cavity faster and cleaner with a plain blade and two fingers as a guide than they ever could with a hook. As one longtime writer for BLADE Magazine put it after decades of hunting on three continents, he’d simply never needed one.
- You value a simple, easy-to-maintain edge. The hook is the first thing to dull and the hardest thing to fix.
- You mostly process small game or fish, where the hook is more in the way than in use.
Why do so many hunters quietly abandon their gut hooks? Three honest reasons, and they’re worth saying out loud. First, the hook snags on hide and hair if your radius is tight or your technique is off. Second, it dulls fast and most people never re-sharpen it, so it becomes dead weight. Third, and this is the big one, it’s genuinely hard to sharpen, so a lot of hooks live their whole lives as decoration. On hunting forums you’ll find the same refrain repeated for twenty years: “I have one, I never use it, I can’t keep it sharp.”
None of that makes the gut hook bad. It makes it specialized. A specialized tool used by the wrong person is a gimmick; used by the right person, it’s a quiet workhorse. The trick is knowing which person you are.
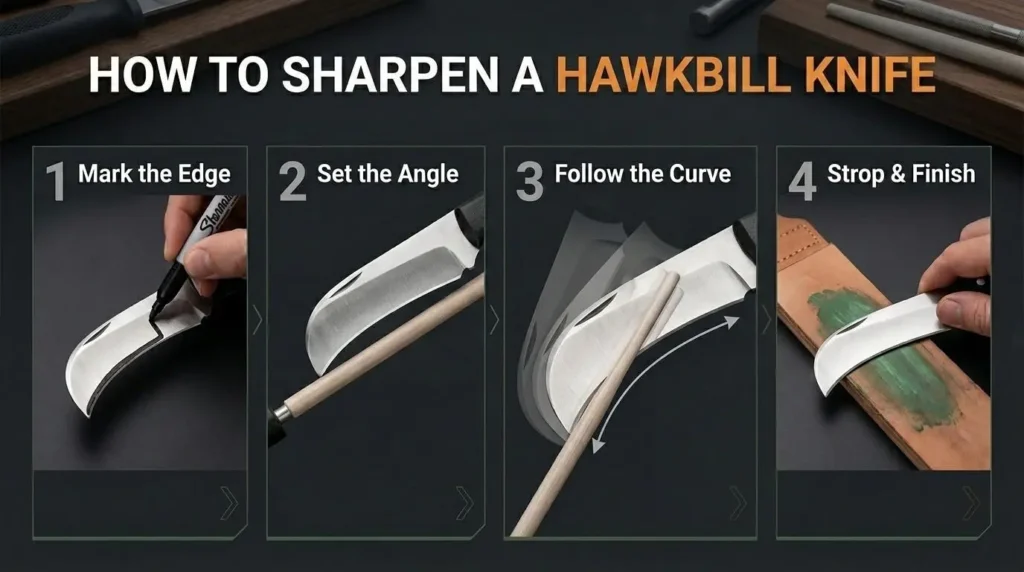
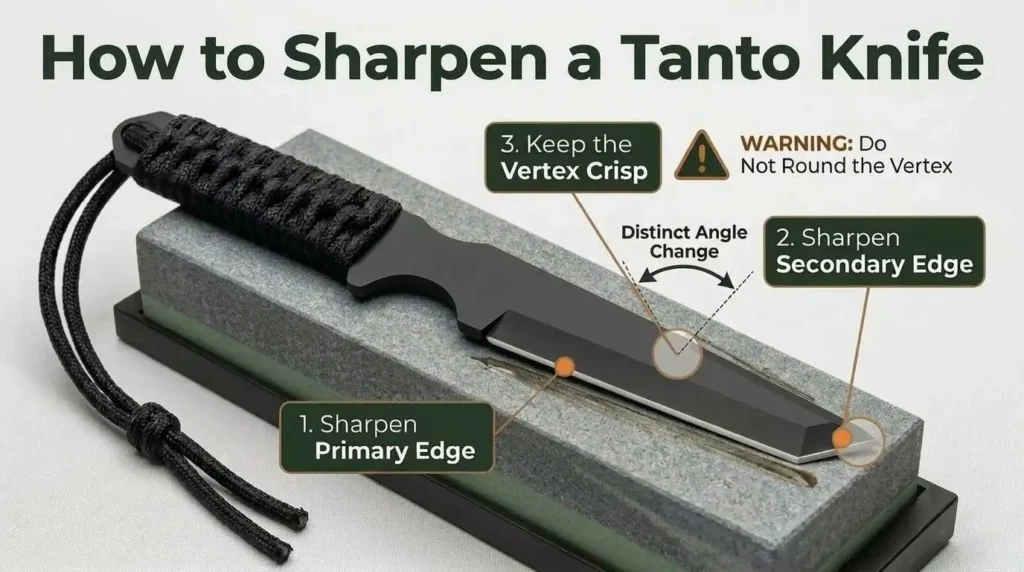
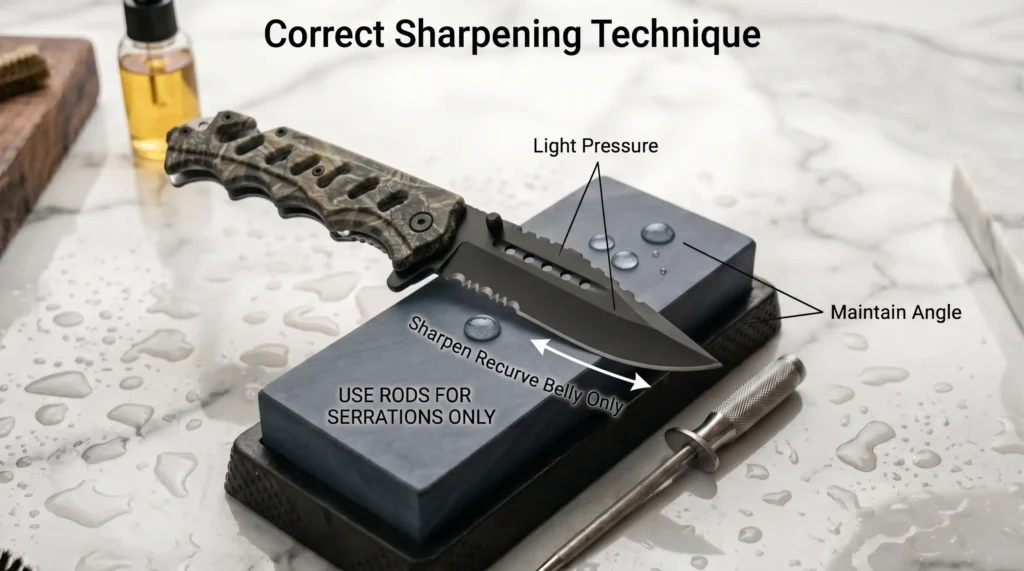
How to Sharpen a Gut Hook (The Part Everyone Gets Wrong)
If there’s one section to bookmark, it’s this one, because how to sharpen a gut hook is the question the entire internet half-answers and then runs from.
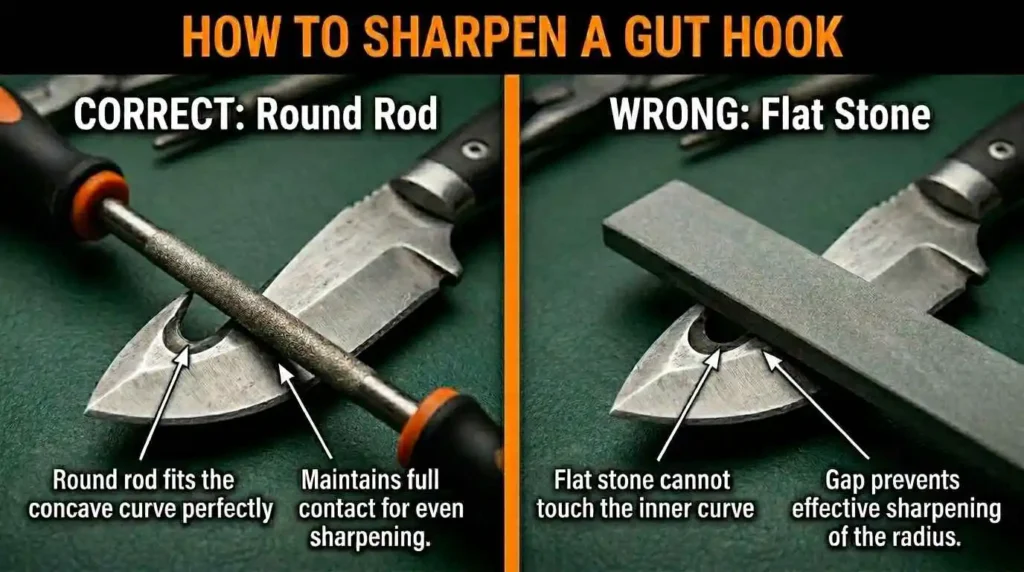
The problem is geometry. The sharpened inner edge is concave and faces into a tight curve. A flat bench stone, the thing most people own, physically cannot reach inside that curve. Drag a gut hook across a flat stone and you’ll just round off the outside of the spine while the actual cutting edge stays dull. This is the single most common sharpening mistake, and it’s why so many hooks are hopeless.
You need a round or tapered abrasive that fits inside the hook. Your real options, from best to passable:
- A tapered diamond rod (the kind sold for serrations) is the best general answer. The taper lets you match the rod’s diameter to your specific hook radius, and diamond cuts steel fast.
- A round ceramic rod works well for maintenance and finishing. It’s slower than diamond but leaves a cleaner edge, and the small-diameter rods from sharpening kits fit most hooks.
- A chainsaw file or small round file is the old-school field fix. It’s coarse and aggressive: fine for reprofiling a badly neglected hook, less ideal for a refined edge. Many older hunters keep exactly this in their kit.
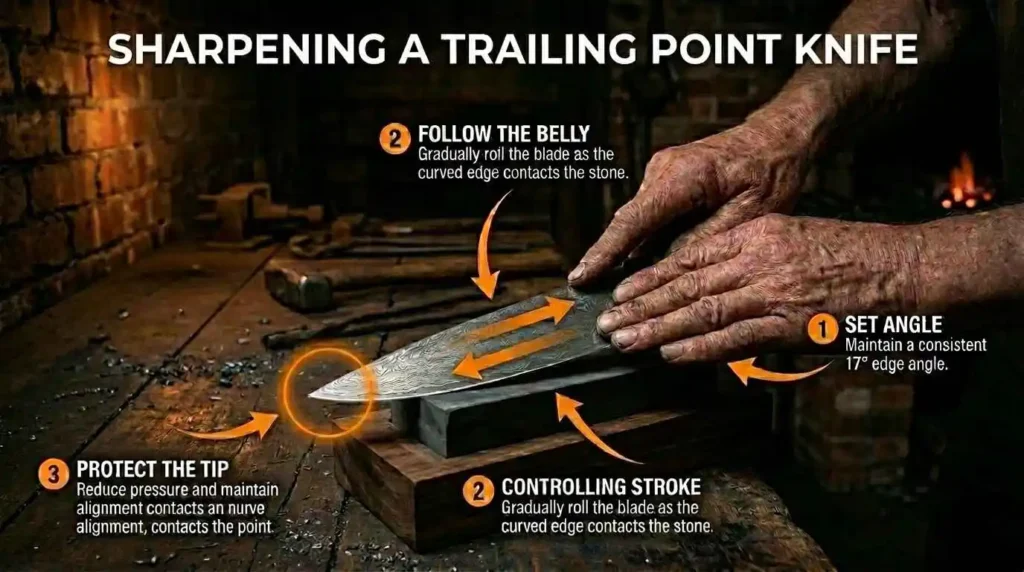
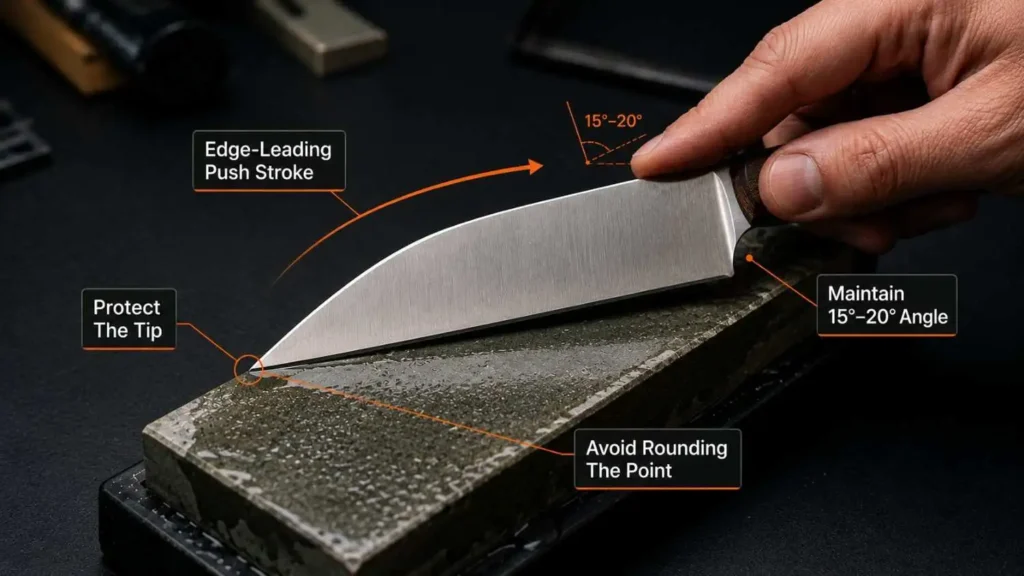
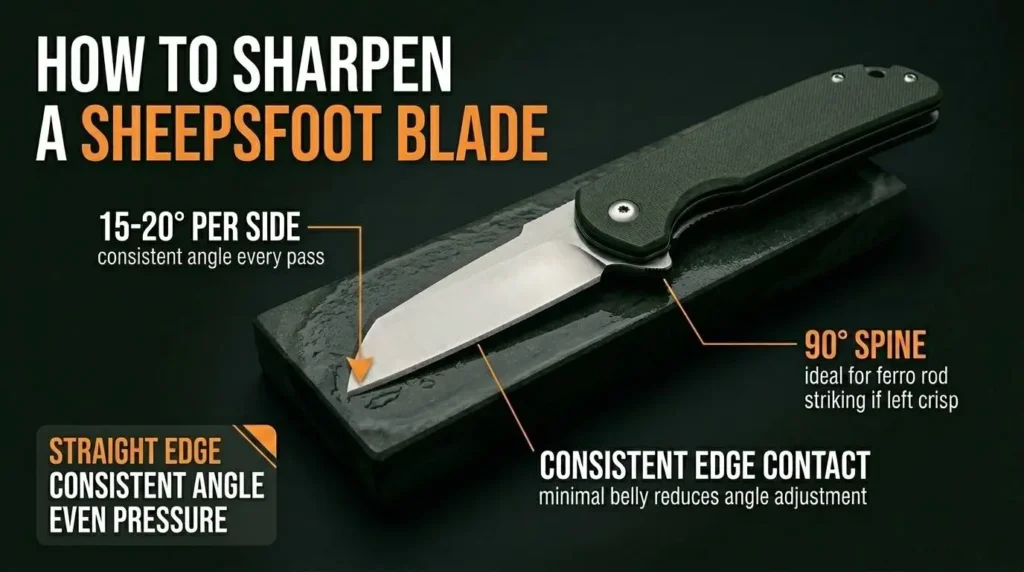
The technique: seat the rod inside the hook so it matches the curve, then stroke only in the direction the edge faces. Draw the rod through the concave edge, lifting and repeating, always cutting one way. Match the existing edge angle (most hooks live around 20 to 25 degrees per side). Work slowly; you’re sharpening a tiny amount of steel in a confined space, and it’s easy to scratch the flats of the blade if you rush. A few passes, check for a burr on the inside, and you’re done.
[INFOGRAPHIC: Cross-section showing a round rod seated inside the concave hook edge vs a flat stone failing to reach it | ALT: “How to sharpen a gut hook: a round diamond or ceramic rod fits inside the concave inner edge, while a flat stone cannot reach it”]
What file to sharpen a gut hook with? If you’re buying one thing, buy a small tapered diamond rod. It handles the gut hook and any serrations on the spine, and it’s the difference between a hook that works for a decade and one that quits after a season.
How to Clean and Maintain the Hook
The hook throat is a trap. Its narrow concave shape collects blood, hair, fat, and tissue exactly where you can’t easily see or wipe it, and that trapped organic material is corrosive. On most knives, the gut hook is the first place rust appears, simply because it’s the hardest spot to clean and dry.
So after every use: flush the hook with warm water, then run a folded edge of paper towel, a pipe cleaner, or a small brush through the throat to clear it physically. Dry it completely (a damp hook is a rusting hook) and add a drop of light oil to the inside of the curve before storage.
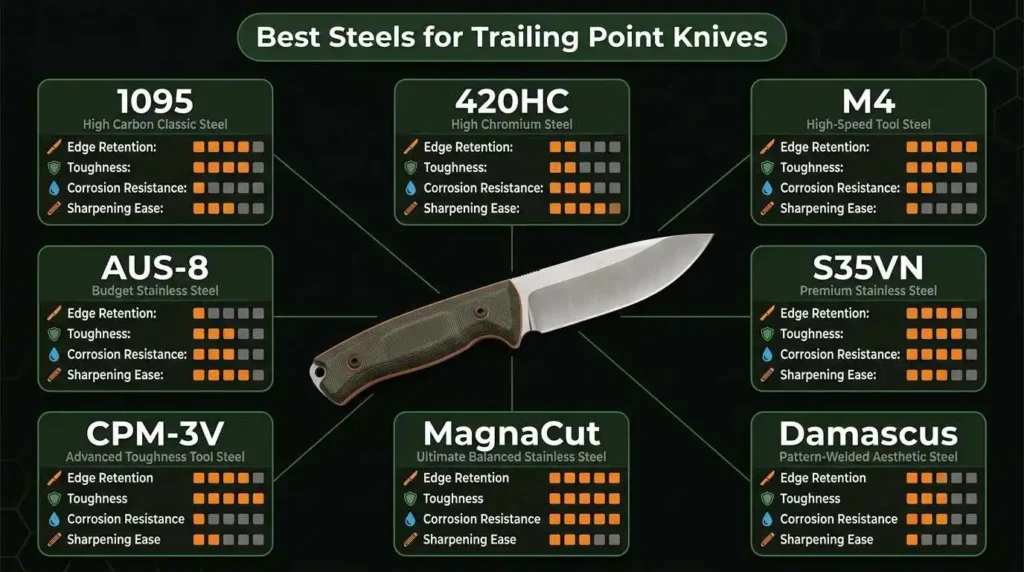
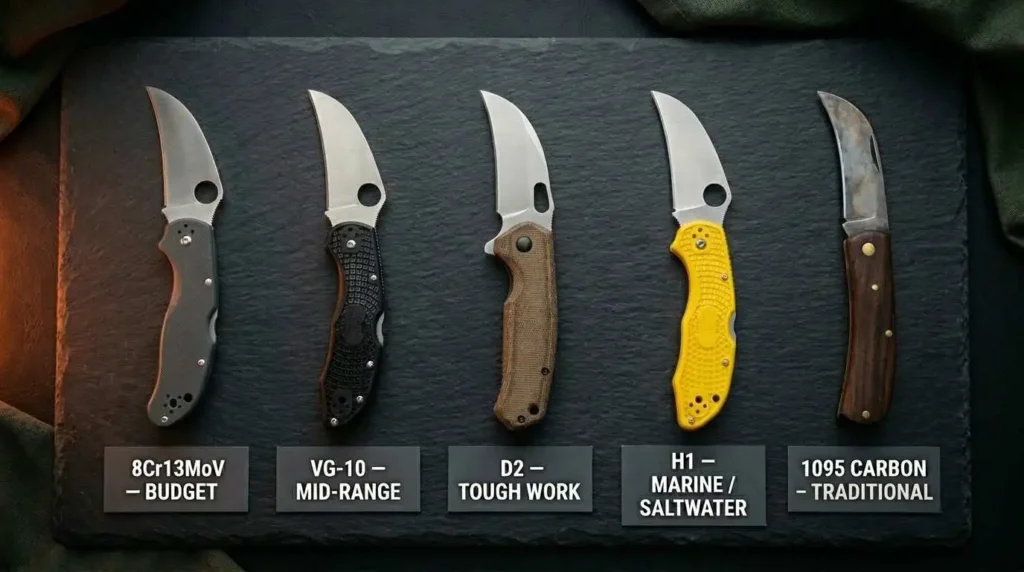
This is also where blade steel matters. A stainless steel blade with good corrosion resistance forgives a rushed cleanup far better than carbon steel will; if you hunt in wet conditions or you know you won’t baby your gear, stainless is the sensible choice for a gut hook specifically, because the throat is going to take abuse no matter how careful you are.
Common Gut Hook Mistakes
A quick honest list of the ways people misuse these knives:
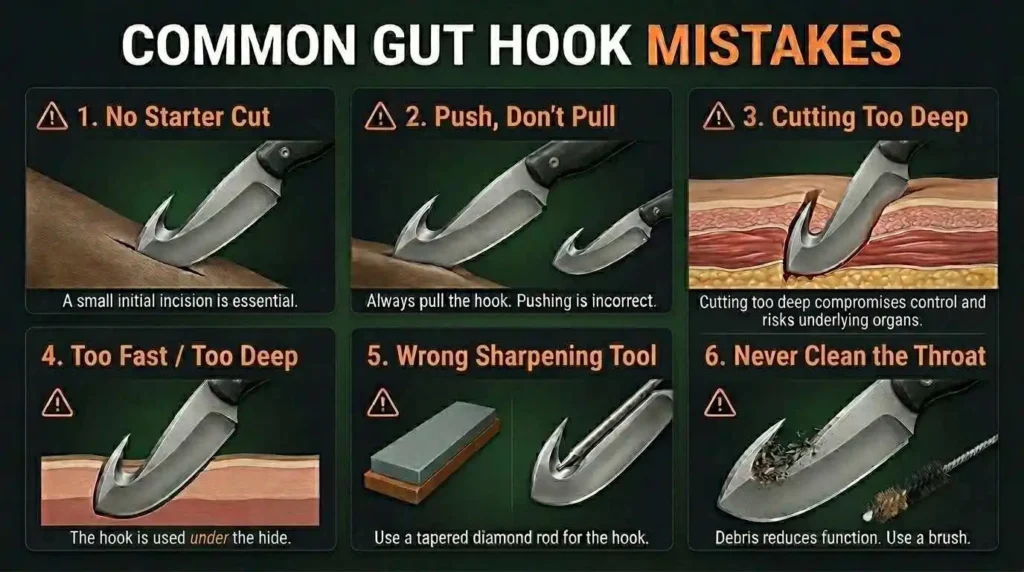
- Using the hook to make the starter cut. The hook can’t start its own incision cleanly: open the wall with the point first, then insert the hook.
- Pushing instead of pulling. The geometry only cuts on the draw.
- Going too deep or too fast and snagging the hide or nicking the paunch, the very thing the hook is supposed to prevent, defeated by impatience.
- Sharpening on a flat stone and wondering why it stays dull.
- Never cleaning the throat, then blaming the knife when it rusts.
Most “the gut hook is useless” complaints trace back to one of these five, not to the tool.
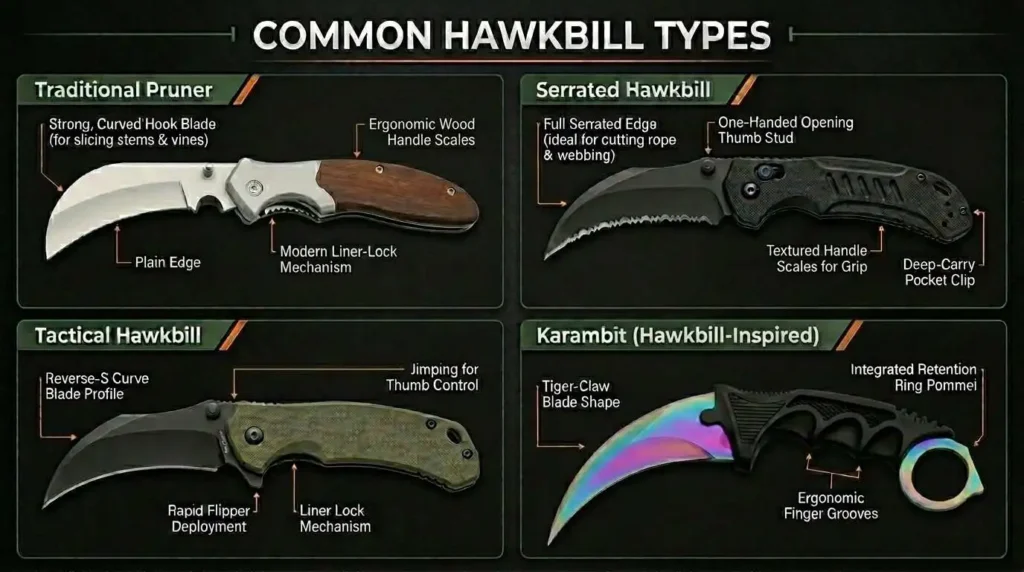
Gut Hook Variants and Alternatives
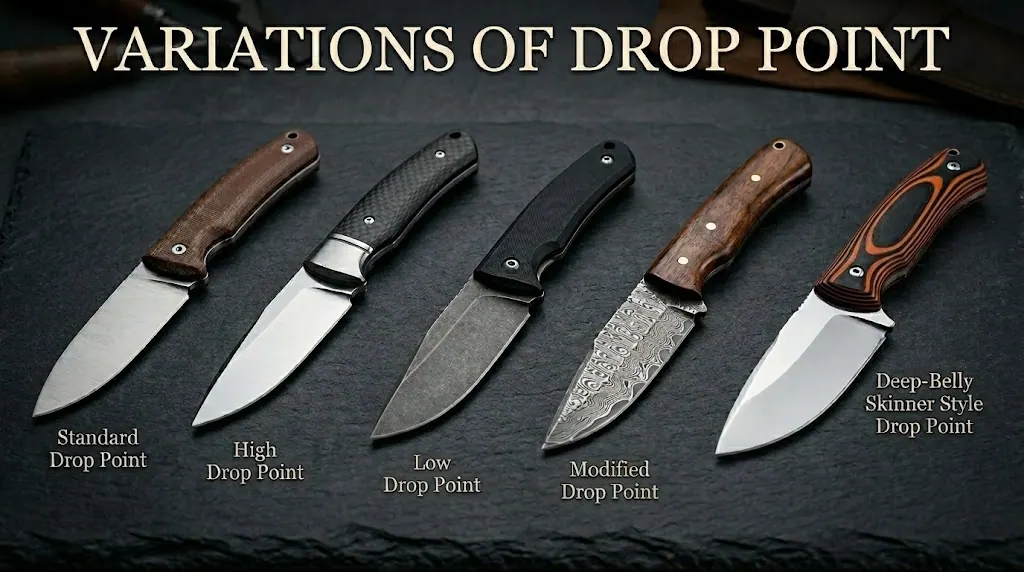
Not every gut hook blade is the same, and there are alternatives worth knowing.
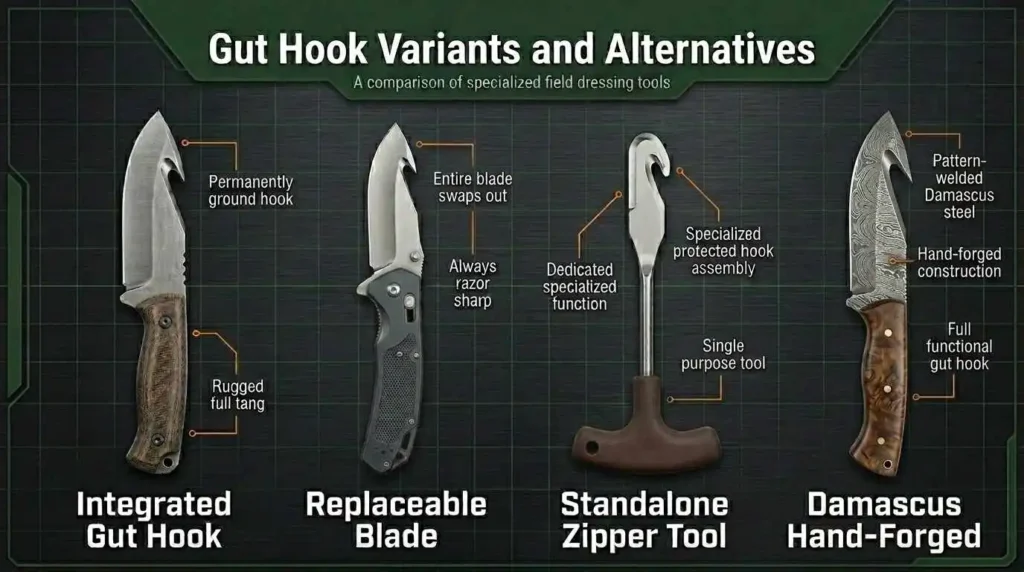
Drop point with integrated gut hook. The most common configuration: a drop point skinner with the hook ground into the spine. This is the “do everything” hunting knife and the default mental image of a gut hook.
Replaceable-blade gut hooks. A growing category, and an honest answer to the sharpening problem: instead of maintaining the hook, you swap in a fresh blade. If the concave-edge sharpening described above sounds like more trouble than you want, this is the pragmatic workaround that a lot of hunters have quietly migrated to. No shame in it.
Standalone gut hook tools. A small, dedicated hook, sometimes called a “zipper,” separate from your main knife. Cheap, single-purpose, and easy to add to a kit if you want the function without committing your main blade to the shape.
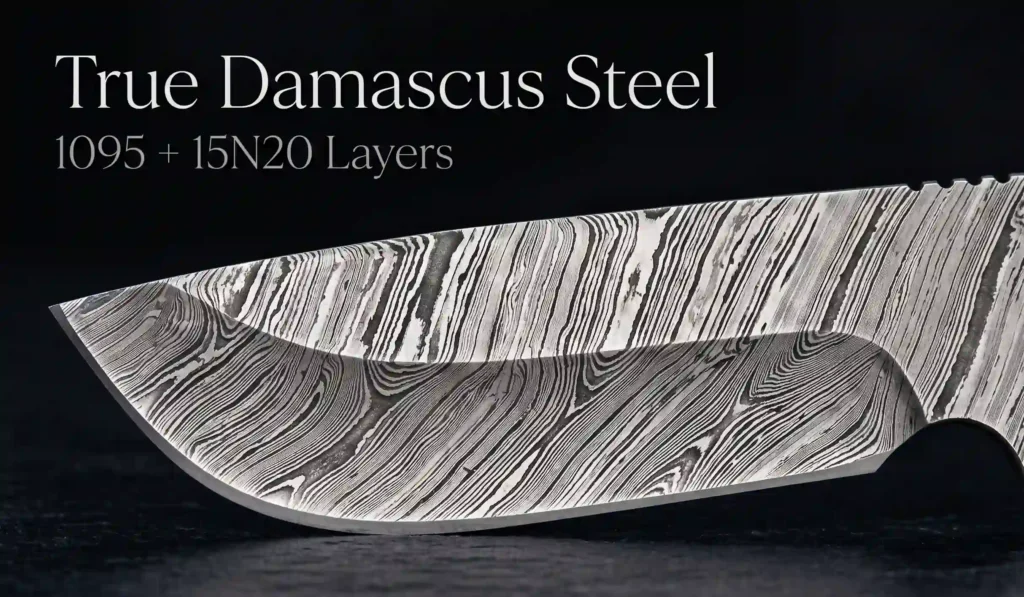
Damascus and hand-forged gut hooks. For collectors and hunters who want a knife with character, a Damascus steel or hand forged gut hook delivers the pattern-welded look along with the function. Worth knowing that the beauty is in the steel and the maker’s work; the hook geometry follows the same rules regardless of how pretty the billet is.
Gut hook blade blanks and bolo models. If you make your own knives, gut hook blanks let you build a custom handle around a pre-ground hook, a popular entry into knifemaking. And occasionally you’ll see the hook added to a big bolo-style blade, for hunters who want chopping power and a gut hook in one heavy tool.
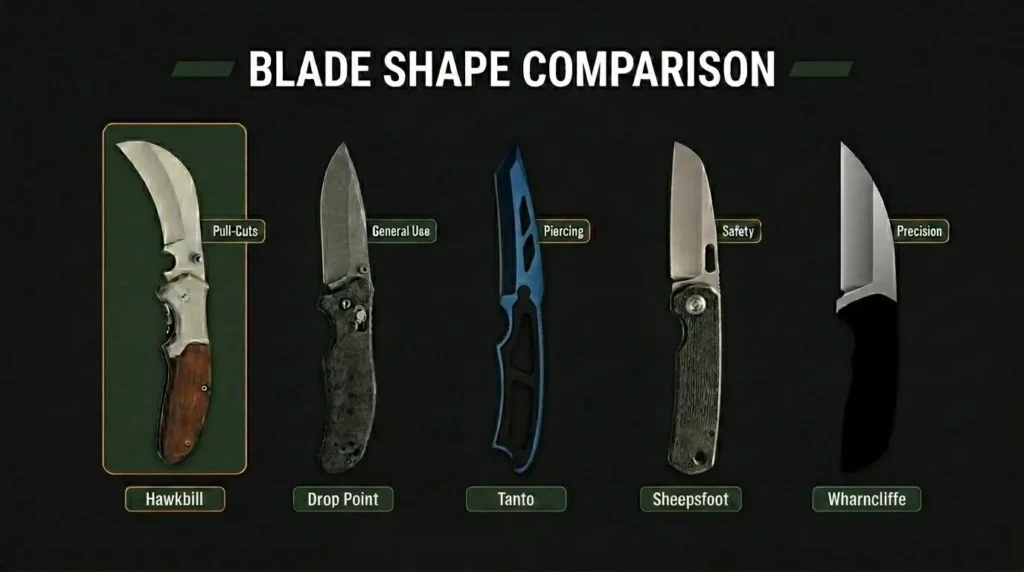
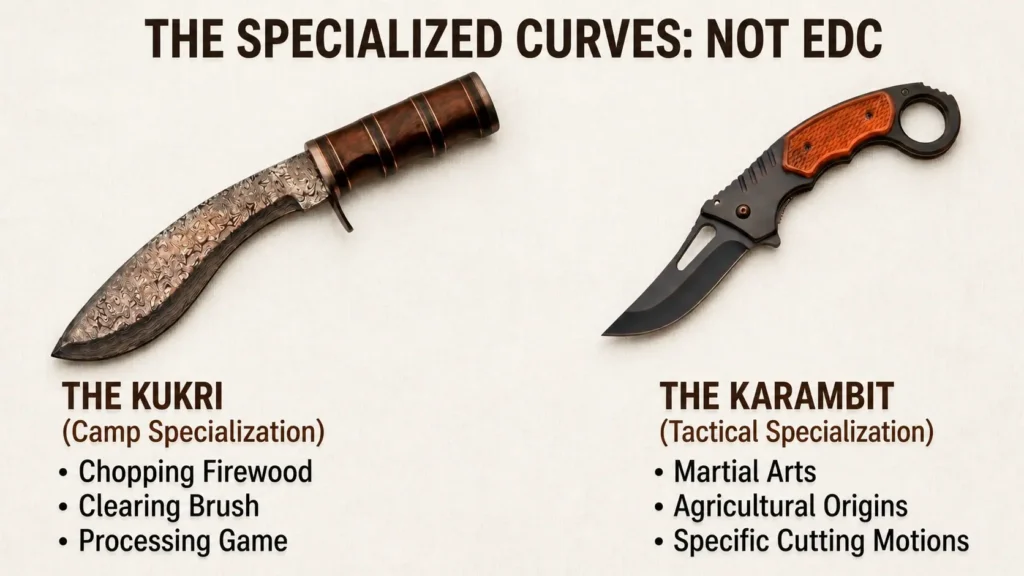
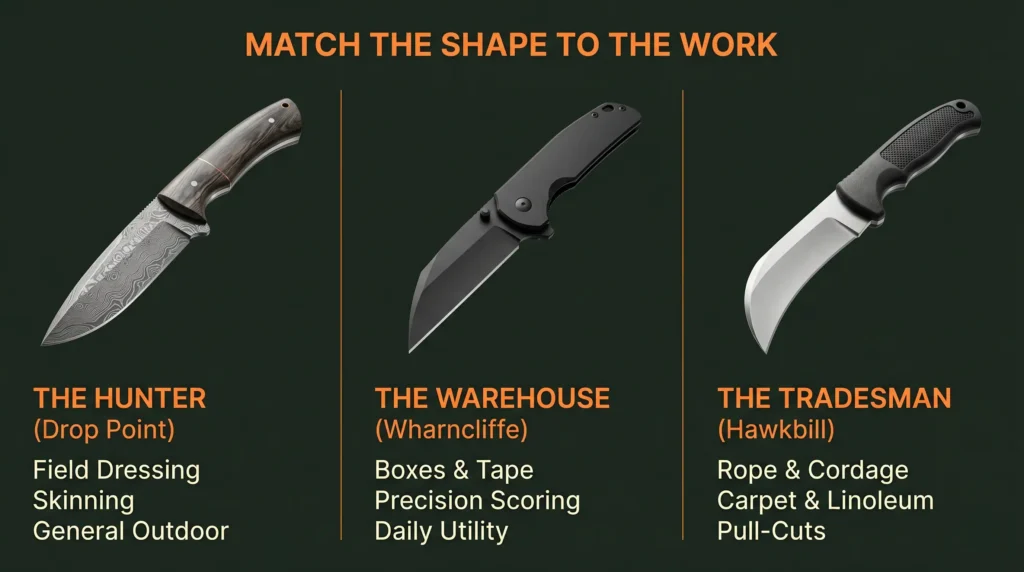
Where the Gut Hook Sits Among Blade Shapes
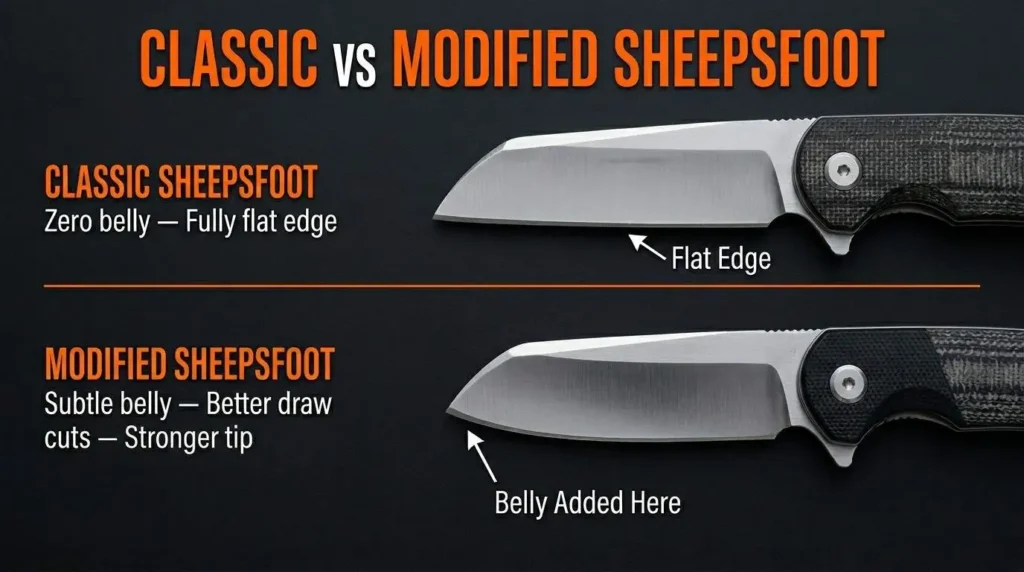
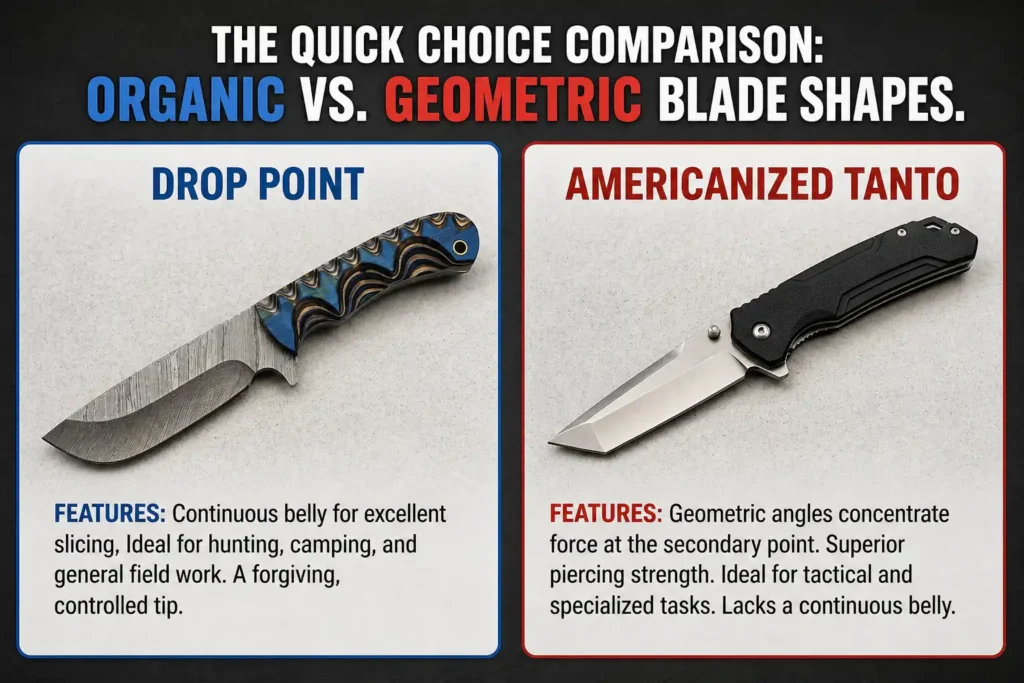
The gut hook isn’t really a blade shape in the way the others are: it’s a feature added to a shape, usually a drop point. But it belongs in the wider family of curved, edge-protected profiles, and seeing it in context helps.
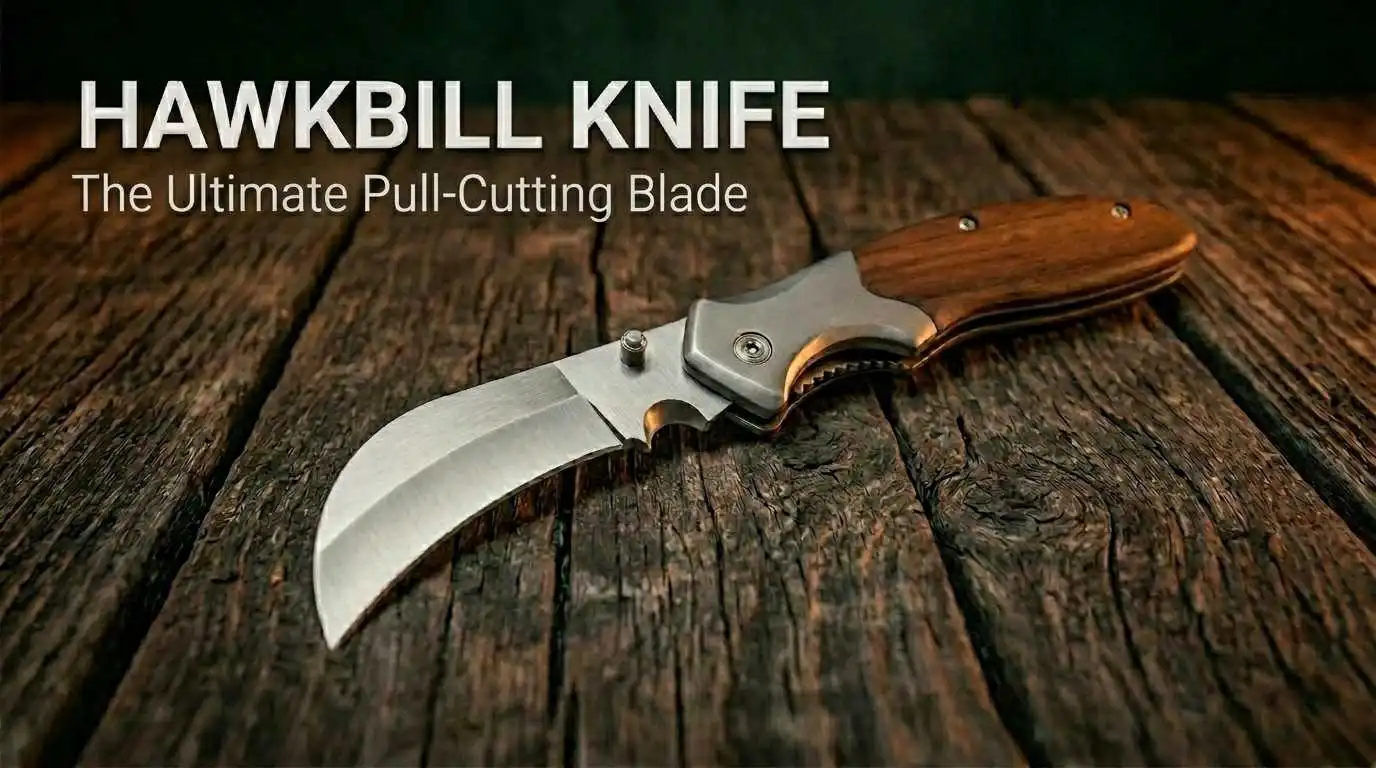
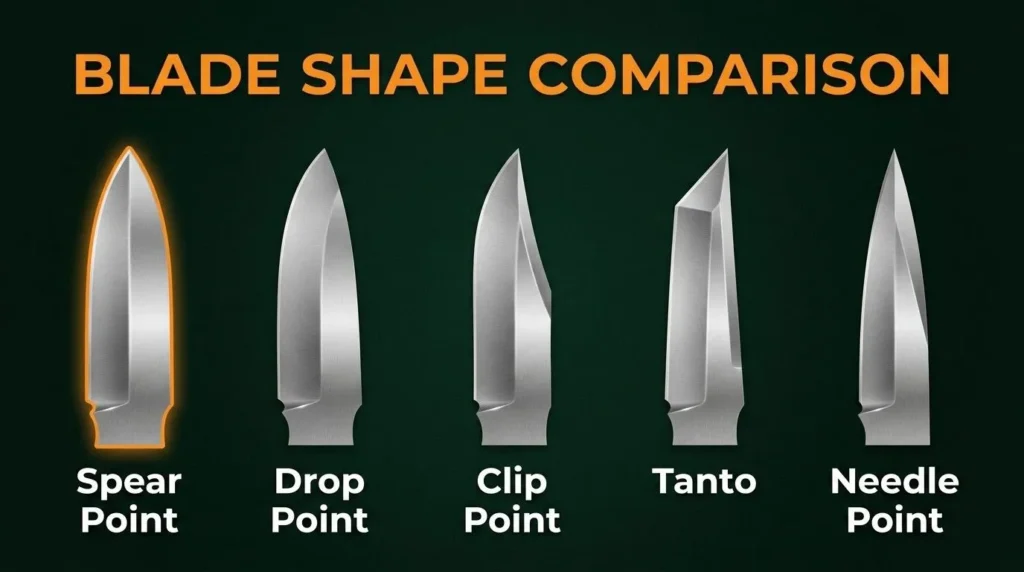
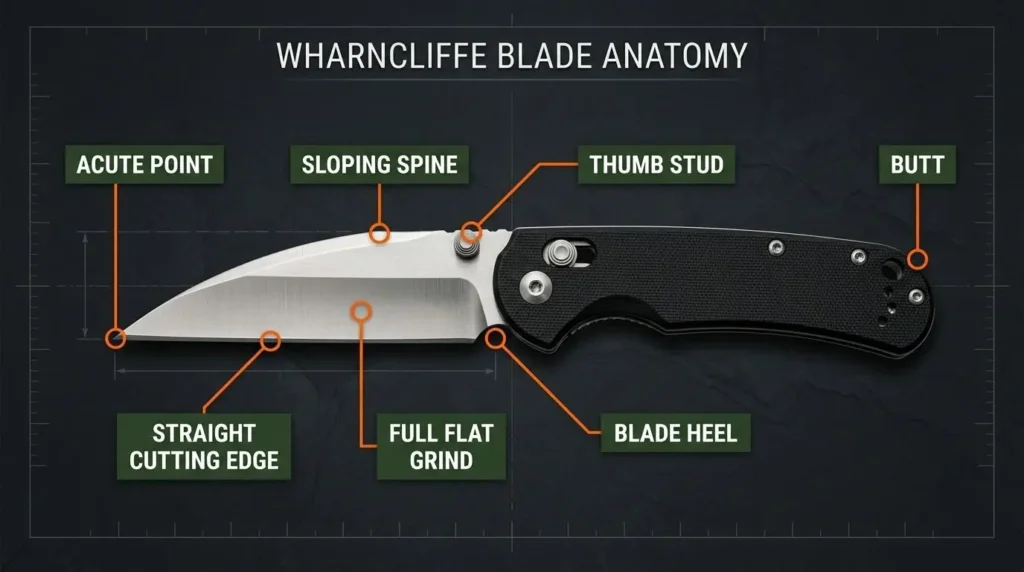
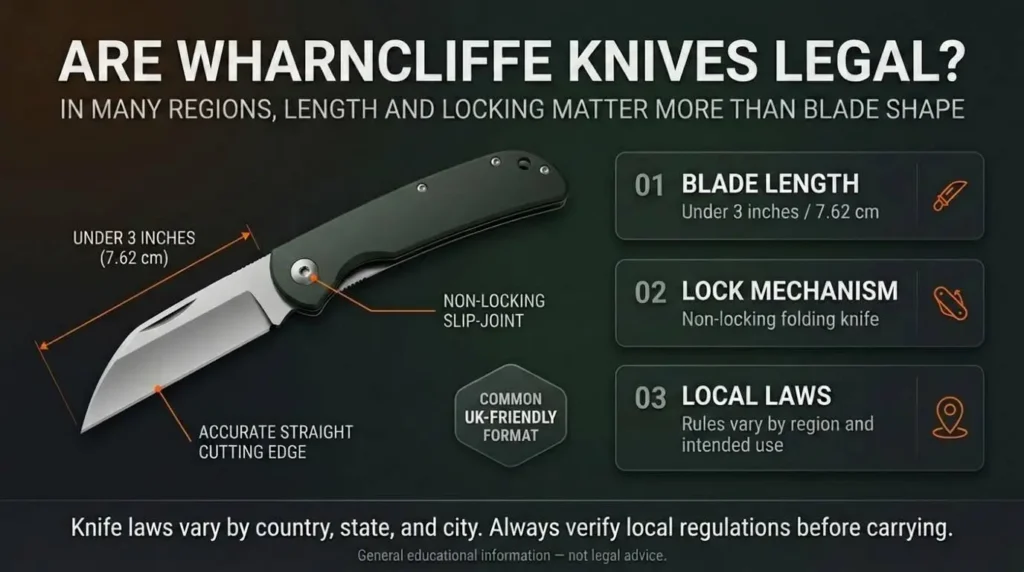
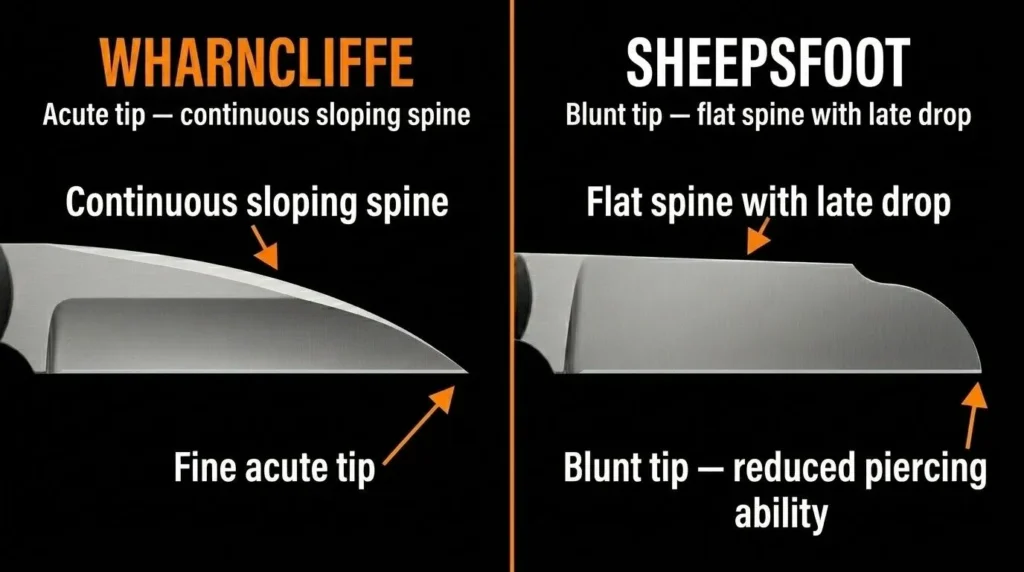
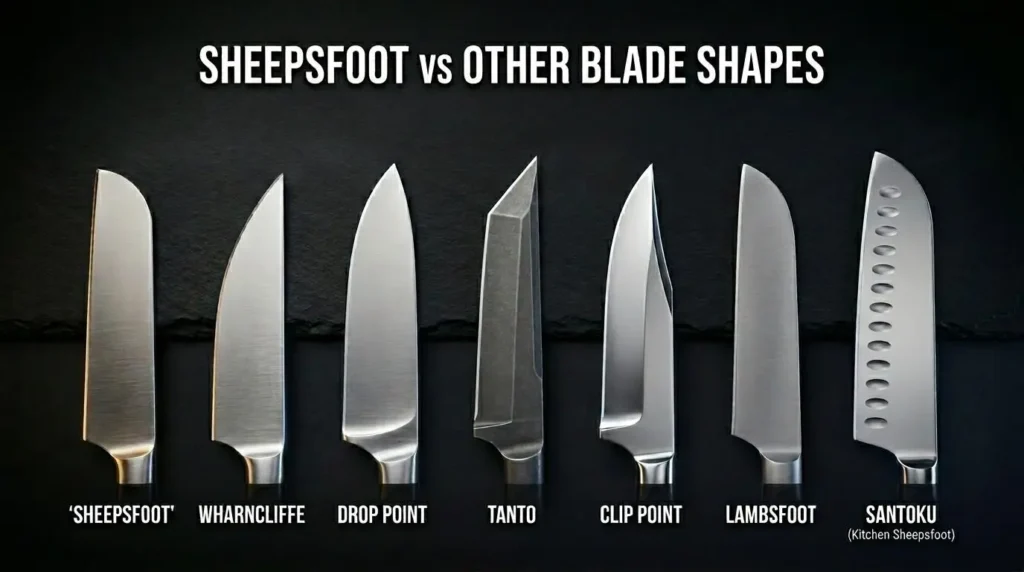
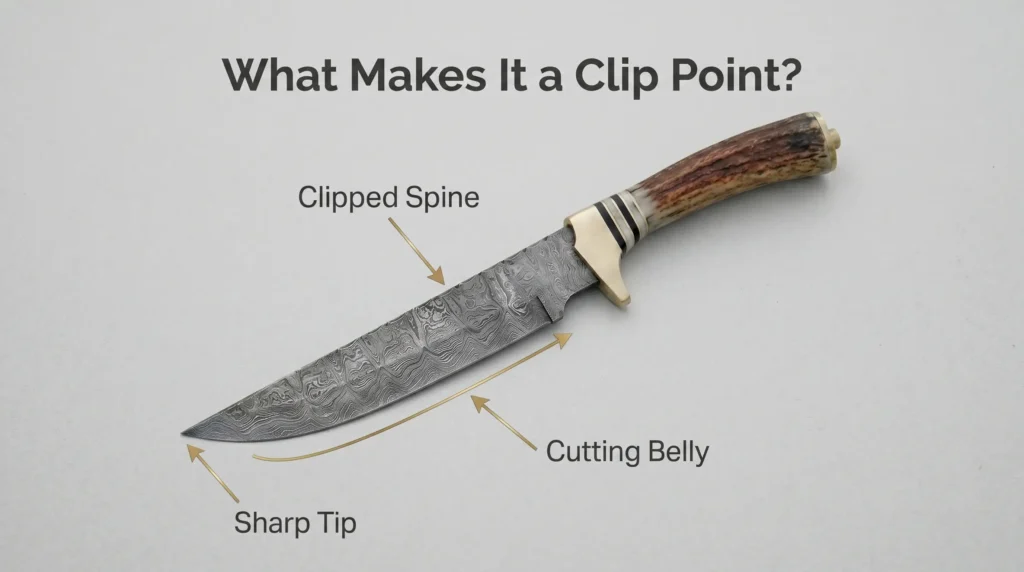
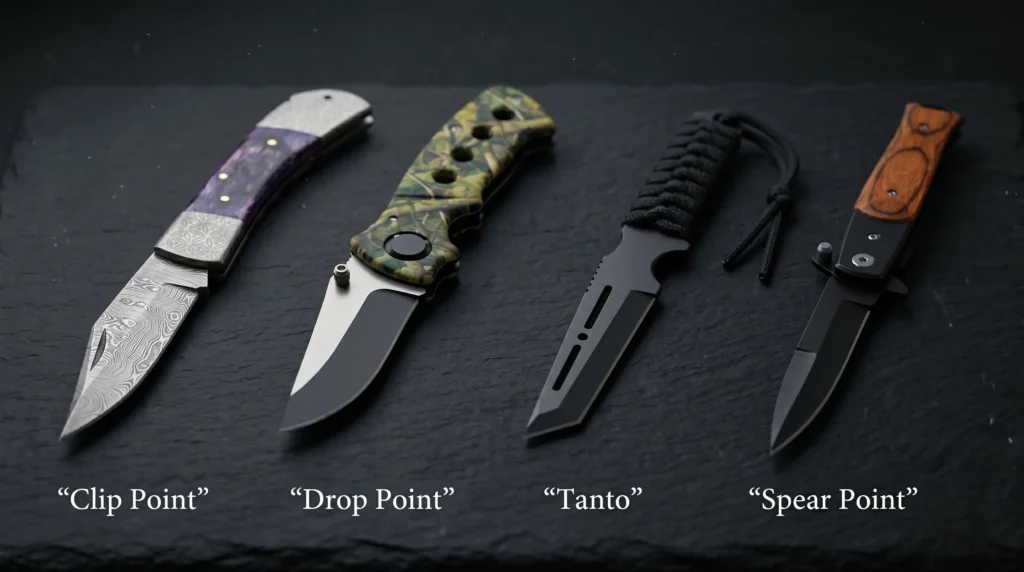
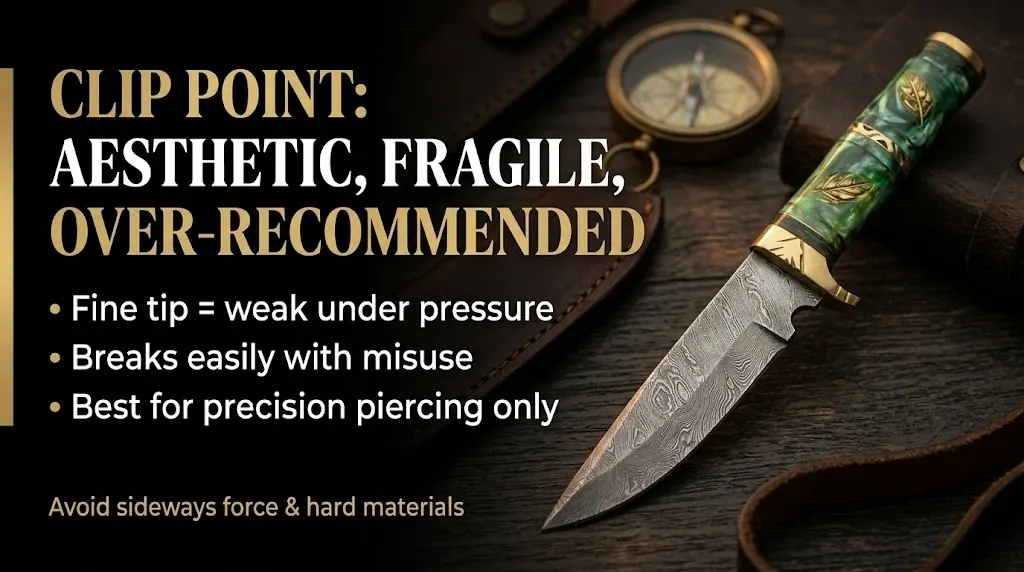
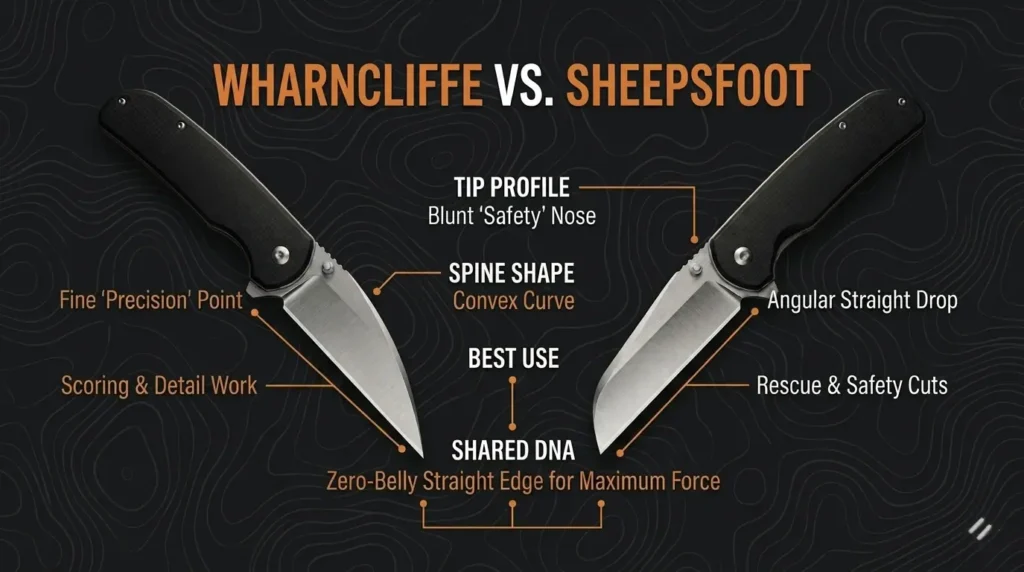
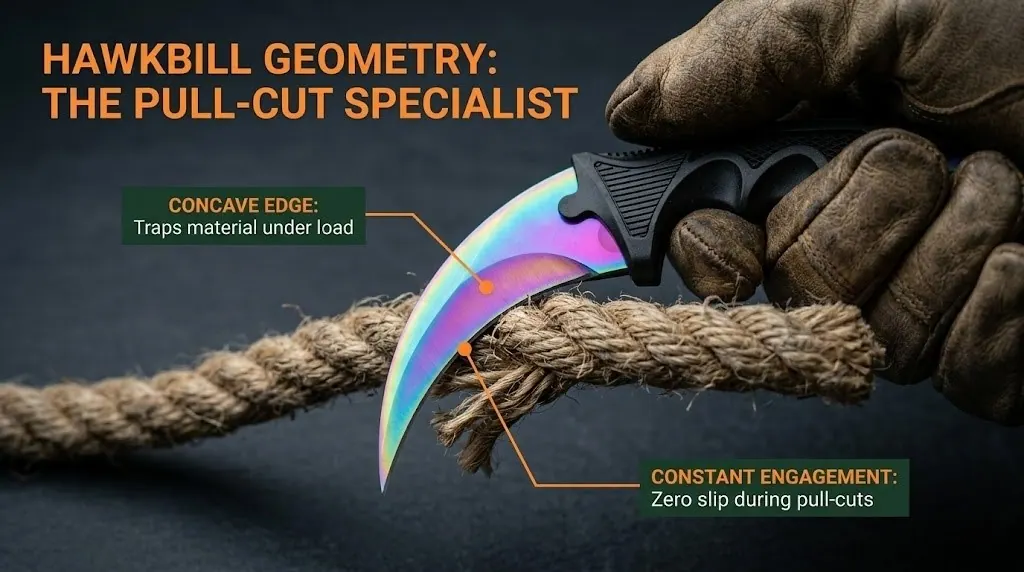
The concave cutting edge of a gut hook has a close cousin in the hawkbill, whose entire edge curves inward for the same pull-cutting logic. For straight, controlled cuts without a piercing tip, the sheepsfoot and wharncliffe take the opposite approach. And for the piercing and detail work a gut hook can’t do, the clip point, spear point, and tanto each have their own answer. The full map of how these relate lives in our knife blade types pillar.
Gut Hook vs Other Blades (Quick Answers)
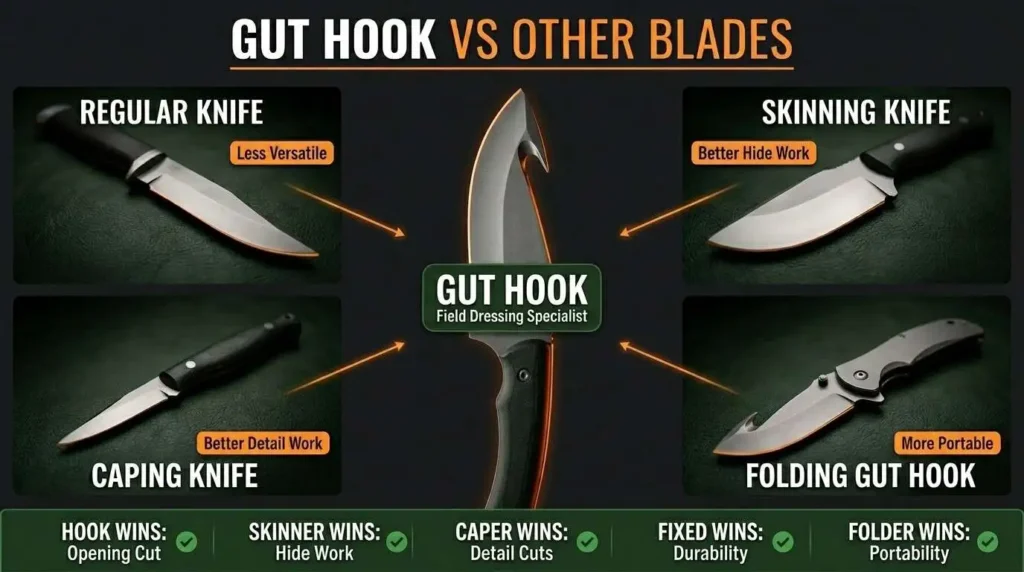
Full head-to-head comparisons are coming in their own posts, but here are the short answers:
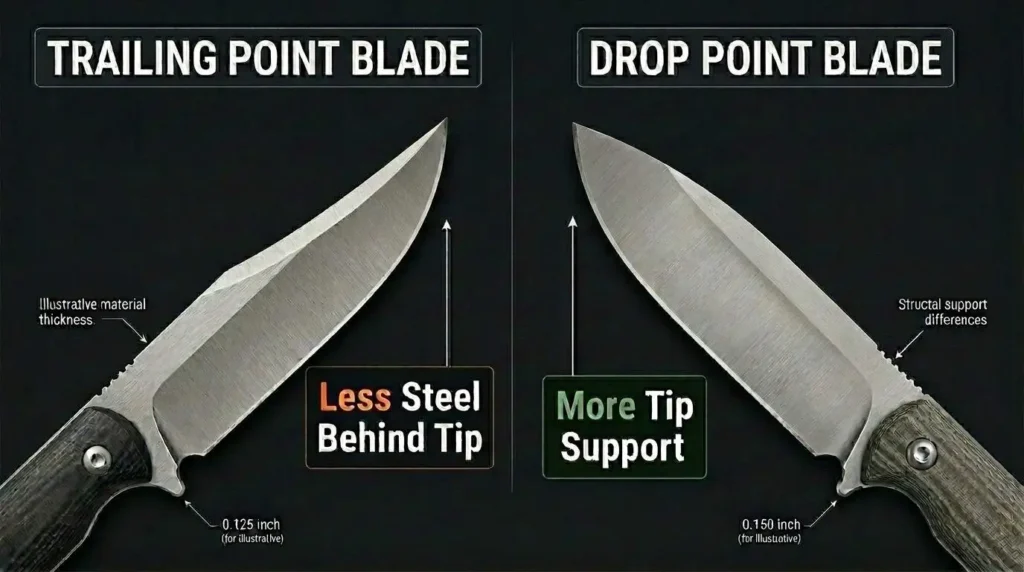
- Gut hook vs a regular knife: A regular blade is more versatile and far easier to sharpen; the gut hook only wins on the single field-dressing opening cut.
- Gut hook vs drop point: Most gut hooks are drop points with a hook added: the hook is a bonus feature, not a replacement for the drop point’s all-around utility. See our drop point guide.
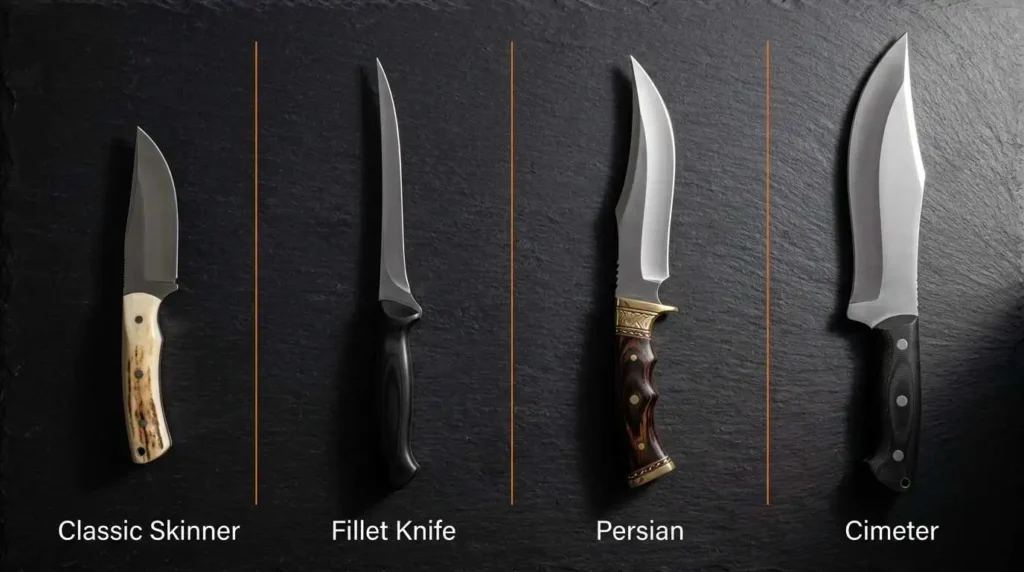
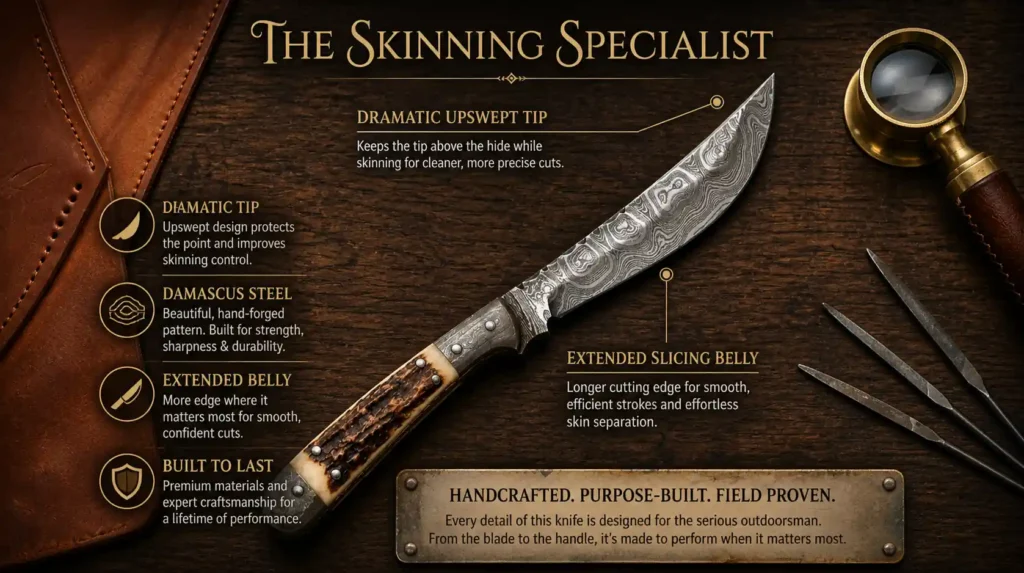
- Gut hook vs a dedicated skinning knife: A pure skinner has a sweeping belly optimized for separating hide; the gut hook trades a little skinning finesse for the unzipping feature.
- Gut hook vs caping knife: Caping favors a small, fine point for detail work; the gut hook is too coarse for serious caping.
- Gut hook vs replaceable-blade tool: Integrated hooks reward maintenance; replaceable-blade tools skip maintenance entirely at the cost of buying refills.
- Fixed vs folding gut hook: Fixed blades are stronger and easier to clean; folders trade some of both for portability. (We’ll give this one a full breakdown in a dedicated comparison.)
FREQUENTLY ASKED QUESTIONS
What is a gut hook used for?
Opening the abdominal cavity of game during field dressing without puncturing the organs, plus skinning assistance and general controlled pull-cuts.
Why is it called a gut hook?
Because it’s a hook used to open the gut. The feature reportedly began as a hook for lifting pots off a campfire before being sharpened and repurposed for game.
Are gut hook knives good?
Yes, for the right user. New hunters and solo field-dressers benefit most. Experienced hunters with a steady hand often don’t need one, and that’s a legitimate choice, not a failure.
Why don’t some hunters use gut hooks?
Three reasons: they can snag, they dull quickly, and they’re hard to sharpen. Used correctly and maintained, none of those are dealbreakers, but neglected, the hook becomes dead weight.
How do you sharpen a gut hook?
With a round or tapered abrasive (diamond rod, ceramic rod, or small round file) that fits inside the concave edge. A flat stone cannot reach it. Stroke in the direction the edge faces and match the existing angle.
Can I use a flat sharpening stone on a gut hook?
No, the concave inner edge requires a rounded abrasive. A flat stone only rounds the spine and leaves the cutting edge dull.
What blade steel is best for a gut hook?
Stainless steel is the practical pick because the hook throat traps moisture and rusts first; good corrosion resistance forgives imperfect cleaning.
Final Take
A gut hook knife is neither the must-have miracle the packaging claims nor the useless gimmick the forum cynics dismiss. It’s a specialized feature that does one narrow job, opening a cavity with controlled, low-risk pull-cuts, better than a plain blade, and does almost everything else slightly worse.
If you’re newer to field dressing, hunt solo, or just want insurance against a slipped cut, a gut hook earns its place. If you’ve got a steady hand and a decade of dressed deer behind you, you can skip it without missing anything, and you’ll have one less concave edge to sharpen. Either way, now you know how to use it, how to keep it sharp, and how to decide honestly. That’s more than most guides will give you.
When you’re ready to see how the gut hook fits into the bigger picture of blade design, head back to our complete guide to knife blade types and shapes.