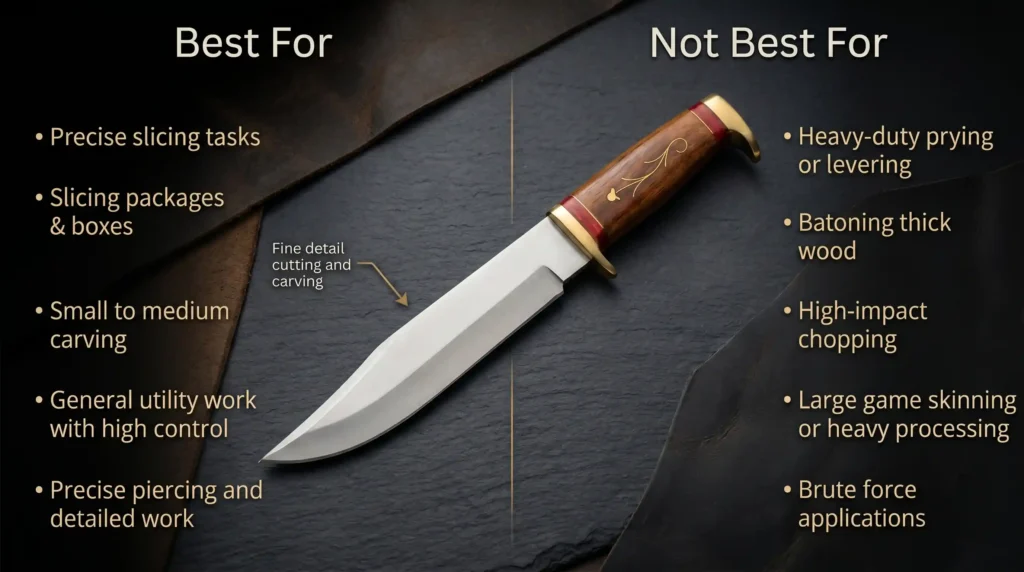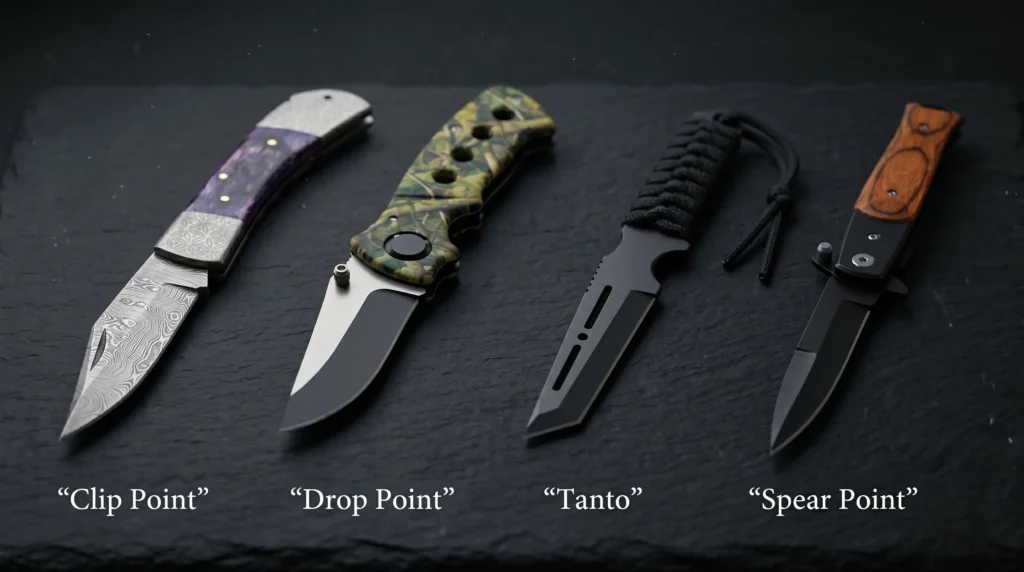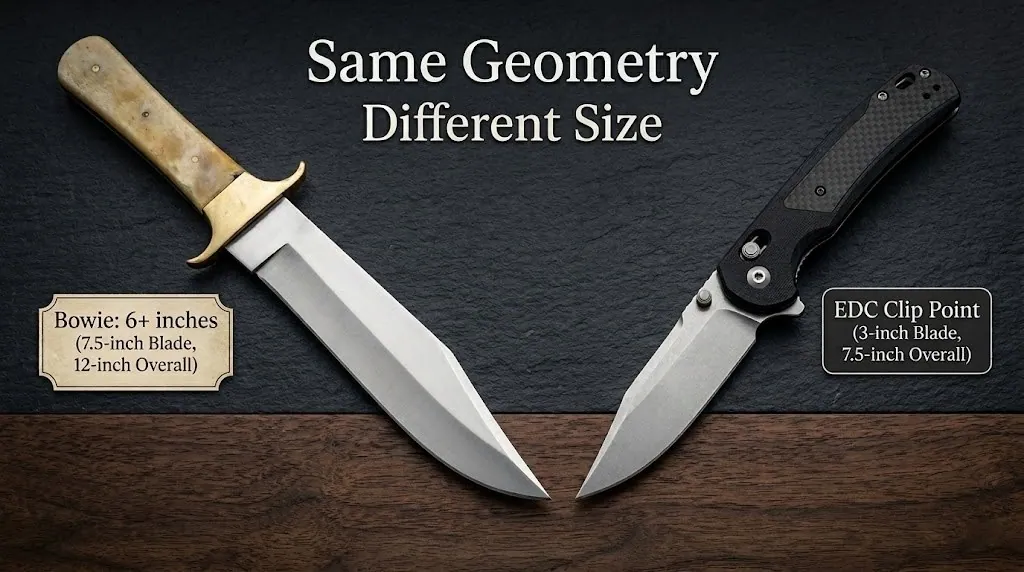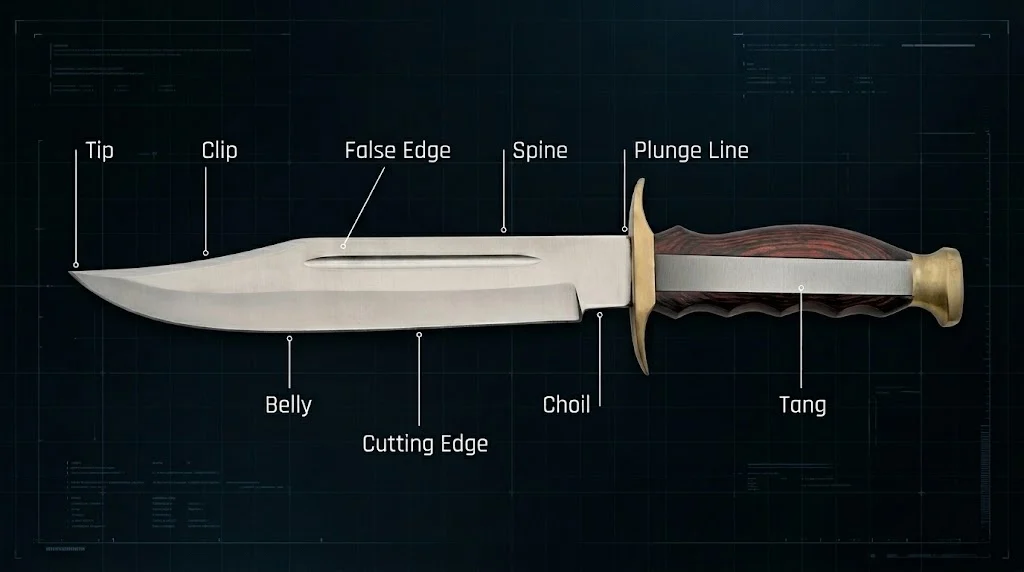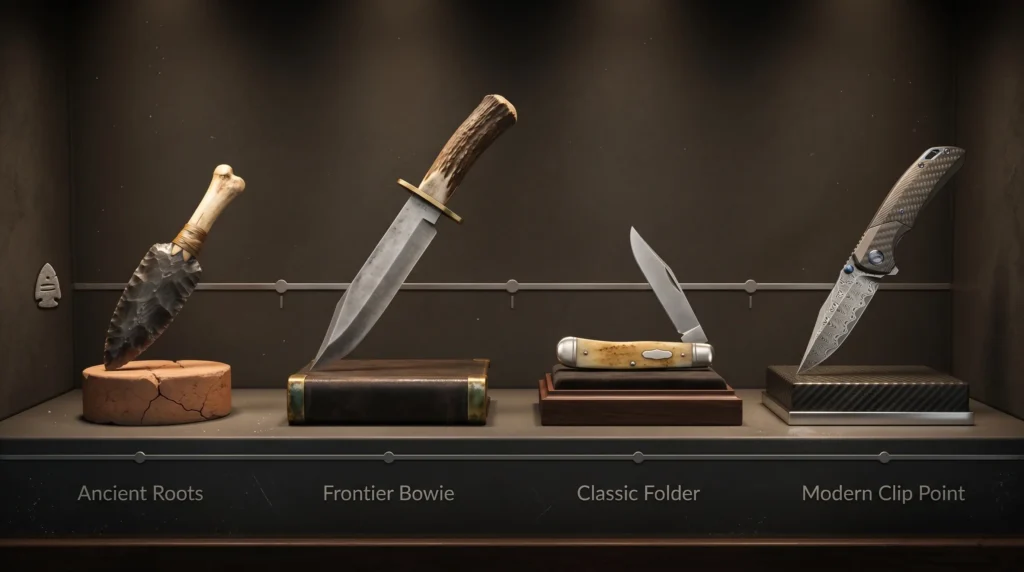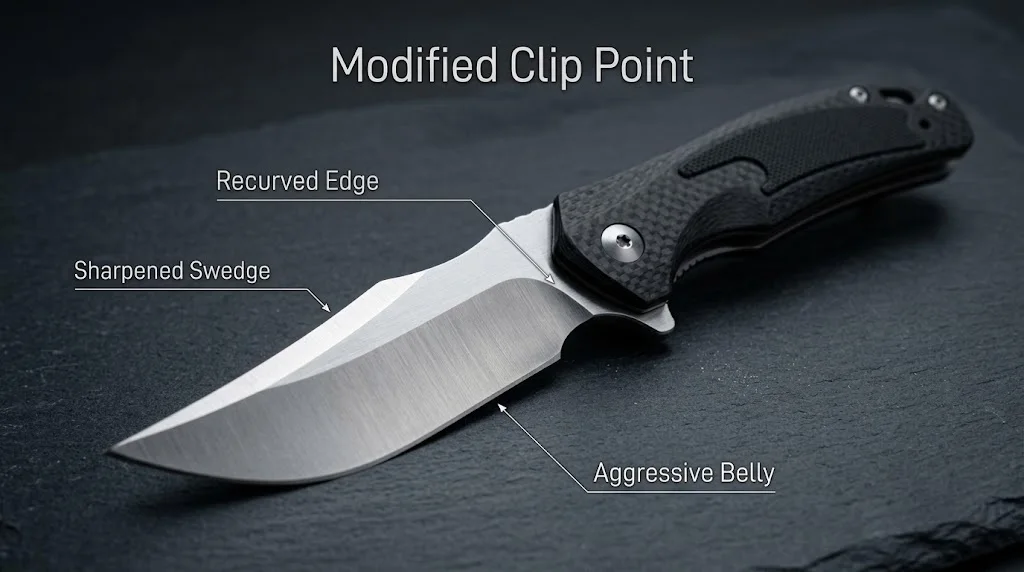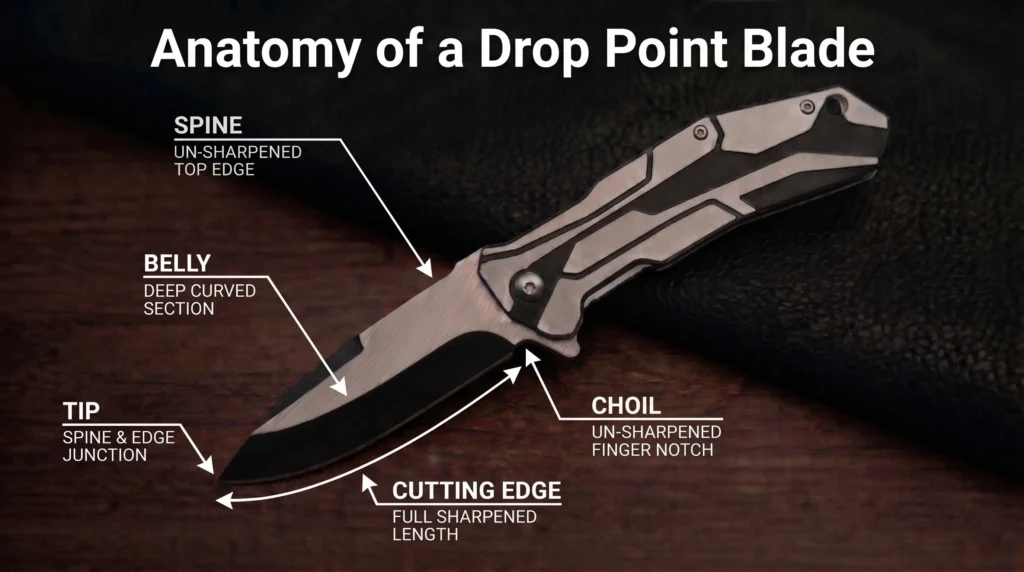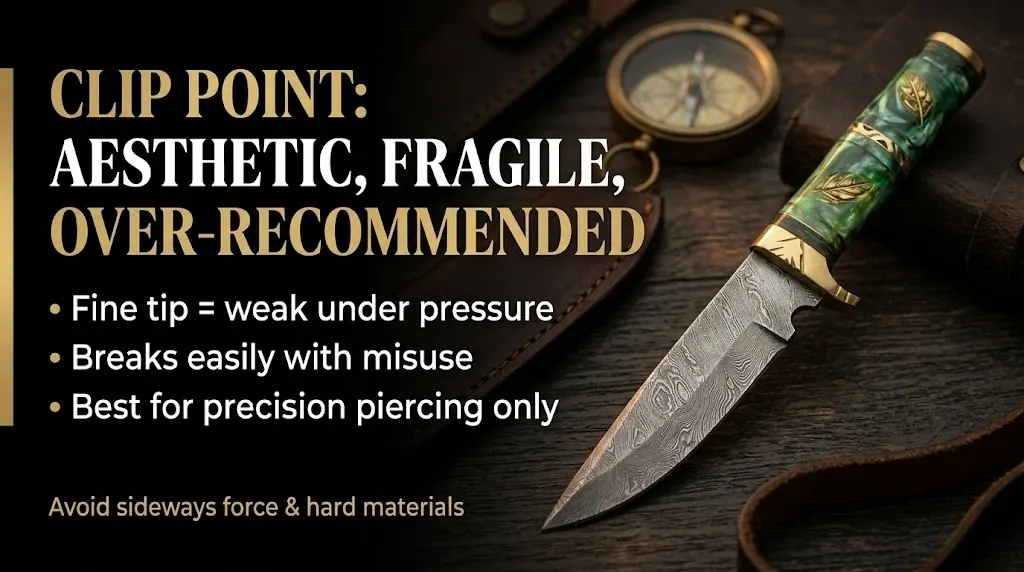
Spear Point Knife: The Blade Built to Pierce Without Giving Up the Cut

A spear point blade is one of the oldest ideas in edged tools, and one of the most misunderstood on the modern knife counter. People see the symmetrical, centered tip and assume one of two things: either it is a dagger they cannot carry, or it is a generic “pointy knife” with no real specialty. Both miss what the shape is actually built to do.

The spear point exists to solve a specific problem: how do you get a strong, controllable piercing tip without throwing away your ability to slice? Most tip-heavy designs sacrifice the cutting edge to get the point. The spear point refuses that trade-off, it puts the tip dead-center on the blade’s long axis so force drives straight through, then keeps just enough belly to do real cutting work.

This guide covers the geometry, the single-edge versus double-edge question that decides whether your knife is legal, the history from ancient spearheads to the Swiss Army Knife, the steels that matter, and how to sharpen a symmetrical edge. For the bigger picture across every common profile, our knife blade types pillar guide maps where the spear point sits in the larger family.

Quick Answer: A spear point knife has a symmetrical blade with the tip aligned to the centerline, where the spine and edge slope toward the point at matching angles. It is best for piercing, thrusting, throwing, and balanced EDC tasks because it combines a strong, controllable tip with enough belly for everyday slicing.

What Is a Spear Point Blade?

A spear point blade is a symmetrical profile where the tip sits exactly on the centerline of the blade’s long axis, with the spine and the cutting edge rising and falling at matching angles to meet at that point. The tip lines up with the middle of the blade, not above it like a clip point or below it like a drop point.

That symmetry is the whole spear point blade shape, and everything the design does well comes from it. Because the point is centered, force travels straight down the spine and out through the tip with nothing pulling it off-axis, an excellent piercing and thrusting geometry. At the same time, the lower edge keeps a small belly, so the knife can still slice, score, and handle ordinary cutting jobs.You will see the name written two ways: spear point and the one-word spearpoint. They mean the same thing. “Spear point” describes where the tip sits, not how many edges are sharpened, a detail that matters enormously, and one we get to next.

Spear Point Blade Anatomy: Understanding the Geometry
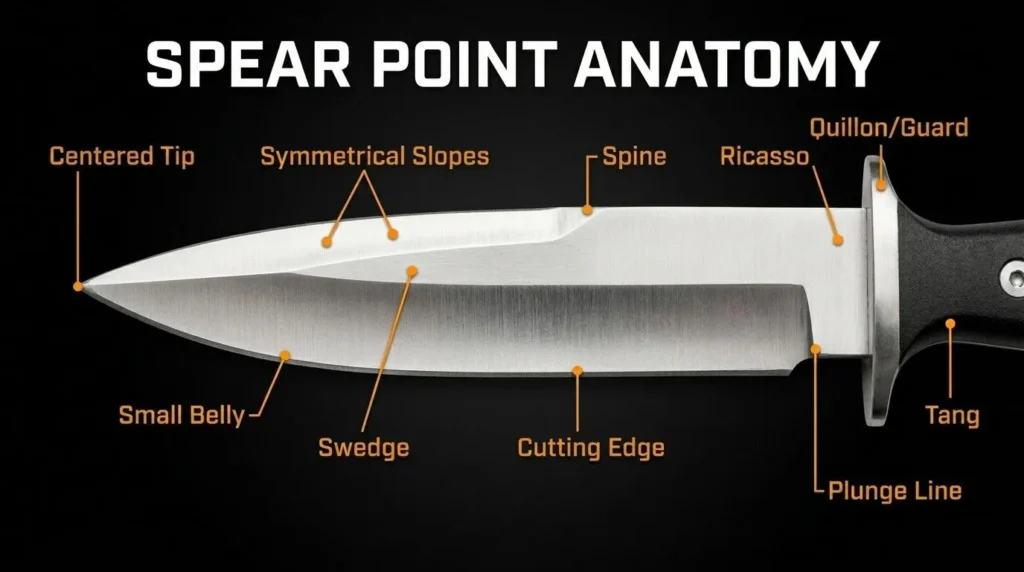
Detailed spear point knife anatomy diagram showing centered tip, symmetrical slopes, spine, swedge, cutting edge, ricasso, tang, quillon guard, plunge line, and blade geometry labels for knife education.

The spear point blade is defined by a few features that set it apart.

The centered tip. The point sits on the blade’s central axis, halfway between spine and edge. A drop point lowers the tip below the spine; a clip point raises it; the spear point puts it dead center. That alignment gives the design its straight-line piercing strength and its natural, controllable feel.

The symmetrical slopes. The spine curves down and the edge curves up to meet at the tip, mirroring each other, which is what makes the profile look like a spearhead and behave like a thrusting tool.

The small belly. Below the tip, the edge keeps a modest curved section: smaller than the deep belly on a drop point or skinner, but enough for slicing and general cutting. Its size is the main thing that varies between one spear point and another.

The swedge or second edge. The top slope is often ground thin. Left unsharpened, it is a swedge (or false edge) that lightens the tip and improves penetration. Sharpened, the knife becomes double-edged, and the legal and practical picture changes completely.

It is a profile engineered to drive a strong tip straight into a target while keeping just enough edge to remain a useful cutter.

Single-Edge vs Double-Edge Spear Points
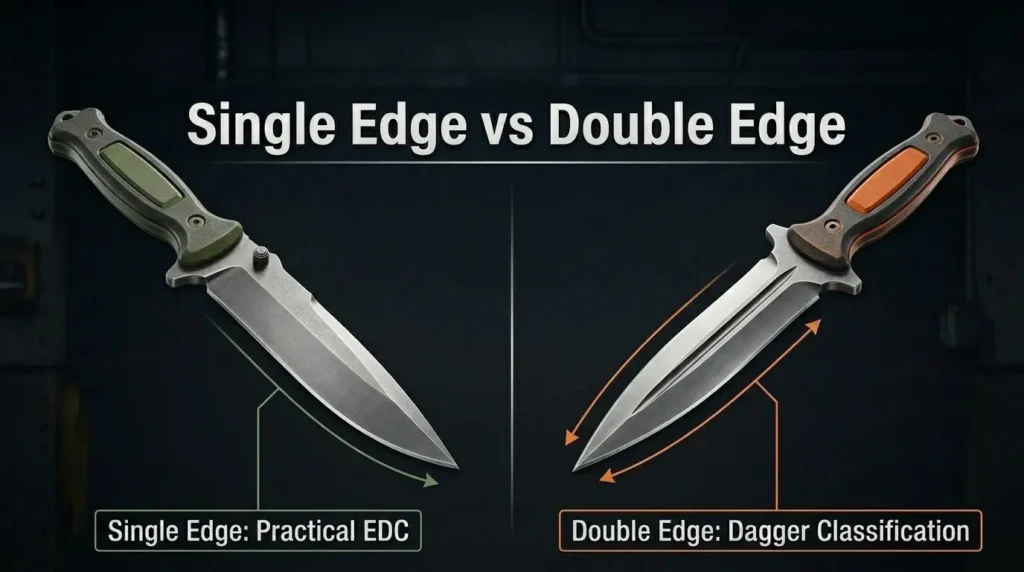
Educational comparison graphic showing single edge vs double edge spear point knives, highlighting practical EDC single-edge blade design versus double-edge dagger classification with labeled blade anatomy differences.

This is the section most blade guides skip, and the single most important thing to understand before you buy a spear point. A spear point is a shape, it says nothing about how many edges are sharpened. The same symmetrical profile is built two completely different ways.

Single-edge spear point. One sharpened edge along the bottom, the top slope left as an unsharpened swedge. This is the practical, everyday version. It still pierces well because the tip is centered and the spine is thinned, but it behaves like a normal working knife: you can rest a thumb on the spine for control, and in most places it carries the same legal status as any single-edged blade. The main blade on a classic Swiss Army Knife is a single-edge spear point, which tells you how useful the shape is for ordinary tasks.

Double-edge spear point. Both slopes sharpened, giving two cutting edges that meet at the centered tip. It cuts on the draw and the push and pierces aggressively. It is also, in many jurisdictions, the point at which a spear point legally becomes a dagger. That is the whole fork in the road. For EDC, utility, camping, or kitchen work, you almost certainly want the single-edge version. If you are drawn to the double-edge version, understand the legal picture first, the second edge is what triggers most knife restrictions.

Is a Spear Point the Same as a Dagger?

Not exactly, and the distinction trips up a lot of buyers. A dagger is a symmetrical, double-edged blade built primarily for thrusting, often with little or no usable belly. A spear point is a shape defined by its centered tip and matching slopes. The overlap is real: a double-edged spear point with a slim profile is essentially a dagger, and many daggers are spear points by geometry.

The practical difference comes down to that second edge. A single-edge spear point with a working belly (a Swiss Army Knife blade, a modern EDC folder) is a knife in every ordinary sense and is treated as one. A fully double-edged spear point with a slim profile and minimal belly is a dagger, regulated accordingly in many regions.

So the honest answer: a spear point can be a dagger, but most sold for everyday use are not. The shape is the family; the dagger is one branch of it. For a full breakdown, see our spear point vs dagger comparison (coming soon).

Spear Point Grind and Swedge
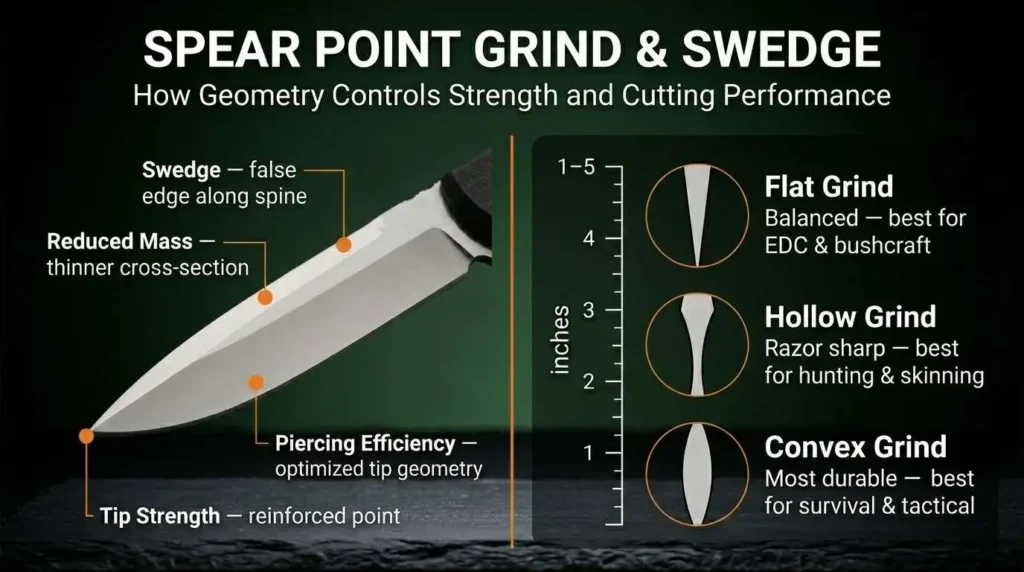
Educational spear point knife grind and swedge infographic explaining flat grind, hollow grind, convex grind, false edge swedge design, tip strength, piercing efficiency, and blade geometry performance.

The profile is only half the story. The grind decides how the spear point cuts and how much tip strength that centered point really has.

The swedge. The top slope is frequently ground down to thin the spine as it nears the tip. Left unsharpened, this swedge reduces mass behind the point and helps the blade penetrate more easily, without removing strength lower down the spine. Makers like Rick Hinderer build a signature top swedge into their spear point designs for exactly this reason: better piercing, tough tip. It is one of the most under-explained features on the shape, and one of the most functional.

Grind type. A flat grind is most common on quality working spear points, balancing edge strength and slicing. A hollow grind thins the edge for a keener cut but leaves the tip more fragile, a real concern on a blade built around piercing. A convex grind gives the most durable geometry behind the point but is harder to sharpen freehand. A spear point with a thinned swedge and a flat grind is the versatile, do-everything build.

Spear Point Blade History

The name is as literal as it gets. The shape descends directly from the spearhead, one of humanity’s oldest tools. A spearhead is symmetrical for a reason: a point on the centerline drives straight and true when thrust. Scaled down onto a knife blade, that geometry became the spear point. Through antiquity and the medieval period the symmetrical, double-edged blade was everywhere, from short thrusting weapons to the daggers carried alongside swords. Only later, as restrictive knife laws spread and everyday needs shifted toward utility over combat, did the double-edged version fall out of common carry and the single-edge spear point become the practical survivor.

That survivor shows up in one place almost everyone has handled: the main blade of a traditional Swiss Army Knife is a spear point, and on slip-joint pocketknives the same small symmetrical blade is known as a pen blade, named for the days it trimmed quill pens. That hand-forging tradition survives in custom shops producing pattern-welded steel, the same craft documented by the American Bladesmith Society, where a centered tip and mirrored grinds are still forged by hand.

What Is a Spear Point Blade Used For?
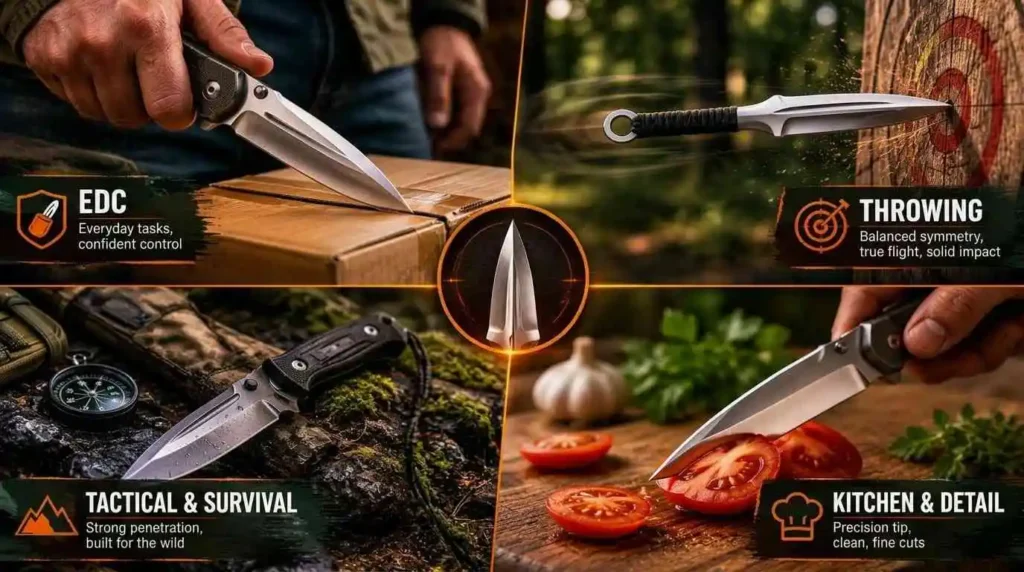
Educational spear point knife use cases infographic showing EDC tasks, knife throwing, tactical survival applications, and precision kitchen cutting to highlight spear point blade versatility and practical performance.

The centered tip and symmetrical profile make the spear point one of the better blade shapes for tasks that reward a strong, precise point without abandoning the cutting edge. Here is how it breaks down by user.

Spear Point for EDC

For everyday carry, a single-edge spear point is a strong all-rounder. The centered tip gives confident piercing for boxes, blister packs, and zip ties, and the small belly handles slicing and food tasks. Because the point sits on the centerline, the knife indexes intuitively and fine tip work feels controlled. A small or mini spear point folder makes an easy, unintimidating pocket knife, a capable do-everything EDC blade, if not the deepest slicer in the drawer.

Spear Point Throwing Knives

This is where the geometry is not just useful but ideal. A throwing knife needs to rotate predictably and strike point-first despite small inconsistencies in the throw, and symmetry makes that possible. With the tip on the centerline and weight distributed evenly around it, a spear point throwing knife flies true and bites reliably, which is why a huge share of dedicated throwing knives use this profile. If throwing is your interest, the spear point is the default answer.

Spear Point for Hunting, Tactical, and Survival

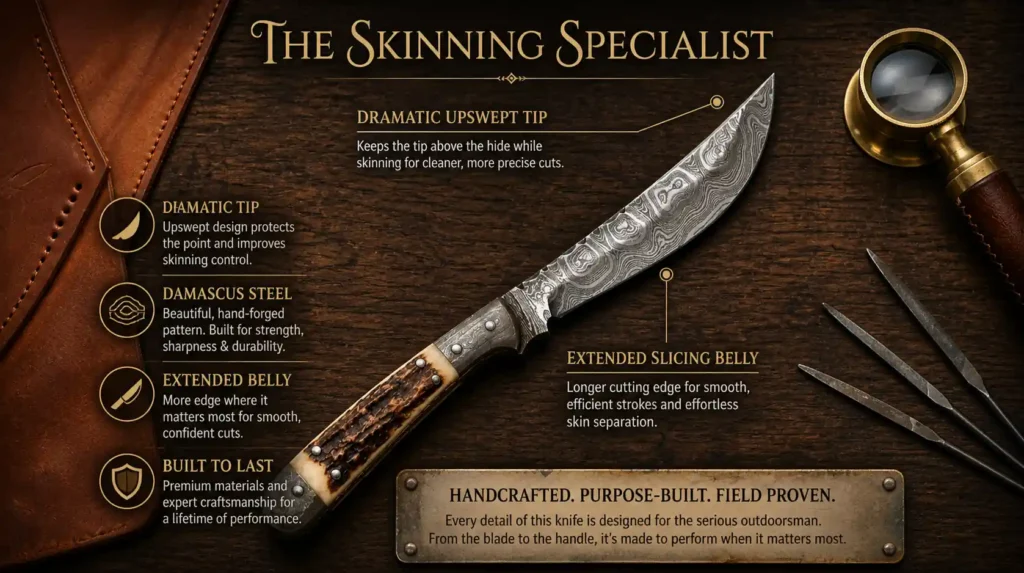
A spear point can serve as a hunting knife, with caveats: the strong centered tip pierces well, but for skinning and field-dressing a deep belly is what keeps the edge on the hide, so a drop point knife out-skins it, and a double-edged spear point is a liability near a hide or gut cavity. Where the shape truly shines is tactical and survival use. A spear point fixed blade gives straight-line penetration and a tough, controllable tip, with a long history in boot knives, dive knives, and combat blades. For a spear point camping or survival knife, the single-edge build keeps your options open, the piercing tip plus a spine you can rest a hand on, while a double-edged version sacrifices batoning and any task needing spine pressure.

Spear Point in the Kitchen and for Self-Defense

A spear point paring knife is a smaller but real niche, using the precise centered tip for peeling, trimming, coring, and detail work while the modest belly handles fine slicing. It manages light whittling too, though a single-edge build is essential there, since you cannot safely brace a thumb on a sharpened spine. As for self-defense: the shape’s reputation comes from its spearhead ancestry, and double-edged versions cut on both push and draw. But capability and legality are different questions, and double-edged blades carry real legal weight. Before considering any blade for self-defense, understand your local laws and the legal section below, and treat carry as a personal responsibility.

Spear Point Variations You Should Know

“Spear point” is a family, not a single shape. Beyond the single-edge and double-edge builds covered above, a few variants are worth knowing:

  • Modified spear point. Production tweaks: a slightly raised or lowered tip, a longer swedge, or a deeper belly to improve slicing.
  • Pen blade. A small spear point used as the primary or secondary blade on slip-joint and multi-tool knives. Compact, friendly, genuinely useful for light tasks.
  • Needle point. A close relative, not the same thing. It narrows to a much finer, sharper, weaker tip built purely for piercing; a spear point keeps more steel behind the point for a stronger, more durable tip. Needle point is the specialist piercer, spear point the balanced one.

Damascus and Hand-Forged Spear Points

The spear point’s mirrored geometry is a natural showcase for pattern-welded steel. Because both slopes are visible and symmetrical, the flowing layers of a hand-forged Damascus blade read cleanly across the whole profile, and the centered tip becomes a focal point for the pattern. A hand-forged Damascus spear point pairs the shape’s straight-line strength with the edge-holding and toughness of layered high-carbon construction.

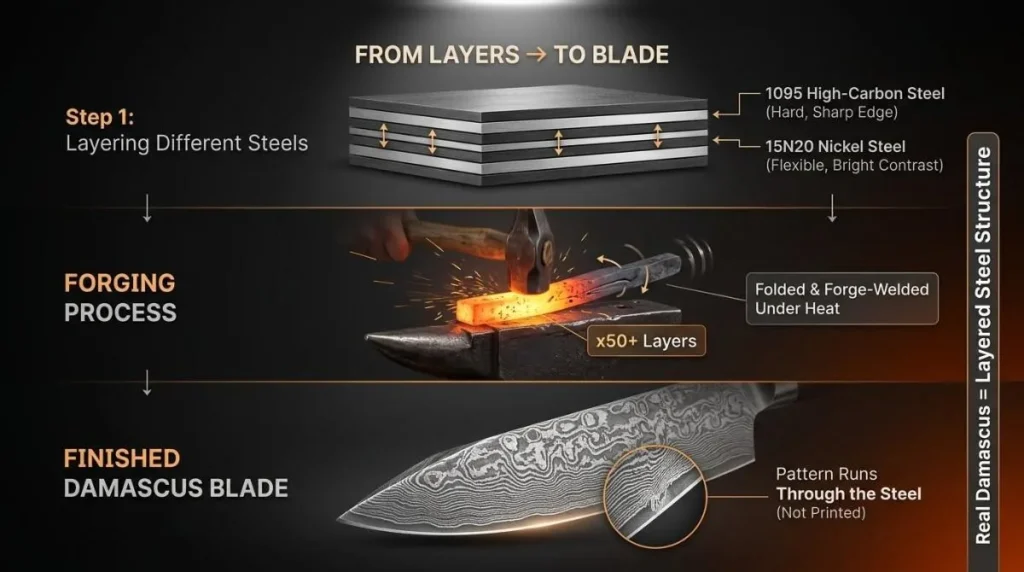
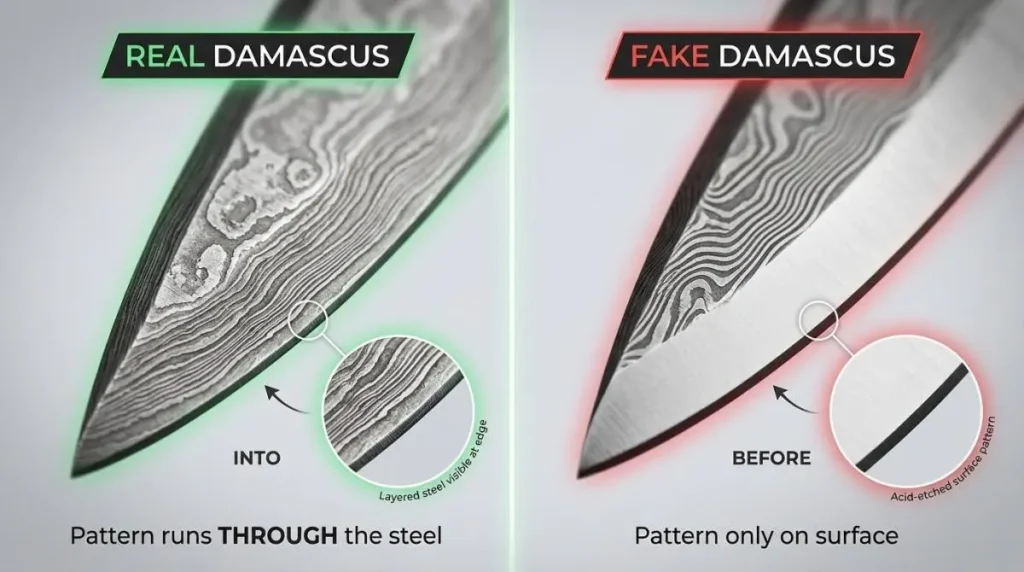
A true Damascus spear point is forged, not etched: alternating layers of high-carbon and nickel steel folded so the pattern runs all the way through the blade. To tell real from fake before buying any patterned blade, our complete guide to Damascus steel knives walks through the honest tests, and our Damascus knife collection shows what hand-layered steel looks like across working profiles.

Steel Selection for Spear Point Knives
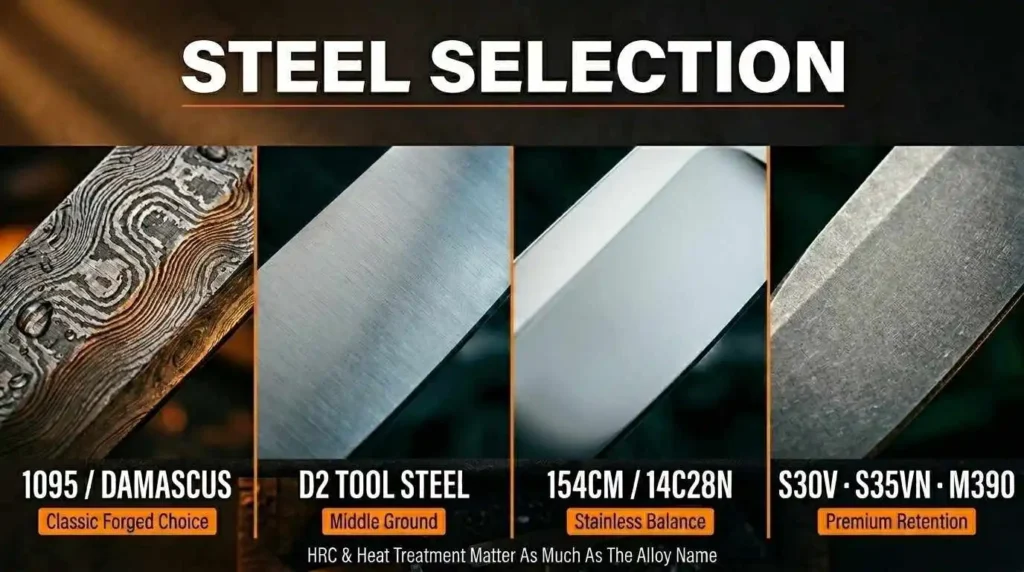
Spear point knife steel selection infographic comparing 1095 and Damascus steel, D2 tool steel, 154CM, 14C28N, S30V, S35VN, and M390 for edge retention, corrosion resistance, toughness, and knife performance.

Because the spear point lives and dies by its tip, steel choice matters more than on a forgiving, deep-bellied blade. A thin, centered point under stress wants steel that resists chipping and holds an edge.

  • High-carbon (1095, and the 1095 / 15N20 pairing in Damascus). Tough, takes a screaming edge, easy to resharpen, needs care against rust. The classic forged-blade choice.
  • D2. Semi-stainless tool steel with excellent edge retention and good toughness, a popular middle ground.
  • 154CM and 14C28N. Stainless steels balancing sharpness, edge retention, and corrosion resistance, common on quality production spear points.
  • Premium stainless (S30V, S35VN, M390-class). Outstanding edge retention for users who want to sharpen less often.

Prioritize toughness and edge retention so the tip survives the piercing work the shape is built for. Heat treatment and hardness (HRC) matter as much as the alloy name.

How to Sharpen a Spear Point Knife

Sharpening a spear point is straightforward once you account for its symmetry, with one wrinkle most guides ignore: on a double-edged spear point you maintain two edges that meet at the tip, and both must stay consistent or the point drifts off-center.

Set your edge angle. Most spear points sharpen well at roughly 17 to 20 degrees per side, slightly more obtuse for a hard-use piercing blade, slightly more acute for a fine slicer.

Work the edge in zones, and match both sides. Maintain your angle through the straight section near the heel, then sweep up through the curved belly so the tip gets the same attention. Because the profile is symmetrical, alternate sides evenly with the same stroke count; uneven sharpening pushes the centered tip off-axis and ruins the very thing that makes the shape work.

Mind the swedge or second edge. On a single-edge spear point, leave the unsharpened swedge alone. On a double-edge spear point, sharpen the top edge to match the bottom so both meet cleanly at the point.

Protect the tip. Finish with light, edge-trailing strokes and avoid heavy pressure right at the point, where thin steel rounds off easily. A regular bench stone handles a spear point fine; the discipline is consistency, not special tools.

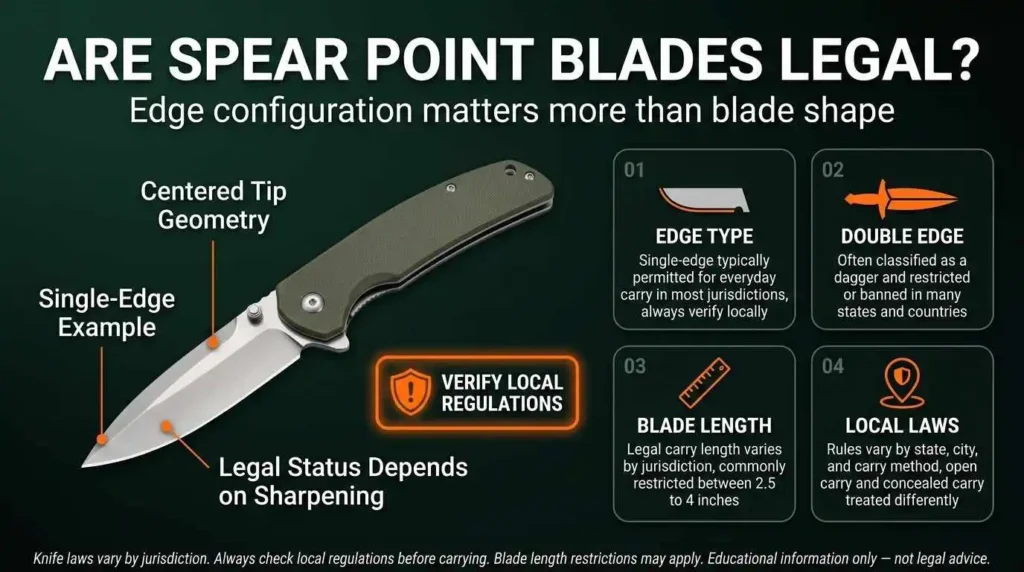
Educational infographic explaining spear point knife legality, showing single-edge spear point blade example, edge type regulations, blade length restrictions, and local knife laws for legal everyday carry guidance.

This is the part of the spear point story that genuinely matters, and the part most guides wave away in a single line.

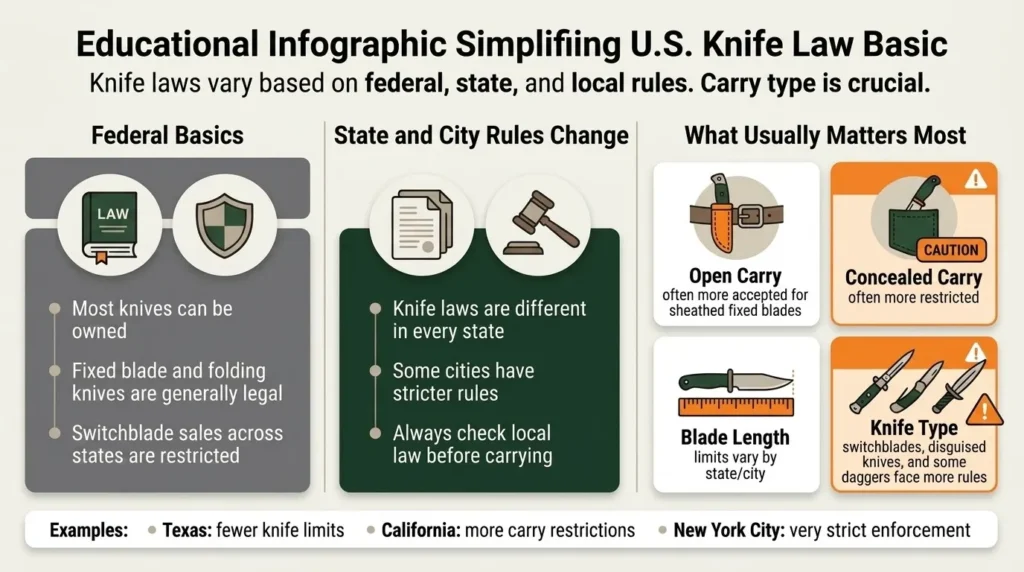
The shape itself, a centered tip with symmetrical slopes, is not what regulations target. What gets regulated is the second edge. A single-edge spear point is, in most places, treated like any other single-edged knife and judged by ordinary blade-length and carry rules. A double-edged spear point is frequently classified as a dagger or dirk, and double-edged blades face the tightest restrictions: some jurisdictions limit them, some ban concealed carry, some prohibit them outright. The same shape can be legal in one build and restricted in another, depending on whether both edges are sharpened, blade length, and where you are. Automatic and out-the-front mechanisms add another layer of rules.

We are not lawyers, and this is not legal advice. Knife laws vary widely by country, state, and even city, and they change. Before you carry any spear point, especially a double-edged one, check your local statutes. Our responsible ownership and legal compliance page covers the principles, and for jurisdiction-specific rules a resource like Knife Up’s state-by-state knife law overview is a useful starting point.

Spear Point vs Other Blade Shapes
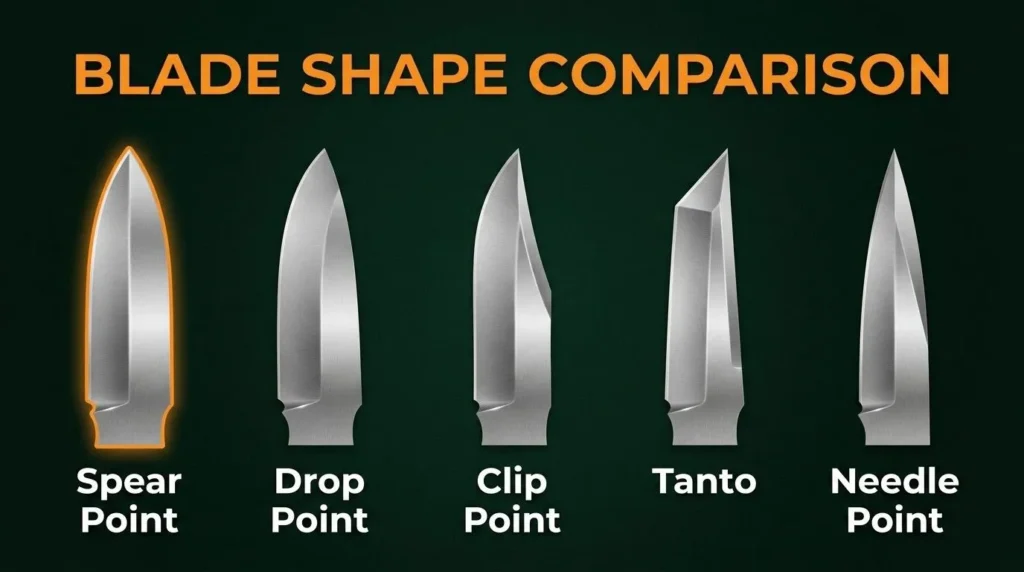
Knife blade shape comparison infographic showing spear point, drop point, clip point, tanto, and needle point blade profiles for understanding blade geometry, design differences, and practical knife uses.

The full head-to-head breakdowns are getting their own dedicated comparison guides. Here is the short version with links to where those deep dives live.

  • Spear point vs drop point. A drop point lowers the tip and adds a deep slicing belly; the spear point centers the tip for straighter piercing and keeps less belly. Drop point for hunting and slicing, spear point for piercing and balance. Full spear point vs drop point comparison coming soon.
  • Spear point vs clip point. A clip point raises and thins the tip for fast, fine piercing; the spear point’s centered tip is stronger and symmetrical. Breakdown coming soon.
  • Spear point vs tanto. A tanto puts a reinforced angular tip ahead of a straight edge for hard-target piercing with little belly; the spear point pierces with more finesse and keeps a usable belly. Coming soon.
  • Spear point vs needle point. Same family: needle point is a finer, weaker, pure-piercing tip; the spear point keeps more steel behind the point. Guide coming soon.
  • Spear point vs sheepsfoot. Opposite philosophies, the sheepsfoot removes the point for control; the spear point is all about it. Coming soon.
  • Spear point vs wharncliffe. The wharncliffe is a straight-edge precision slicer with a low, fine tip; the spear point is a centered piercer. Coming soon.

Spear Point Blade Pros and Cons (Advantages and Disadvantages)

ProsCons
Strong, centered tip drives straight for piercingSmaller belly than a drop point limits long slicing
Symmetrical balance feels natural and controllableDouble-edge versions can’t choke up on the spine
Excellent for throwing thanks to even weightThin, fine tip can chip under prying or hard use
Single-edge build keeps it legally simple in most areasDouble-edge build triggers dagger restrictions
Versatile EDC: pierces well, still slicesNot the best skinner or dedicated detail blade
Showcases hand-forged Damascus patterns beautifullyRarely the single best tool at any one task

Frequently Asked Questions

What is a spear point knife good for?

A spear point knife is good for piercing, thrusting, throwing, fine tip work, and balanced everyday carry. The centered tip drives straight and stays controllable, while the small belly handles ordinary slicing and light food prep. It is a strong all-rounder rather than a specialist.

Are spear point knives good?

Yes, for the right user. They offer a strong, precise piercing tip, a naturally balanced feel because the point sits on the centerline, and real versatility, since a single-edge spear point both pierces and slices. They are less ideal if your main job is skinning or deep slicing, where a drop point wins.

Why is it called a spear point?

Because the shape mirrors a spearhead: symmetrical, with the tip centered on the long axis so force drives straight through on a thrust. When that ancient geometry was scaled down onto a knife, the name came with it.

Is a spear point blade legal?

A single-edge spear point is generally treated like any other single-edged knife. A double-edged spear point is often classified as a dagger and faces tighter restrictions. Laws vary by location and change, so always check your local statutes before carrying one.

Can you baton with a spear point?

A single-edge spear point can handle light batoning since you have an unsharpened spine to strike. A double-edged spear point is a poor choice because both edges are sharp with no safe spine to hammer. For serious batoning, a sturdy single-edge fixed blade is better.

Is a spear point good for skinning?

It can skin, but it is not the best choice. Skinning rewards a deep, continuous belly that stays on the hide through long draws, the drop point’s strength. A spear point’s smaller belly and centered tip make accidental punctures more likely near a hide or gut cavity.

Final Take

The spear point is one of the most honest shapes on the knife rack, as long as you understand what it is. It is not a watered-down dagger or a generic pointy blade; it is a deliberate balance: a centered, strong tip for piercing and throwing, paired with just enough belly to stay a real cutter. Get the single-edge version and you have a versatile, legally straightforward EDC blade with a tip you can trust; the double-edge version is a specialist piercing tool that comes with real legal homework. If you value a straight-driving tip and a knife that feels balanced in the hand, the spear point belongs on your shortlist. If your day is mostly slicing, skinning, or detail cutting, one of its siblings will serve you better, and the knife blade types pillar guide will point you to the right one.

Wharncliffe Knife: What the Straight Edge Is Actually For (and Who Should Carry One)

Most people meet the wharncliffe blade and quietly write it off. They see a knife with no belly, a spine that ramps straight down to the point, and they assume something is missing. Then they spend an afternoon trimming leather, scoring drywall on a flat bench, or making a long, dead-straight cut that any curved blade would have wandered off, and the wharncliffe suddenly makes complete sense.

That misread happens because most guides describe the shape in a sentence and move on. The wharncliffe is not a knife with the curve sanded off. It is a deliberate piece of geometry built around one idea: a perfectly straight edge that puts every millimeter of steel in contact with your work, with a fine point for detail and almost no risk of the edge rolling away mid-cut. Once you see what that trade buys, the shape stops looking incomplete and starts looking purpose-built.

This guide covers the geometry, the genuine history (including the naming argument nobody settles), who actually carries one, the steel that matters, how to sharpen the one tricky part, and where the wharncliffe earns its keep versus where it does not. For the full map of every common shape, our knife blade types pillar guide shows where the wharncliffe sits in the larger family. This is the deep dive.

What Is a Wharncliffe Knife?

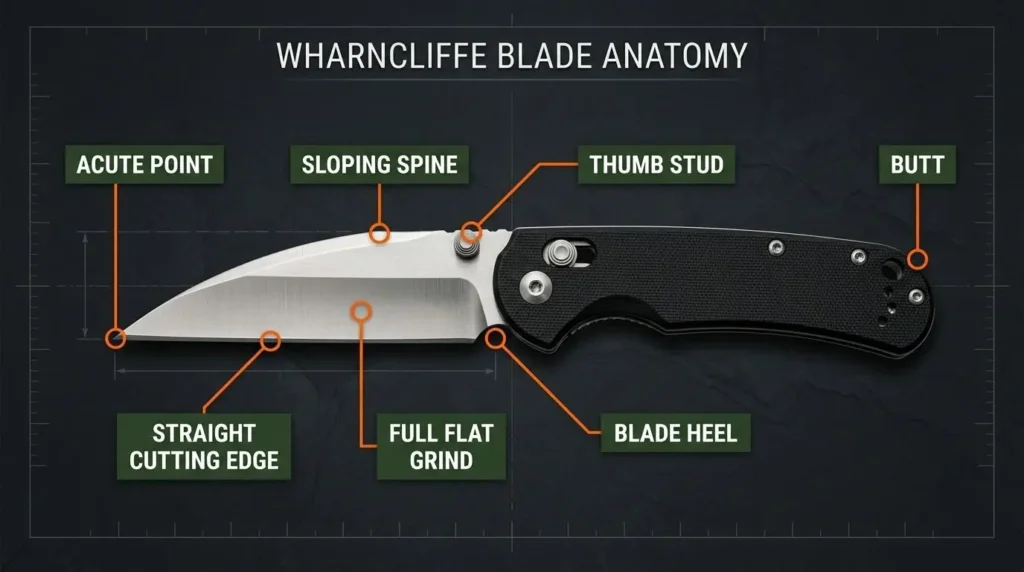
A wharncliffe knife is a blade with a completely straight cutting edge and a spine that slopes gradually downward from the handle to meet that edge at a fine, acute point. There is no belly and no upward curve. The result is a blade engineered for controlled, precise cutting rather than sweeping or rocking cuts.

That single description explains everything the shape does well and everything it cannot do. Flat edge for control, descending spine for a keen tip, no belly for slicing efficiency. Every strength and every limitation of the wharncliffe blade flows from that one geometric decision.

You will see the term written a few ways across catalogs: wharncliffe blade, wharncliffe knife, and the plurals wharncliffe blades and wharncliffe knives. They all describe the same profile. It is closely related to the sheepsfoot blade but with one important difference we will get to in a moment.

Wharncliffe Blade Anatomy: Understanding the Geometry

Detailed Wharncliffe blade anatomy infographic labeling acute point, sloping spine, straight cutting edge, thumb stud, blade heel, and full flat grind on an EDC folding knife.

The wharncliffe blade shape comes down to four features that separate it from every other profile.

The straight cutting edge. The edge runs flat from heel to tip with no curve at all. On a flat surface, the entire edge touches the material at once, which is what gives the wharncliffe its signature control on push cuts and long straight slices. There is no belly to roll through a cut, which is a deliberate trade, not an oversight.

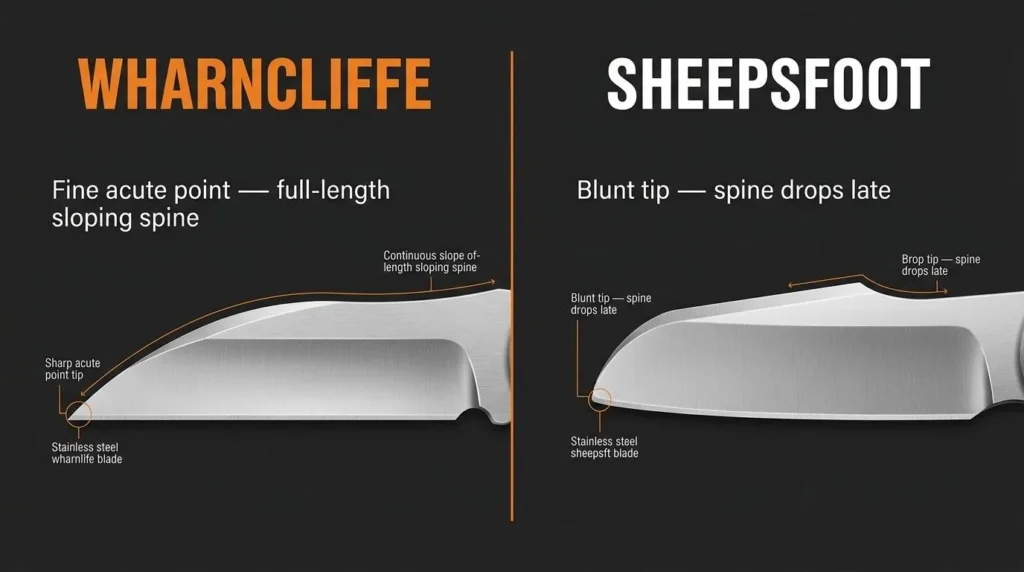
The sloping spine. This is the defining feature and the thing that separates a wharncliffe from a sheepsfoot. The spine starts straight along the top of the blade and descends in a long, gentle taper toward the tip. On a sheepsfoot, that drop happens late and steeply, leaving a blunt nose. On a wharncliffe, it begins early and runs the length of the blade, driving the spine all the way down to a true point.

The acute point. Where the sloping spine meets the straight edge, the wharncliffe forms a fine, low-set point. Unlike the sheepsfoot’s blunt false tip, this point pierces and handles detail work. It also sits low, near the centerline of the blade, which keeps it controllable. The catch is that this fine tip is the thinnest, most fragile part of the knife, and it has direct consequences for how you sharpen it.

The grind. The classic wharncliffe wears a full flat grind, which suits its role as a controlled slicer and adds strength behind the edge. But the shape works with several grinds, and the choice changes how the blade behaves.

Wharncliffe Grind Types

The grind sitting on a wharncliffe edge matters more than people expect. A full flat grind is the traditional choice and the best all-rounder, balancing slicing ability with a durable edge. A hollow grind thins the edge dramatically for cleaner, more aggressive slicing, which is why several modern tactical wharncliffes use it, at the cost of a slightly more delicate edge. A scandi grind is popular on bushcraft-leaning fixed blades and is exceptionally easy to maintain on a flat stone. A chisel grind, ground on one side only, appears on some utility and Japanese-influenced patterns and gives the thinnest, sharpest edge of all, though it cuts with a slight bias.

Whichever grind you choose, the straight edge makes a wharncliffe genuinely simple to sharpen, with one exception at the tip that we will cover in detail below.

Wharncliffe Blade History (and the Naming Question)

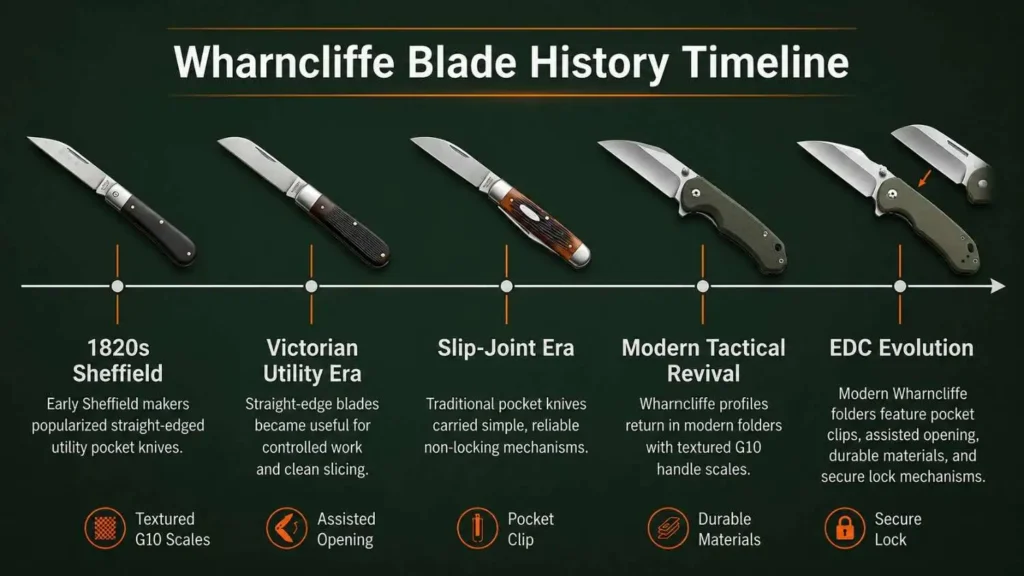
Wharncliffe blade history timeline infographic showing the evolution of straight-edge pocket knives from 1820s Sheffield designs to modern EDC tactical folders.

The wharncliffe is one of the few blade shapes named after a person rather than a function, and the story sits squarely in the golden age of Sheffield cutlery. Around the 1820s, James Archibald Stuart-Wortley-Mackenzie, the 1st Baron Wharncliffe, is credited with discussing a new blade design that would give the folding knives of the day, then a recent innovation, a strong, controllable straight edge. He took the idea to the renowned Sheffield firm Joseph Rodgers & Sons, who brought it to life, and the pattern carried his title forward as the wharncliffe.

That is the popular account, and it is worth knowing there is a competing one. Some sources argue the name traces instead to Wharncliffe Wood in southern Yorkshire, near the lord’s estate, rather than the man directly. Both explanations point to the same family and the same region, so the truth may simply be that the place named the title and the title named the blade. Either way, the wharncliffe pattern was a Sheffield creation, and traditional wharncliffe knives still carry that slip-joint, gentleman’s-knife heritage.

The shape rose and faded in popularity for over a century, surviving as a staple in traditional multi-blade folders. Its modern revival came from an unexpected direction. In the 1990s, self-defense instructor Michael Janich, founder of Martial Blade Concepts, argued that the straight edge and forward-driving point made the wharncliffe unusually effective and controllable, and partnered with Spyderco to produce the Ronin and then its folding successor, the Yojimbo. That collaboration dragged a nearly two-century-old gentleman’s pattern into the modern EDC and tactical world, where it has stayed ever since.

What Is a Wharncliffe Blade Used For?

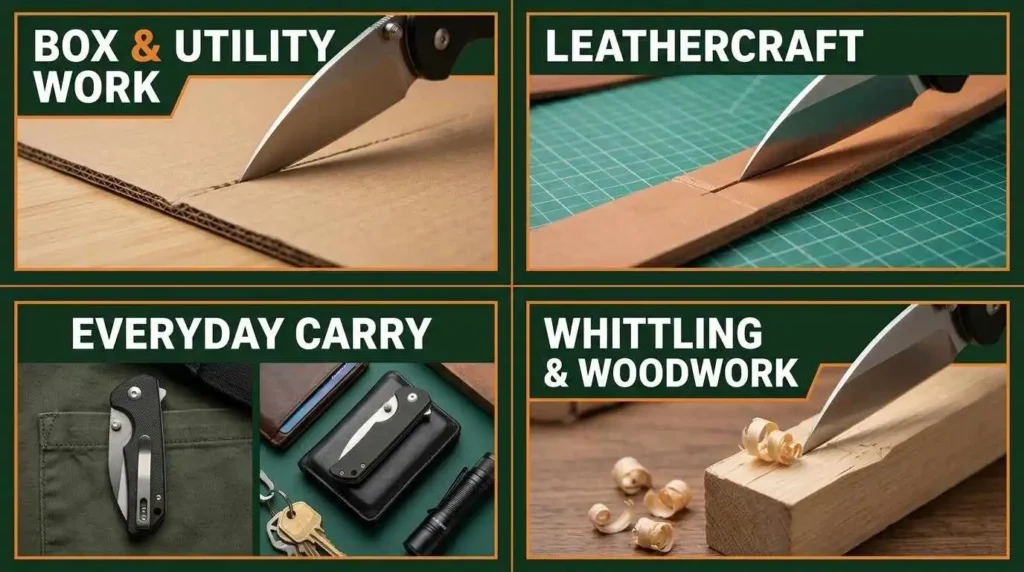
Wharncliffe knife use case infographic showing box cutting, leathercraft, everyday carry EDC, and woodworking applications with straight-edge precision blade.

The wharncliffe is a precision specialist. Here is where the straight edge genuinely outperforms.

Wharncliffe for EDC

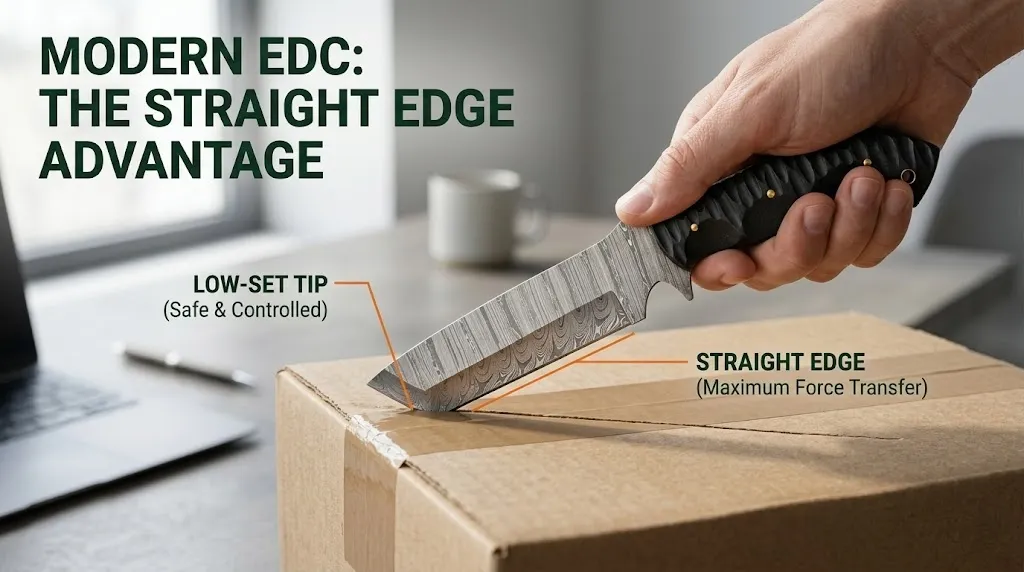
A wharncliffe EDC knife is an excellent everyday choice for anyone whose daily cutting leans toward utility and detail rather than the outdoors. Opening mail and packages, breaking down boxes, cutting tape and zip ties, trimming loose threads, the wharncliffe handles all of it with more control than a drop point and a less aggressive look than a tanto. The low, fine point excels at the small, fiddly punctures EDC throws at you, like starting a cut in shrink wrap or popping a staple. Most wharncliffe pocket knives and wharncliffe folding knives land in the practical 3-inch range, and compact mini wharncliffe folders make a tidy, low-profile carry.

Wharncliffe Utility and Box Work

This is the shape’s home turf. A wharncliffe utility knife slices clean on a flat surface because the whole edge contacts at once, scoring cardboard, drywall, gasket material, and packaging far more cleanly than a curved blade that only touches in a small arc. Warehouse and trade workers who open and break down material all day get real mileage out of the straight edge.

Wharncliffe for Leathercraft

Leatherworkers prize the wharncliffe for the same reason a straightedge and a sharp blade beat scissors: dead-straight, repeatable cuts. Trimming straps, skiving edges, cutting welts, and following a ruler all reward an edge with no belly to drift off the line. The fine point gets into corners and tight curves that a rounded tip cannot reach, which makes it a quiet favorite for wallet and sheath makers.

Wharncliffe for Whittling and Woodworking

It is fitting that one of the wharncliffe’s best modern jobs is close to its original one. The early pattern was conceived partly for woodwork, and the straight edge still shines at whittling, fine carving, and detail work where you push the edge in controlled passes and steer with the low tip. It is not a chopper or a roughing tool, but for clean, deliberate cuts in wood it is hard to beat.

Rescue and First-Responder Use

Like the sheepsfoot, the wharncliffe is valued as a rescue knife because the low, controllable point cuts seatbelts, clothing, and webbing with reduced risk of jabbing the person being freed. First responders who want a bit more piercing ability than a fully blunt sheepsfoot, while keeping the straight slicing edge, often reach for a wharncliffe or modified wharncliffe.

Where It Falls Short

An honest guide says where a shape struggles. The wharncliffe has no belly, so it is poor at the rolling, sweeping cuts that skinning and food prep depend on, and it does not bore or drill as comfortably as a curved tip. For hunting, field dressing, and general bushcraft, a drop point knife is simply the better tool. The fine tip is also vulnerable to lateral stress, so prying is a quick way to snap a point. Match the wharncliffe to controlled cutting, and pair it with a sturdier blade if your day includes rough outdoor work.

The Modified Wharncliffe and Other Variants

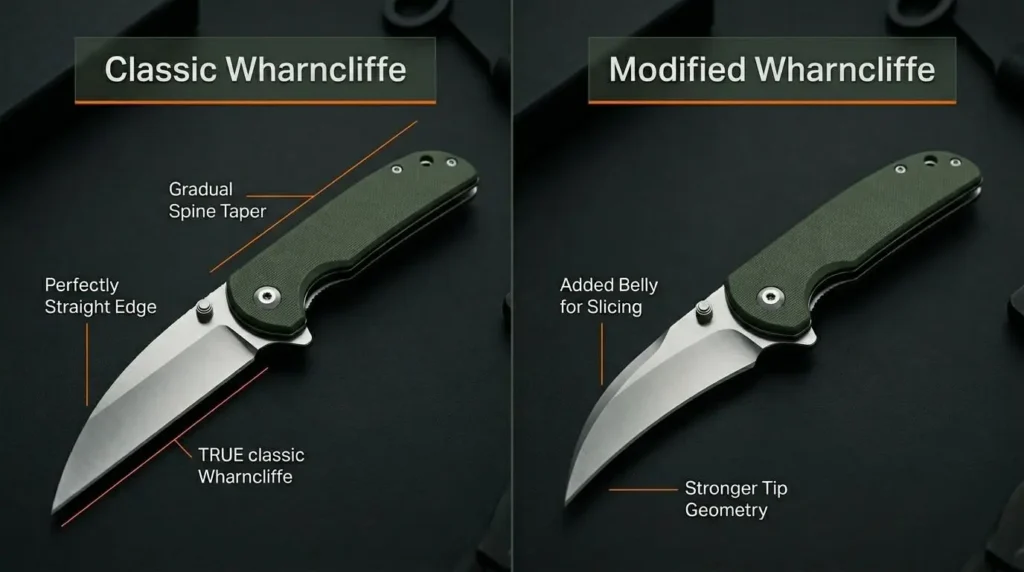
Comparison infographic of classic and modified Wharncliffe knife blades showing straight edge geometry, spine taper, slicing belly, and stronger tip design.

The classic wharncliffe is flat from heel to tip, which is perfect for push cuts but gives up some efficiency on draw cuts. The modified wharncliffe is the refinement. It adds a subtle, sloping belly near the tip to improve slicing while preserving the straight working edge and the forward point. Many modern designs, including reinterpretations on platforms like the Rick Hinderer XM-18, also leave more steel behind the point to address the fragility of the traditional fine tip.

It is also worth clearing up the reverse wharncliffe, a term people confuse with the reverse tanto. A reverse wharncliffe flips the geometry so the spine drops near the handle and the point rides high, the inverse of the standard layout. If you are sorting out the broader point-up family, our tanto knife guide breaks down the reverse tanto, which is a different shape entirely despite the similar name.

Notable Wharncliffe Knives

A few designs anchor the wharncliffe’s modern reputation and are worth knowing as reference points. The Spyderco Yojimbo 2 is the most influential, the folding result of Michael Janich’s collaboration with Spyderco, and the knife most responsible for the shape’s tactical revival. Spyderco’s Lil’ Native Wharncliffe brought the profile to a popular compact EDC platform with a full-flat-ground blade. On the custom and hard-use side, the Hinderer XM-18 wharncliffe is a benchmark for a reinforced, modern interpretation. And for traditionalists, classic Sheffield slip-joint patterns and the close-cousin sheepsfoot carry the original gentleman’s-knife lineage. None of these are required to appreciate the shape, but together they map how a 19th-century idea became a 21st-century staple.

How to Sharpen a Wharncliffe Blade

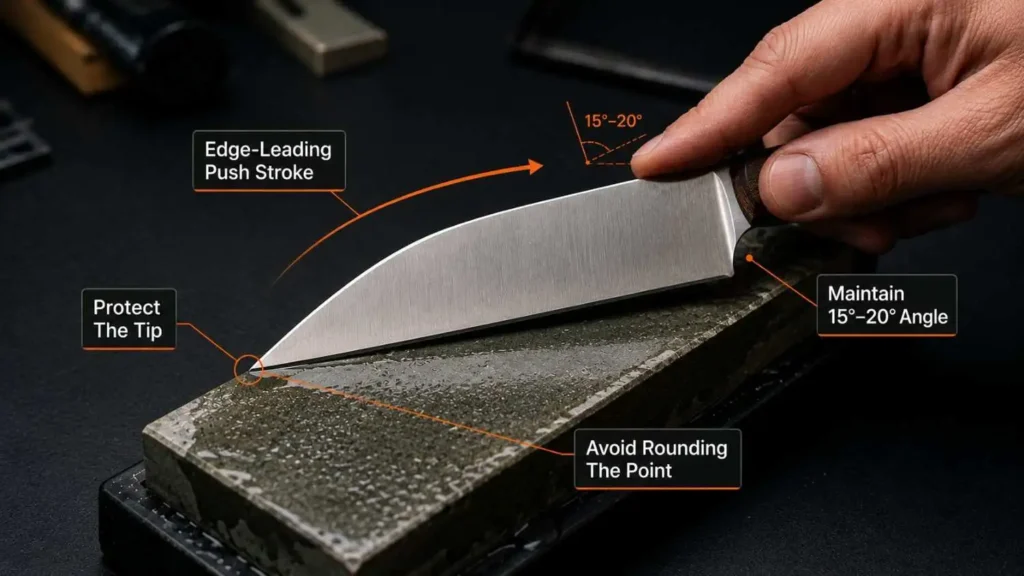
Wharncliffe knife sharpening tutorial showing correct 15 to 20 degree sharpening angle on whetstone with edge-leading push stroke technique.

Here is the section every other guide skips. They all tell you a wharncliffe is “easy to sharpen because the edge is straight,” and they are half right. The straight edge is genuinely simple. The problem is the tip, and if you sharpen a wharncliffe the way you sharpen a normal blade, you will round off the point and ruin the profile over time. This is the single most common wharncliffe sharpening mistake, and the fix is straightforward once you understand the cause.

Why the tip rounds off. When you sharpen by pulling the blade toward you and letting the tip run off the end of the stone, you apply extra pressure right at the point and remove more steel there than anywhere else. Do that repeatedly and the once-sharp wharncliffe point slowly turns into a curve. It is the same way an old, over-sharpened sheepsfoot ends up looking like a spey blade.

The fix: sharpen tip-first with push strokes. Set the tip end of the edge on the stone and push away from yourself, working from the tip back toward the heel, rather than dragging the blade toward you and running off the point. Keeping the tip planted and pushing into the stone protects the point instead of grinding it away. Many experienced sharpeners do the last half-inch at the tip first, then blend the rest of the straight edge into it, stopping short of the point so they never drag across it.

A simple step-by-step:

  1. Mark the entire edge with a permanent marker. This shows you exactly where you are removing steel and confirms you are hitting the whole bevel.
  2. Set your angle. A wharncliffe sharpens well at roughly 18 to 20 degrees per side, which is about 36 to 40 degrees inclusive. A guided system or the slots on a fixed-angle sharpener make this consistent.
  3. Start at the tip and push the edge away from you along the stone, keeping steady, even pressure and a locked wrist so the angle never changes.
  4. Work back toward the heel in overlapping passes, checking that the marker is disappearing evenly.
  5. Flip and repeat on the other side, matching your stroke count.
  6. Move to finer grits, then finish on a strop to refine the edge.

Because the edge is dead straight, a simple flat bench stone is all you need, no following a curve. Just keep the angle locked and never let the tip run off the end of your sharpener. Get that one habit right and a wharncliffe is one of the easiest blades you will ever maintain.

Steel Selection for Wharncliffe Knives

The right steel depends on whether you value corrosion resistance, edge retention, or easy maintenance, and the wharncliffe’s fine tip adds one extra consideration.

Carbon steels like 1095, 1084, and 5160 are traditional choices, offering excellent toughness and an easy-to-sharpen edge, at the cost of needing care to prevent rust. Stainless steels like AUS-8, 154CM, VG-10, D2, Sandvik 12C27, and premium CPM S30V give strong corrosion resistance and good edge retention, which suits a knife that lives in a pocket. Most quality wharncliffe knives land around 56 to 62 HRC. There is a real trade-off at the tip: harder steel (60-plus HRC) holds an edge longer but is more brittle, and on a thin wharncliffe point, brittleness shows up as chipping. If you use the tip hard, slightly tougher steel at a moderate hardness will serve you better.

For those drawn to pattern-welded blades, a damascus wharncliffe knife pairs the shape’s clean lines with striking layered steel, and the same metallurgy rules still apply. Our Damascus steel knife guide explains what the layering does and does not do for performance, which is worth reading before you judge a blade by its pattern.

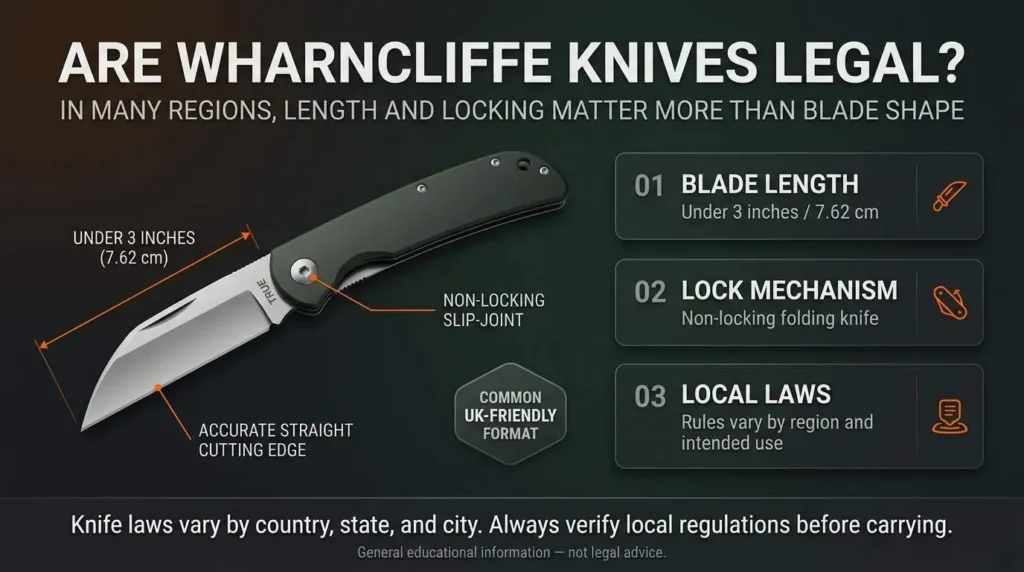
Educational infographic explaining Wharncliffe knife legality, including blade length limits, non-locking slip-joint mechanisms, and local knife carry laws.

This is another area competitors ignore, and it is one where the wharncliffe genuinely stands out. In most places, a knife’s legality depends on its mechanism and blade length rather than the blade shape itself, but the wharncliffe pairs unusually well with the strictest carry rules.

In the United Kingdom, for example, you can generally carry a folding knife without needing a specific reason only if it is non-locking and has a cutting edge under 3 inches (7.62 cm). That is exactly the territory where the wharncliffe shines: it adapts perfectly to a non-locking slip-joint mechanism, and its controlled, low point makes a compact “UK-friendly” carry that is practical without being aggressive. A wharncliffe slip joint is one of the most popular UK-legal EDC formats for that reason, and several makers build sub-3-inch wharncliffe slip joints specifically for that market.

That said, knife laws vary widely by country, state, and even city, and lock type, opening mechanism, and intent can all matter. This is general information, not legal advice, so always confirm the current rules where you live and travel before you carry. For UK readers, the official guidance on buying and carrying knives is the authoritative starting point.

Wharncliffe vs Other Blade Shapes

Side-by-side comparison infographic of Wharncliffe and Sheepsfoot knife blade profiles showing spine shape, edge geometry, and tip differences for EDC knives.

Quick orientation against the shapes people most often compare it to. We are building dedicated head-to-head guides for these, but here is the short version.

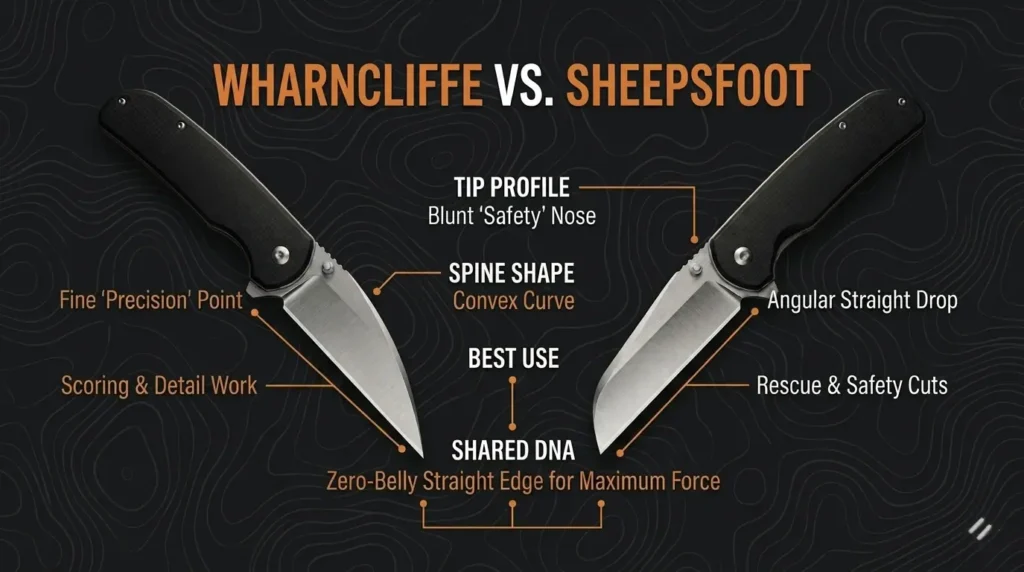
Wharncliffe vs sheepsfoot: nearly the same idea, but the wharncliffe’s spine slopes the full length of the blade to a true, usable point, while the sheepsfoot drops late to a blunt, safety-first tip. Choose wharncliffe when you need the point; choose sheepsfoot when you want zero piercing risk.

Wharncliffe vs drop point: opposite philosophies. The wharncliffe is flat and precise; the drop point has a belly built for slicing, skinning, and general outdoor work. Detail versus versatility.

Wharncliffe vs tanto: both are strong-point shapes, but the tanto concentrates strength in a high, angular tip for piercing hard material, while the wharncliffe keeps a low, fine point and a continuous straight edge for control.

Wharncliffe vs clip point: the clip point gives you a fine tip plus a belly, making it more of a generalist, where the wharncliffe is the dedicated straight-cut specialist.

Wharncliffe vs lambsfoot: very close cousins from the same British tradition; the lambsfoot’s spine curves more gently and the point sits a touch higher, but in daily use they are near-interchangeable.

Wharncliffe Blade Pros and Cons

No shape wins every job, and the wharncliffe trades honestly.

On the positive side: outstanding control on straight and push cuts, full-edge contact on flat surfaces, a fine forward point that handles detail work and small punctures, an exceptionally easy edge to sharpen once you protect the tip, a clean non-threatening look, and a profile that adapts beautifully to UK-legal slip-joint carry.

On the negative side: no belly, so it is weak at sweeping, rolling, and skinning cuts; a fine tip that chips or rounds if you pry with it or sharpen it carelessly; limited bushcraft and food-prep utility; and a look some traditional buyers find unusual at first glance.

Frequently Asked Questions

Are wharncliffe knives good?

Yes, for the right user. If your cutting is mostly utility, detail, and straight-line work, a wharncliffe gives you more control than almost any other shape. It is the wrong pick only if you mainly skin, field-dress, or need a do-everything outdoor blade.

What is the benefit of a wharncliffe blade?

Control. The straight edge contacts your work along its full length, so cuts go exactly where you aim them, and the low point handles fine detail. That makes it ideal for leatherwork, whittling, box work, and precise EDC tasks.

Why is it called a wharncliffe?

It takes its name from the 1st Baron Wharncliffe, who is credited with the design’s creation in 1820s Sheffield, though some sources tie the name to Wharncliffe Wood in Yorkshire near his estate. Both point to the same family and region.

Is a wharncliffe good for self-defense?

Some instructors, notably Michael Janich, have built defensive systems around the shape because of its control and forward point. That said, this is a sensitive and heavily regulated area, carry laws differ everywhere, and capability is no substitute for training and legality. Treat any defensive use as a serious decision and check your local law first.

Can you sharpen a wharncliffe on a regular stone?

Yes. Because the edge is straight, a flat bench stone is ideal. The only rule is to push from the tip back rather than dragging the blade and running off the point, which is what rounds the tip over time.

What is a reverse wharncliffe?

It inverts the standard layout so the spine drops near the handle and the point sits high. It is a distinct shape from the reverse tanto, despite the similar naming.

Final Take

The wharncliffe is not a knife with something missing. It is a knife with something specific to offer: a straight edge that gives you control most blades cannot, and a fine point that handles detail most straight edges lack. That combination is wasted on a hunter and perfect for a leatherworker, an electrician, a whittler, or anyone who values clean, deliberate cuts over rough versatility.

Carry one if your work lives on flat surfaces and straight lines, sharpen it tip-first to keep that point sharp, and match the steel to whether you fear rust or chasing the stone. Used for what it was built to do, the wharncliffe is one of the most quietly capable shapes you can put in your pocket. For the full lineup of profiles and where each one fits, head back to our knife blade types guide.

Sheepsfoot Knife: What It’s Actually Made For (and Who Should Carry One)

The sheepsfoot knife gets dismissed a lot. People see the blunt tip, decide it looks incomplete, and reach for something pointier. Then they end up cutting a seatbelt, opening fifty boxes a day, or working with rope on a moving deck, and suddenly the pointier knife is the wrong tool.

Most blade guides describe a sheepsfoot in two sentences and move on. That is exactly why people misjudge it. The shape is not a watered-down knife with the tip cut off. It is a deliberate piece of geometry built around one principle: maximum cutting control with zero piercing risk. Once you understand what that trade-off actually buys you, the sheepsfoot stops looking strange and starts looking obvious, for the right user.

This guide covers the geometry, the real history, who actually uses these knives, the steel choices that matter, and an honest look at where the sheepsfoot earns its keep versus where it does not. For the bigger picture across every common shape, our knife blade types pillar guide maps where the sheepsfoot sits in the larger family. This is the deep dive.

What Is a Sheepsfoot Knife?

A sheepsfoot knife is a blade profile with a perfectly straight cutting edge and a dull, gently curving spine that drops down to meet the edge at a blunt, rounded tip. The result is a false point: the tip exists geometrically but has no piercing capability.

That is the whole sheepsfoot blade shape right there. Flat edge for slicing, dropped spine for safety, no functional point. Everything the sheepsfoot does well, and everything it cannot do, comes from that one decision.

You will see the same word spelled three ways: sheepsfoot, sheep foot, and sheepfoot. They are identical. The one-word spelling is the most common and the one most catalogs use.

Sheepsfoot Blade Anatomy: Understanding the Geometry

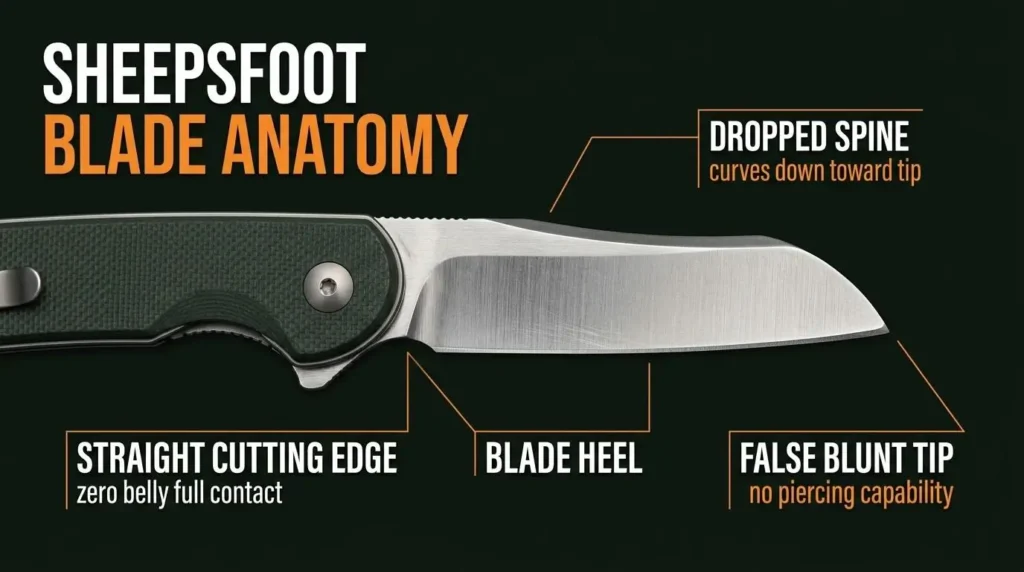
Detailed sheepsfoot blade anatomy infographic showing dropped spine, straight cutting edge, blade heel, and false blunt tip on a folding knife.

The sheepsfoot blade shape is defined by four features that set it apart from every other profile.

The straight edge. Unlike a drop point or clip point, the cutting edge does not curve. It runs flat from heel to tip. This eliminates the belly most knives have and changes how the blade behaves on a cutting surface: every part of the edge touches at the same time, which is exactly what you want for push cuts and controlled slicing.

The dropped spine. The spine starts straight along the top of the blade and curves downward to meet the edge. A steeper drop gives you the squared-off classic sheepsfoot. A gentler drop gives you something closer to a wharncliffe.

The false point. Where the spine meets the edge, you get a tip, but it is blunt. Depending on the maker, this can be a 90-degree corner (useful for striking a ferro rod) or a softly rounded curve (preferred for rescue work where any sharp corner is a liability).

The grind. Sheepsfoot blades work with almost every grind type. A flat grind gives balanced cutting performance. A chisel grind, common on Japanese and traditional patterns, gives a thinner, more aggressive edge for slicing. The straight edge makes all of these easier to sharpen than curved profiles.

This blade is engineered to slice with maximum control while making it physically difficult to puncture anything you did not mean to.

Sheepsfoot Blade History

Historical timeline infographic showing the evolution of the sheepsfoot knife from 1700s shepherd tools to modern EDC and rescue pocket knives.

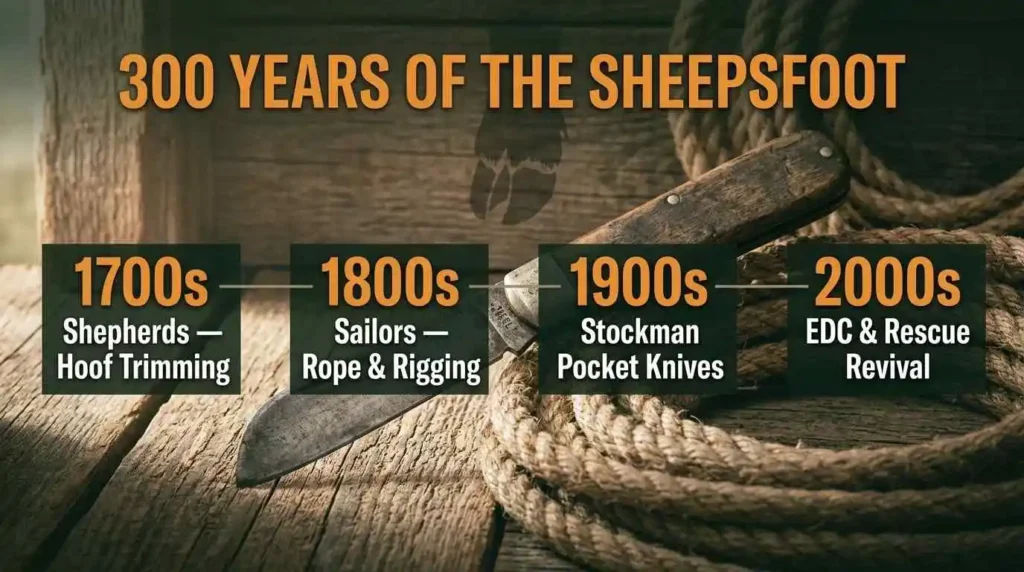
The name is literal. In the 1700s, shepherds needed a knife that could trim overgrown hoof material from sheep without slipping and injuring the animal. A straight edge gave them controlled cutting power against tough hoof. The dropped, rounded tip meant a startled animal could not get jabbed by a slipped knife. The shape worked, the name stuck, and the design spread well beyond livestock.

Sailors picked it up for the same reason: a pointy knife on a rocking deck is a problem. Cutting frozen rope, working around fragile sails, breaking up jams in pulleys, every one of those tasks rewards a flat slicing edge and punishes a pointed tip. The sheepsfoot became the standard maritime blade for several centuries, and there is a popular story that ship captains broke the points off their crewmen’s knives to prevent fights and accidents on board.

By the early 20th century, the shape was a fixture in folding pocket knives across Europe and America. The traditional American stockman pattern usually carries three blades, and one is almost always a sheepsfoot, designed specifically for the precision work a cattle rancher needs.

The modern revival came from two directions: rescue services adopting the shape for first-responder knives in the 1980s and 1990s, and custom makers like Rick Hinderer reinterpreting it for everyday carry in the 2000s. The sheepsfoot did not get popular again because it was new. It got popular because the original problem it solved has never gone away.

What Is a Sheepsfoot Blade Used For?

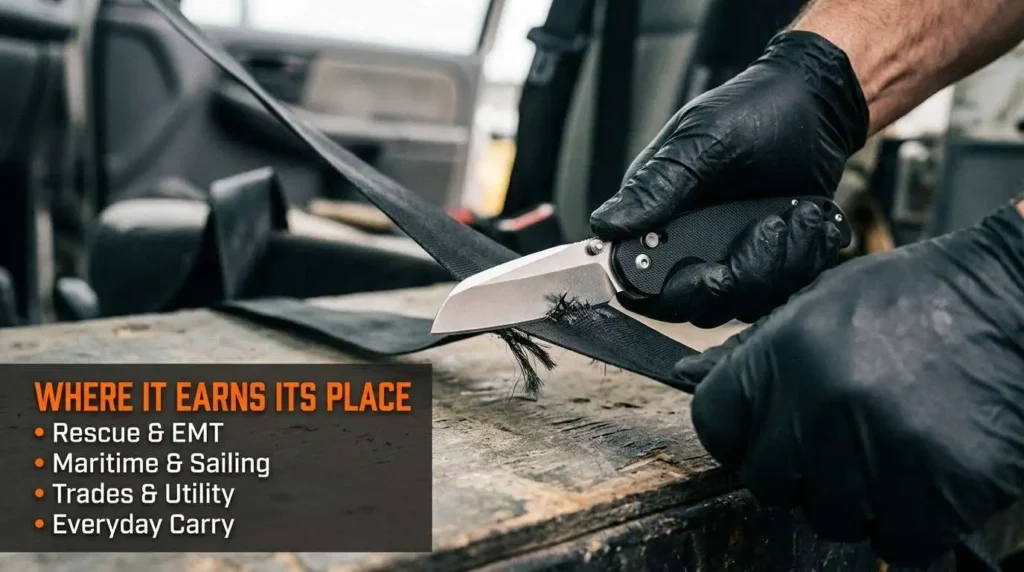
Sheepsfoot folding knife cutting a seatbelt strap in a rescue scenario, highlighting EMT, maritime, utility, and everyday carry applications.

The sheepsfoot is a specialist, not a generalist. Here is where it actually earns its place.

Sheepsfoot Rescue Knives and Emergency Services

EMTs, paramedics, firefighters, and search-and-rescue teams rely on sheepsfoot rescue knives for one specific reason: they cut seatbelts, clothing, and webbing without risking deeper injury to the person trapped inside. When you are slicing fabric across someone’s chest, a pointed tip is the last thing you want near skin. The flat edge does the cutting work; the blunt tip stays out of trouble. This is the single strongest case for the sheepsfoot, and it is why most purpose-built rescue knives use either this shape or its close cousin, the modified sheepsfoot.

Maritime and Sailing Use

Cutting rope, line, and rigging on a boat, especially under load or in bad weather, rewards a blade you can drag across material without the tip catching or piercing what is underneath: your other hand, a sail, or an inflatable. The straight edge gives even pressure across the cut. The blunt tip will not punch through fabric or hull material. This is the use case that defined the sheepsfoot knife for sailors across centuries.

Electricians, Tradespeople, and Box Work

Stripping wire jackets, scoring drywall, cutting cardboard, opening packaging, slicing tape and foam, these are all sheepsfoot utility knife tasks. The flat edge slices clean on a flat surface like a workbench or floor, much cleaner than a curved blade that only contacts material in a small arc. Tradespeople have carried sheepsfoot patterns for over a century for exactly this kind of work.

Sheepsfoot EDC Knives

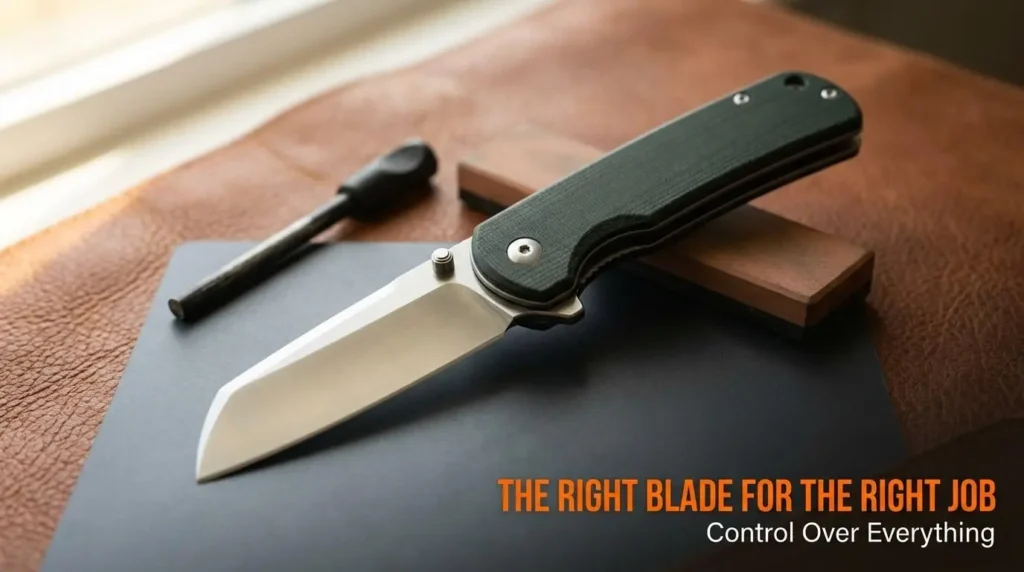
Modern sheepsfoot folding knife displayed on a leather desk setup with straight edge blade design focused on precision cutting and control-oriented utility use.

A sheepsfoot EDC knife is a quietly excellent choice if your daily cutting tasks lean toward utility rather than outdoor or defensive use. Mail, packages, food prep, loose threads, broken zip ties, the sheepsfoot handles all of it with more control than a drop point and considerably less anxiety than a tanto. Pocket-friendly profiles in the 3-inch range are the most common form factor for sheepsfoot folding knives and sheepsfoot pocket knives.

It is also worth noting that a sheepsfoot does not look threatening. In professional settings or restrictive environments, that matters. A knife with a flat edge and a rounded tip draws far less reaction than something with a tactical clip point.

Sheepsfoot Kitchen Knives and the Santoku Connection

The Japanese santoku knife is, geometrically, a sheepsfoot. Straight edge, dropped spine, blunt tip, same DNA. Santoku translates roughly to “three virtues,” referring to its use on meat, fish, and vegetables. The reason it works so well in the kitchen is identical to why a sheepsfoot works at sea: a flat edge against a flat surface gives you clean, controlled, full-contact cuts every time. A sheepsfoot kitchen knife and a santoku are solving the same problem at different scales.

Sheepsfoot Fixed Blade and Folding Options

The shape works across formats. Sheepsfoot fixed blade knives are popular in maritime and rescue contexts where a locking mechanism is a liability. Sheepsfoot folding knives cover EDC, traditional patterns like the stockman and Barlow, and modern tactical folders. Sheepsfoot pocket knives in compact sizes are a strong option for anyone who wants a low-profile, non-threatening carry.

Bushcraft and Outdoors: Where It Falls Short

A sheepsfoot is not a good bushcraft blade. You cannot reliably bore a hole, field-dress an animal without awkward angles, or drill a fire-board notch the way you would with a drop point. If your primary use is hunting, skinning, or wilderness survival, a drop point knife handles those tasks far better.

A sheepsfoot can work as a secondary woods blade paired with a chopper or fixed-blade survival knife, but as a sole bushcraft tool, it is the wrong choice.

The Modified Sheepsfoot Blade

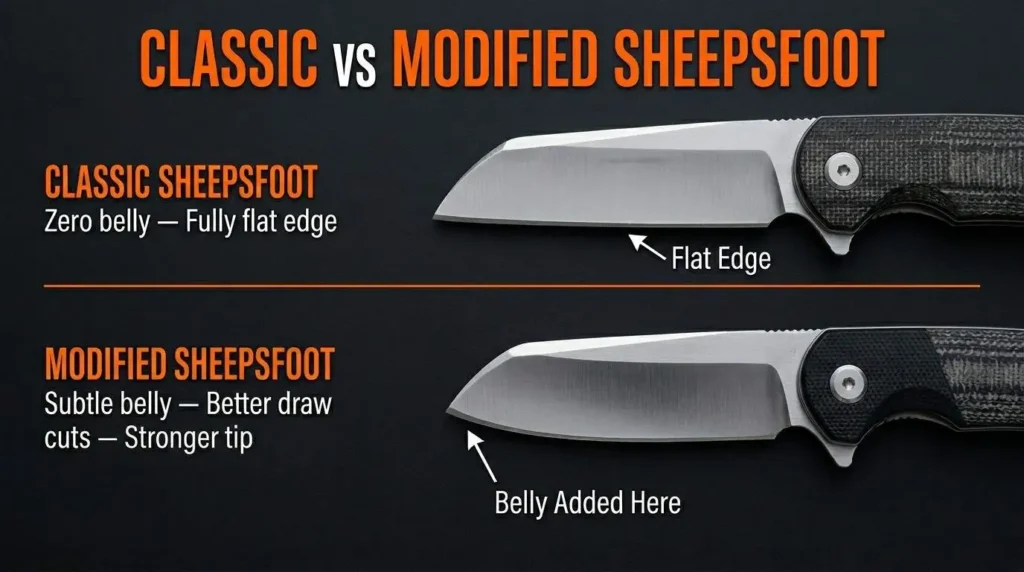
Side-by-side comparison infographic of classic vs modified sheepsfoot knife blades showing flat edge geometry, added belly curve, and cutting performance differences.

The classic sheepsfoot has a near-zero belly, completely flat from heel to tip. That works well for push cuts but loses some efficiency on draw cuts where a slight belly helps the blade roll through material.

The modified sheepsfoot blade is the refinement. Rick Hinderer popularized this evolution on his XM-18 platform, and it has since spread across the industry. The modification adds a subtle, sloping belly that improves slicing performance while preserving the dropped tip and the overall safety-first geometry. Hinderer also kept more steel behind the tip than traditional patterns, which were sometimes fragile at the point. The modern modified sheepsfoot is sturdier, slices better, and still will not accidentally puncture anything.

If you are shopping the modern market, you will see “modified sheepsfoot” listed on many EDC knives. It is not a different blade; it is a refined version of the same idea.

Sheepsfoot Blade Pros and Cons

No knife shape is perfect for every job, and the sheepsfoot trades capabilities honestly.

On the positive side: exceptional control on push cuts and draw cuts, no accidental punctures by design, easy to sharpen because the edge is straight, strong and durable tip from the thick steel behind the false point, excellent performance on flat cutting surfaces, and a non-threatening appearance that suits professional or restrictive environments.

On the negative side: no piercing ability at all, limited bushcraft utility, not a self-defense blade, and some users find the shape visually unfamiliar or unfinished-looking.

The trade-offs are clean. If your cutting tasks reward control and punish punctures, the sheepsfoot works. If you need to pierce, drill, or skin, it does not.

Damascus Sheepsfoot Knives

The sheepsfoot’s straight edge and broad blade face make it a natural canvas for Damascus steel. The flat geometry lets the pattern run uninterrupted across the entire blade, which means a damascus sheepsfoot knife tends to show off the steel pattern more dramatically than busier profiles like clip points or bowies, where curves break up the visual flow.

Practically, a damascus sheepsfoot combines the cutting characteristics of the shape with the toughness and edge retention of modern pattern-welded steel. Custom and hand forged sheepsfoot knives in Damascus have become a small but growing segment of the EDC and collector market. Because the shape is mechanically simple, no complex curves to forge around, it is also one of the more accessible profiles for makers working in Damascus.

You will find damascus sheepsfoot blades on slipjoint stockman knives, Barlows, and modern EDC folders. For fixed blades, the format works well as a utility or kitchen knife where visual appeal pairs with practical cutting performance.

Steel Selection for Sheepsfoot Knives

The right steel depends on what you are cutting and where.

For rescue and maritime use, prioritize corrosion resistance: saltwater, blood, and chemical exposure will damage carbon steel quickly. Look for 154CM, S35VN, CPM MagnaCut, or VG-10. MagnaCut has become a favorite for rescue and EDC sheepsfoot blades because it handles corrosion well without sacrificing toughness.

For everyday carry and utility work, you have more flexibility. S30V, S35VN, D2, and 154CM are solid mid-tier choices. Higher-end EDC sheepsfoots in M390 or 20CV push edge retention further but cost more and can be harder to sharpen in the field.

For traditional patterns and Damascus, carbon steel is often the right call. Options like 1095, 1084, or O1 sharpen to a keen edge and patina over time. They need more maintenance, but for collectors and traditional users, that is part of the appeal.

For sheepsfoot kitchen knives including santoku-style blades, high-carbon stainless options like AEB-L, 14C28N, or VG-10 give you slicing performance without rust concerns.

How to Sharpen a Sheepsfoot Blade

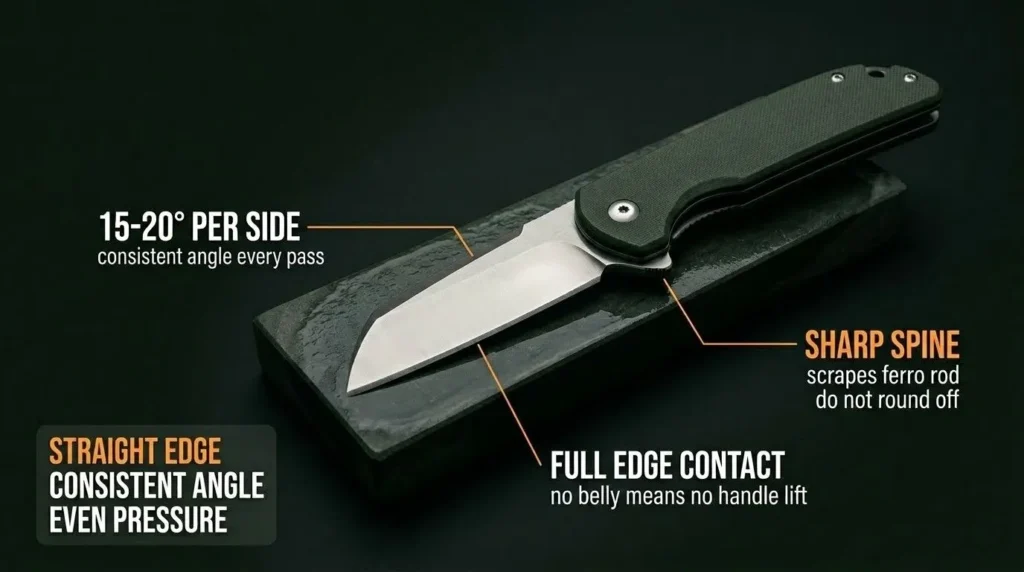
Sharpening guide infographic for a sheepsfoot knife showing straight edge sharpening angle, full edge contact, even pressure, and sharp spine maintenance.

The sheepsfoot is one of the easiest blade shapes to sharpen. The straight edge means every part of the edge meets the stone at the same angle, every pass, with no belly to navigate.

Pick your bevel angle (15 to 20 degrees per side for most utility sheepsfoots), maintain it consistently, and work from heel to tip in even strokes. Because there is no belly, you will not need to lift the handle as you move along the edge. Chisel-ground sheepsfoot blades only need sharpening on one side, with a light deburring pass on the back.

The 90-degree spine on many modern sheepsfoot fixed blades is intentional. It is left sharp for scraping a ferro rod or processing tinder. Do not round it off when maintaining the blade.

A dedicated sharpening walkthrough is coming soon. The principle for now: straight edge, consistent angle, even pressure.

Sheepsfoot vs Other Blade Shapes

Each of these gets a dedicated comparison post. Here is the short version so you can place the sheepsfoot in the wider family.

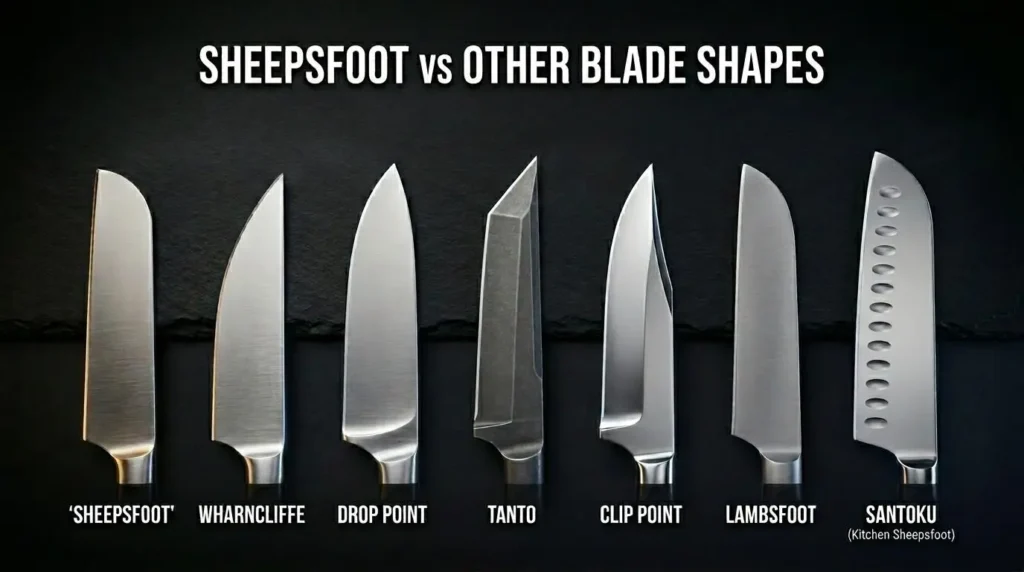
Ultra-realistic comparison infographic showing Sheepsfoot, Wharncliffe, Drop Point, Tanto, Clip Point, Lambsfoot, and Santoku knife blade shapes side by side on a dark background.

Sheepsfoot vs Wharncliffe: Both have straight edges, but the wharncliffe’s spine slopes gradually to a sharper, more usable point, giving you some piercing ability the sheepsfoot lacks. A dedicated sheepsfoot vs wharncliffe comparison is coming soon.

Sheepsfoot vs Drop Point: The drop point trades the sheepsfoot’s no-puncture design for a usable, controllable point. Outdoor work, drop point wins. Utility cutting, sheepsfoot wins.

Sheepsfoot vs Tanto: Opposite philosophies. The tanto maximizes piercing strength with its reinforced angular tip. The sheepsfoot eliminates piercing entirely. They serve completely different users.

Sheepsfoot vs Clip Point: The clip point gives you a fine, precise tip for detail work. The sheepsfoot gives you control across the whole edge.

Sheepsfoot vs Lambsfoot: The closest cousin. The lambsfoot has a slightly curved edge versus the sheepsfoot’s fully straight edge, and a more rounded transition at the tip. It is a more traditional British pattern. Visually similar, subtly different in use.

Sheepsfoot vs Santoku: A santoku is a sheepsfoot. Same geometry, scaled up for kitchen use.

FREQUENTLY ASKED QUESTIONS

Why is it called a sheepsfoot blade?

The name comes from its original use trimming the hooves of sheep in the 1700s. The straight edge and blunt tip let shepherds work safely around the animals. Some sources also note that the blade’s side profile resembles a sheep’s hoof, which may have reinforced the name over time.

Are sheepsfoot knives good?

For utility cutting, rescue work, maritime use, EDC, and kitchen tasks, yes, they are excellent. For hunting, bushcraft, piercing, or self-defense, they are the wrong tool. The shape rewards the right user and frustrates the wrong one.

Is a sheepsfoot good for self-defense?

No. A sheepsfoot has no piercing ability and a controlled edge optimized for slicing flat material. It is not built for defensive use, and there are better blade shapes for that purpose if it is your priority.

Is a santoku a sheepsfoot?

Yes, geometrically. The santoku is a Japanese kitchen knife built on sheepsfoot principles, flat edge, dropped spine, blunt tip, scaled and refined for food prep. The two share the same design DNA.

Are sheepsfoot blades legal to carry?

Sheepsfoot blades are among the least legally restricted knife shapes because the geometry eliminates piercing capability, helping them avoid definitions that flag stabbing knives in many jurisdictions. Blade length and locking mechanisms still matter, so check your local laws.

What is the difference between a sheepsfoot and a modified sheepsfoot?

A traditional sheepsfoot has a fully flat edge. A modified sheepsfoot adds a subtle belly toward the tip for better slicing performance on draw cuts while keeping the dropped, blunt tip. The modified version is what most modern EDC knives ship with.

Can a sheepsfoot blade be used for whittling?

Yes, and it is one of the better profiles for it. The straight edge gives controlled, predictable cuts on softwood, and the blunt tip means a slipped knife will not stab your palm. It is the same control logic that makes it good for rescue work.

Final Take

The sheepsfoot knife is not trying to be a do-everything blade. It is a specialist that solves a specific cutting problem with deliberate geometry, and for the right user, it does that job better than anything else in the drawer. EMTs, sailors, electricians, EDC carriers, and anyone whose daily cutting tasks involve flat surfaces and zero tolerance for accidental punctures end up reaching for this shape and not looking back.

If your needs run toward outdoor work, hunting, or defensive use, you are better served by other profiles in our knife blade types pillar. But if controlled slicing is what your day actually demands, the sheepsfoot has been quietly earning its keep for three hundred years, and the modern versions are the best they have ever been.

Tanto Knife: What It’s Actually Good For (and Where It Falls Short)

Quick Answer

A tanto knife has a blade with two distinct edges meeting at an angle, creating a reinforced, almost flat-tipped point. The modern shape most Western buyers picture — the American tanto — was popularized by Cold Steel in the early 1980s as a tactical reinterpretation of the historical Japanese tantō, which had a more curved, flowing profile. American tantos excel at piercing hard materials, prying, and tip-abusive tasks. They are poor choices for food prep, fine slicing, or anything that benefits from a curved belly.

This post is part of our broader knife blade types and shapes pillar — see that guide for a side-by-side comparison across every common blade profile.

What Is a Tanto Knife?

A tanto knife is defined by its angular point: a primary cutting edge runs along the bottom of the blade and meets a shorter secondary edge near the tip, with the two edges converging at an obvious vertex. Instead of curving smoothly to a point like a drop point, the blade essentially “turns a corner.”

That single design decision changes everything about how the knife behaves. The tip is thick and braced by steel on both sides, which makes it unusually resistant to snapping under lateral or impact stress. The trade-off is that the blade has almost no belly — the gentle curve a knife uses to roll through a slice — so the tanto is one of the worst common blade shapes for food work and one of the best for piercing and hard-material cutting.

The name comes from the Japanese tantō (短刀), meaning “short blade,” but the historical Japanese tantō and the modern American tanto are different enough that conflating them causes most of the confusion in other guides. We’ll untangle that below.

Tanto Blade Anatomy & Profile

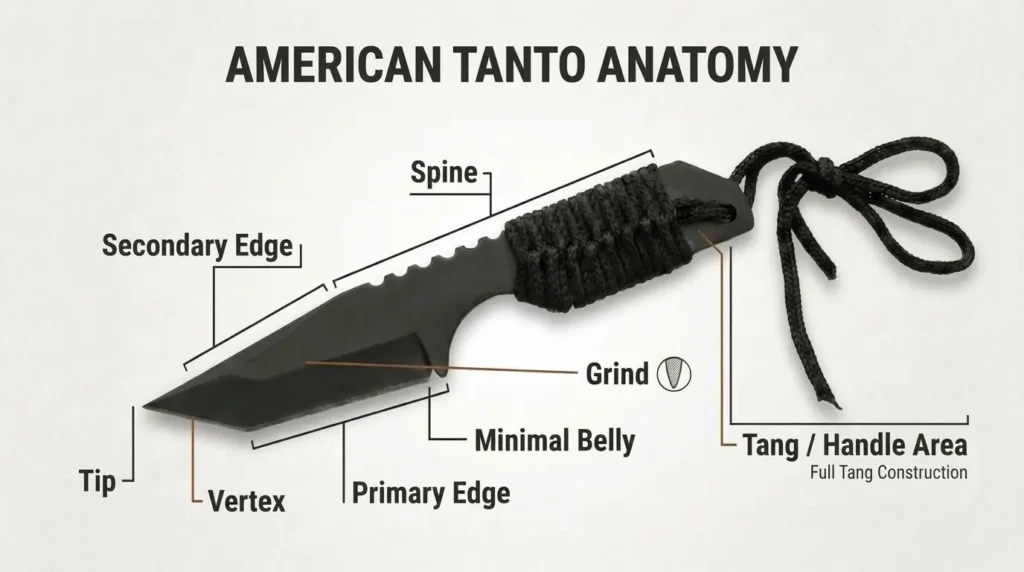
American Tanto knife anatomy diagram showing blade parts including tip, secondary edge, spine, grind, primary edge, minimal belly, and full tang handle construction on a tactical fixed blade knife.

The American tanto silhouette has eight features worth naming:

  1. Primary edge — the longer cutting edge running along the bottom of the blade.
  2. Secondary edge — the shorter angled edge running up to the tip. Does most of the piercing work.
  3. Vertex (the “corner”) — where the primary and secondary edges meet. The defining feature, and a common stress point on cheap steel.
  4. Tip — the actual point at the top of the secondary edge.
  5. Spine — usually straight, sometimes with a false edge or swedge.
  6. Belly — minimal to none. A feature, not a flaw, but it limits what the knife can do well.
  7. Grind — flat, sabre, hollow, or chisel; varies by maker. Determines how the knife slices versus pries.
  8. Tang — full tang on quality fixed blades, partial on budget knives. Always check.

The vertex is the single most argued-about part of the knife. Maintain it crisp during sharpening and the blade keeps its design intent. Round it off and you’ve essentially made a budget drop point.

What a Tanto Knife Is Best For

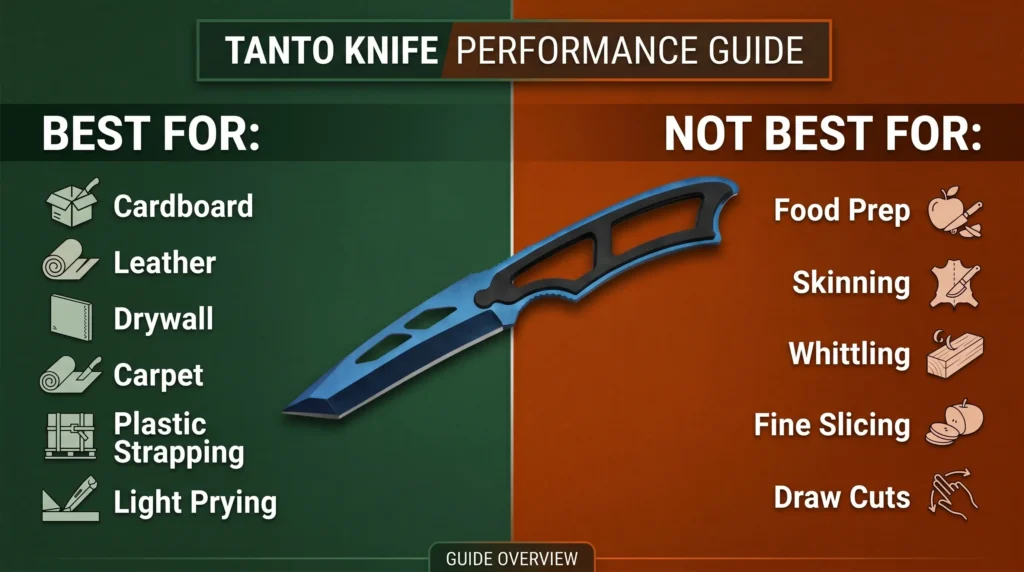
Tanto knife performance guide showing best uses for cardboard, leather, drywall, carpet, plastic strapping, and light prying, plus weak uses like food prep, skinning, whittling, fine slicing, and draw cuts.

A tanto earns its keep on hard materials and abuse tasks — any cut where you’d rather have a tip that refuses to break than one that slips in more elegantly.

Best ForNot Best For
Piercing cardboard, leather, plastic strappingFood prep — no belly for rocking cuts
Drywall scoring and cuttingDetail slicing and fine carving
Carpet cutting and seam workSkinning game (almost no curve)
Light prying on packaging cratesWhittling, bushcraft slicing
Penetrating tough exterior layersAnything requiring a draw cut
Hard-use utility on construction sitesLong, continuous slicing motions
Tactical / defensive contextsApple and cheese pocket knife tasks

If your daily use is mostly cardboard, boxes, and hard materials, a tanto handles it fine. If half your cutting is food, look at a drop point instead.

A Brief History of the Tanto

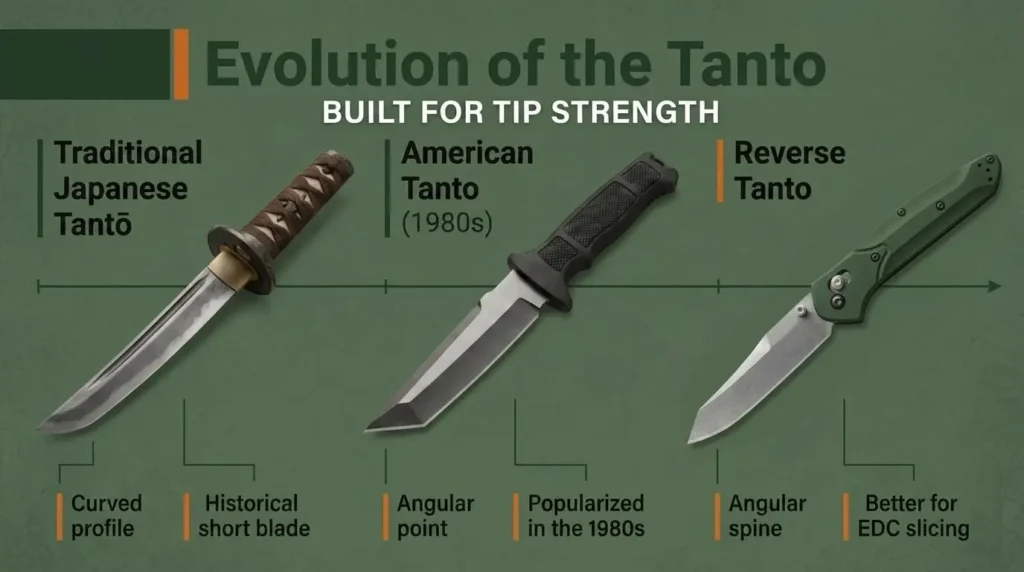
Evolution of the Tanto knife design comparing Traditional Japanese Tantō, American Tanto, and Reverse Tanto blades with features focused on tip strength, angular blade geometry, and everyday carry utility.

The tantō in Japanese sword culture is a short blade — typically 15–30 cm — historically worn alongside or in place of a wakizashi. Its profile is curved and continuous, often with no shinogi ridge line. It looks almost nothing like what most Americans now call a tanto.

The modern angular shape was largely defined by Lynn Thompson and Cold Steel in the early 1980s, starting with the original Tanto fixed blade and the later Recon Tanto. Thompson marketed the geometry hard, with promotional videos showing the tip punching through car doors and steel drums. Within a decade the angular “tanto” became one of the most recognizable tactical blade silhouettes in the world.

Subsequent makers — Spyderco, Benchmade, Microtech, Spartan Blades — refined the idea. A separate evolution, the reverse tanto, emerged as designers reimagined the angular cut on the spine instead of the edge.

So when someone says “tanto,” they may mean any of three different things: a historical Japanese dagger, an American tactical reinterpretation, or a modern reverse-tanto EDC blade. Each has a different purpose.

American Tanto vs Japanese Tanto

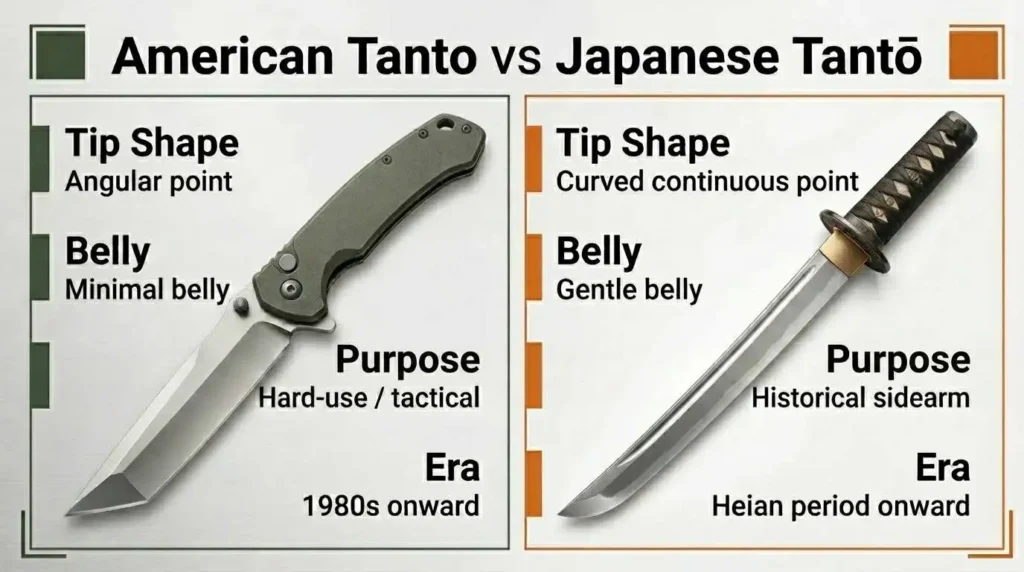
Comparison infographic of American Tanto vs Japanese Tantō knives highlighting differences in tip shape, blade belly, tactical use, historical purpose, and blade design evolution.

The two share a name and very little else.

FeatureAmerican TantoJapanese Tantō (historical)
Tip shapeAngular, two edges meeting at vertexCurved continuous point
BellyMinimal to noneGentle, continuous curve
Primary purposeTactical / hard-use cuttingEdged sidearm, ritual, light utility
Era1980s onwardHeian period onward (~10th century)
Geometry nameCompound angularOften hira-zukuri or shōbu-zukuri
Where you’ll see itMost modern “tanto” knivesAntique collections, traditional smiths

Both have legitimate histories. They are not the same blade. Calling an American tanto “the same shape samurai used” is a marketing line, not a fact.

Reverse Tanto vs American Tanto

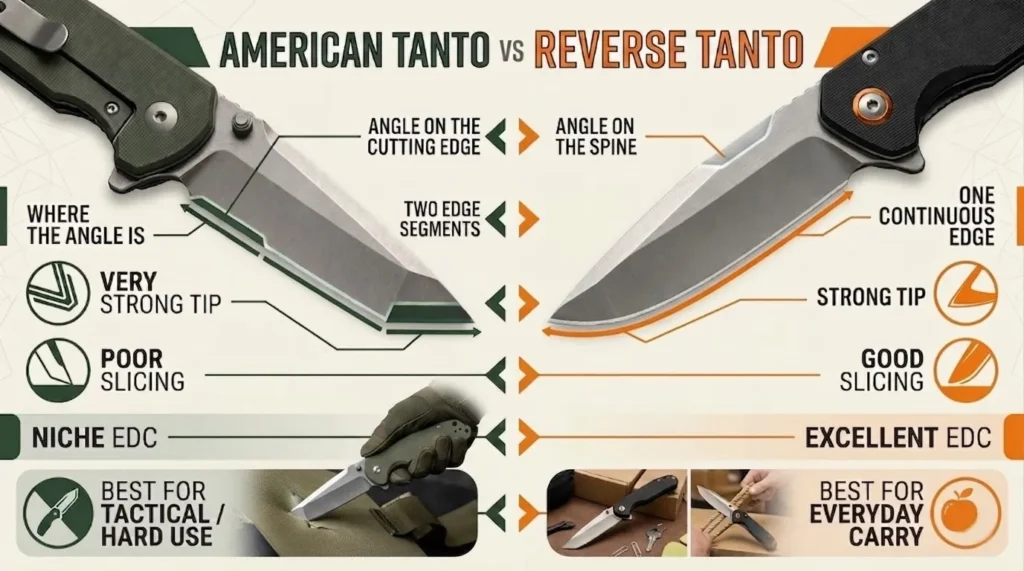
American tanto vs reverse tanto comparison showing cutting edge angle, spine angle, tip strength, slicing performance, tactical use, and everyday carry suitability

The most under-explained comparison in the category. On an American tanto, the bottom edge has two segments meeting at an angle, while the top spine is usually straight. On a reverse tanto, it’s the opposite: the spine drops down to meet a continuous, flowing edge. The reverse tanto has a single cutting edge with mild belly — geometrically much closer to a wharncliffe than to an American tanto.

FeatureAmerican TantoReverse Tanto
Where the angle isOn the cutting edgeOn the spine
Number of edgesTwo distinct edge segmentsOne continuous edge
Tip strengthVery highHigh
Slicing performancePoorGood
EDC suitabilityNicheExcellent
Iconic exampleCold Steel Recon TantoBenchmade 940 Osborne
Best useTactical, hard-useDaily carry, controlled cutting

For a full deep-dive, see our tanto vs reverse tanto comparison.

Tanto vs Drop Point

A tanto and a drop point are opposite design philosophies. The drop point trades tip strength for belly and versatility. The tanto trades belly for tip strength.

TaskTantoDrop Point
Hunting / skinningPoorExcellent
Food prepPoorGood
EDC slicingBelow averageExcellent
Piercing hard materialExcellentGood
Prying / abuseExcellentFair
Self-defenseSpecializedCapable

If you’re choosing between them for general daily use, the drop point is the safer pick. If you specifically need tip strength or you mostly cut hard materials, the tanto earns its place. Full breakdown in our Tanto vs drop point and Drop point knife guide.

Tanto vs Clip Point

The clip point is built around a fine, controllable tip — the opposite of the tanto. Where the tanto resists tip damage by keeping steel behind the point, the clip point sharpens its tip to a needle for piercing precision at the cost of fragility. A clip point is a better skinner, a more elegant slicer, and a more precise piercer in light materials. A tanto is the better choice when you’d rather the tip not snap. See our clip point knife guide for the full breakdown.

Tanto vs Wharncliffe and Sheepsfoot

These three look superficially similar — all favor straight or near-straight edges over belly — but the geometry differs. A wharncliffe has a straight edge with a spine that gently curves down to meet it. A sheepsfoot has a straight edge and a sharply rounded spine. Neither has the angular vertex of an American tanto, and neither has a reinforced tip in the same way.

For controlled detail work or whittling, a wharncliffe or sheepsfoot is usually better than a tanto. For abuse-tolerance and piercing, the tanto wins. Full guides on the wharncliffe blade and sheepsfoot blade.

Fixed Blade vs Folding Tantos

Fixed-blade tantos lean hard-use: thicker stock, full tang, sheath carry. They’re the natural home for the original tactical concept — the Cold Steel Recon Tanto, the Spartan Akribis, the SOG SEAL. If your use case includes prying, batoning, or impact work, fixed blade is the only sensible choice.

Folding tantos cover the EDC and tactical-carry market. The geometry compromises slightly — the vertex is more exposed to chipping than a fixed blade’s, and the locking mechanism limits abuse the blade can absorb — but they’re far more practical to carry.

The honest version: buy a fixed-blade tanto if you’ll actually use it hard. Buy a folding tanto if you mostly want the silhouette and tip strength for moderate tasks.

Variants of the Tanto

The tanto family is broader than most buyers realize.

  • American tanto — the angular, two-edged silhouette Cold Steel popularized.
  • Japanese tantō (traditional) — curved historical short blade. Mostly custom and collector pieces.
  • Reverse tanto — angular spine, continuous edge. EDC darling.
  • Recurve tanto — primary edge has a slight inward curve. Aggressive slicer for a tanto.
  • Modified tanto — softened vertex with a small bevel between primary and secondary edges. Easier to sharpen, less distinctive.
  • Tanto karambit — hybrid: angular point on a karambit-style curved handle. Niche.
  • Hira-zukuri tanto — flat-ground traditional Japanese geometry, no ridge line.

Most modern tantos sold in the US are American tantos or reverse tantos. The rest are specialty buys.

Best Steel for a Tanto

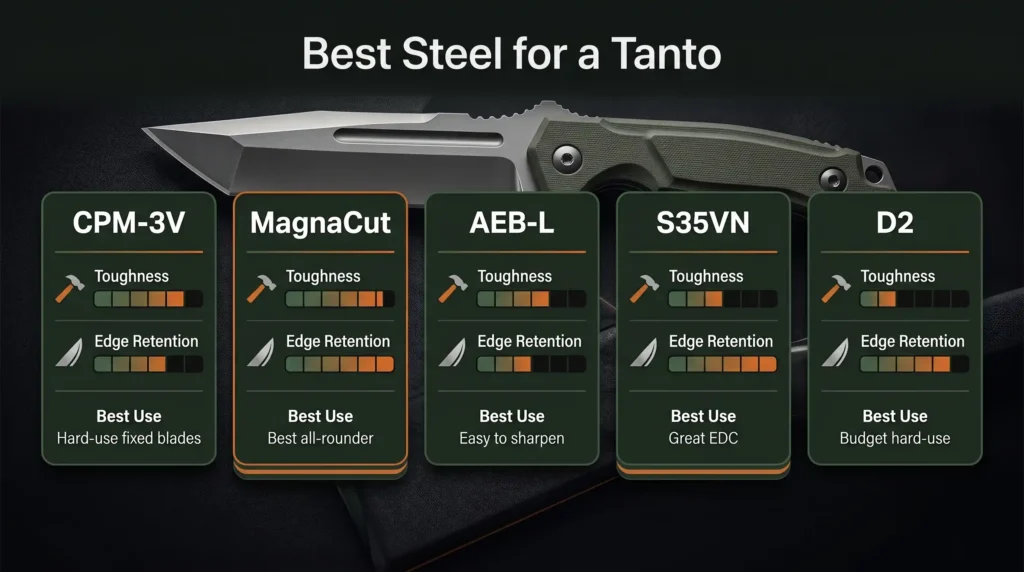
Best steel for a tanto knife comparison showing CPM-3V, MagnaCut, AEB-L, S35VN, and D2 with toughness, edge retention, and best use ratings
The best steel for a tanto knife depends on use: CPM-3V for hard-use fixed blades, MagnaCut as the best all-rounder, AEB-L for easy sharpening, S35VN for EDC, and D2 for budget hard-use knives.

Tantos punish steel differently than slicers do. The tip and vertex see lateral and impact stress that a drop point’s tip never feels, which makes toughness more important than pure edge retention. See Knife Steel Nerds for in-depth metallurgy on any steel below.

SteelToughnessEdge RetentionBest Use
CPM-3VExcellentGoodHard-use fixed blades, tactical
CPM-MagnaCutVery goodVery goodBest modern all-rounder
AEB-LExcellentFairSharpening-friendly, budget builds
S35VNGoodGoodQuality EDC folding tantos
VG-10FairGoodMid-tier folders, traditional Japanese style
D2FairVery goodBudget hard-use; can be brittle
M390 / 20CVFairExcellentPremium EDC if abuse is light
AUS-8GoodFairInexpensive utility

Steel by user type:

BuyerRecommended Steel
Hard-use fixed blade ownerCPM-3V or MagnaCut
EDC carrierMagnaCut, S35VN, or 14C28N
Tactical / duty carryCPM-3V, MagnaCut
Collector / displayDamascus, traditional carbon steels
Budget buyerAUS-8 or 14C28N

Avoid pure high-wear, low-toughness steels (S90V, M398) on tantos meant for impact work — the vertex chips more easily than buyers expect. For premium pattern-welded options, see our damascus knife guide.

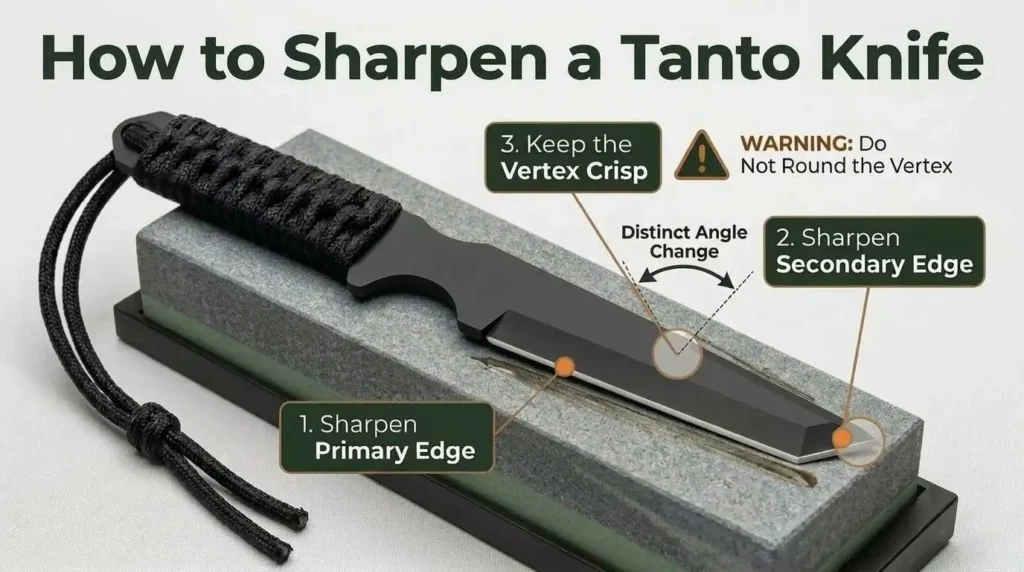
How to Sharpen a Tanto Knife

How to sharpen a Tanto knife infographic showing primary edge sharpening, secondary edge sharpening, and maintaining a crisp vertex angle on a tactical fixed blade using a whetstone.
Sharpen a tanto knife in separate stages: sharpen the primary edge, sharpen the secondary edge, and keep the vertex crisp without rounding the angle change.

Tantos aren’t actually hard to sharpen — they’re hard to sharpen intuitively. The mistake almost everyone makes is treating the edge like one continuous curve. It isn’t. It’s two separate edges that share a steel.

The mental model: sharpen the primary edge as you would a normal knife, then re-set your wrist and sharpen the secondary edge as a separate operation. Keep the vertex crisp.

On a Spyderco Sharpmaker. Set the rods at 40° inclusive. Run the primary edge in normal alternating strokes. Then lift the handle so the secondary edge contacts the rod at the same angle and run that edge for the same number of strokes. The V-rod geometry naturally tracks both bevels.

On bench stones. Same logic, more skill needed. Maintain a consistent angle on the primary edge, then rotate the knife to bring the secondary edge flat to the stone. Treat the vertex as the boundary between two cuts; do not let your stroke roll over it.

On guided systems or belt sanders. Most guided systems (KME, Wicked Edge) handle compound bevels if you reposition the clamp between edges. Belt sanders are forgiving but watch heat at the vertex.

Common errors. Rounding off the vertex (kills the design). Sharpening the secondary edge at a steeper angle than the primary (chips faster). Treating the whole thing as one curve (gradually erases the tanto profile).

Common Buying Mistakes

  • Buying a tanto for general EDC slicing. It will frustrate you within a week. Buy a reverse tanto or drop point instead.
  • Choosing M390 or S90V for a hard-use tanto. Excellent steels, wrong job. Toughness beats wear resistance on impact-prone tips.
  • Ignoring the grind. A sabre-ground tanto pries beautifully and slices poorly. A high-flat-ground tanto cuts better but won’t take the abuse. Match the grind to the use.
  • Mistaking the angular silhouette for “true Japanese.” Most American tantos are inspired by, not copied from, traditional tantō.
  • Buying a thin folding tanto for prying work. Folders flex at the lock. Pry with a fixed blade.

Best Tanto by Use Case

Use CaseBest TypeWhy
EDCReverse tantoContinuous edge, slicing-capable, controlled tip
Tactical / dutyFixed-blade American tantoTip strength under impact and prying
Hard-use utilityFixed-blade tanto in CPM-3VToughness handles abuse without chipping
CollectingTraditional Japanese-style tantōHistorical and aesthetic value
Outdoor / survivalReverse tanto or drop pointTanto’s lack of belly hurts in field tasks
Self-defenseSpecialized; check legality firstSee our best blade shape for self-defense guide

For full picks across categories, see our best tactical fixed blade knives roundup. For state-by-state knife law guidance, American Knife & Tool Institute maintains current information.

Caring for Your Tanto

Wipe and dry the blade after any cutting task — hard materials trap moisture against the steel. Oil the pivot on folders monthly with a drop of mineral oil. Strop the primary edge between sharpenings. Inspect the vertex periodically; small chips can be polished out before they grow. Avoid sustained contact with acidic foods, salt water, or unprotected leather sheaths in humid storage.

Texas-based Axevar Knives carries a small selection of tanto and reverse-tanto folders and fixed blades, hand-finished and built around the steels and geometry choices we recommend in this guide. If you’ve worked through the use-case matrix above and know what you need, browse the Axevar tanto collection and pick the one matched to your actual use, not the prettiest one.

Pros and Cons of a Tanto Knife

ProsCons
Exceptional tip strengthAlmost no belly for slicing
Excellent on hard materialsPoor for food prep
Holds up to prying and impactAwkward for detail work
Distinctive, purposeful silhouetteHarder to sharpen if you don’t understand it
Strong tactical / duty performanceLegal ambiguity in some US states
Wide model selection across price tiersSome designs lean “mall-ninja” aesthetic

Frequently Asked Questions

What is a tanto knife used for?

Piercing hard materials, cutting tough surfaces like leather, drywall, and carpet, and hard-use tasks where tip strength matters more than fine slicing. Commonly carried in tactical and EDC roles.

What’s the difference between a Japanese and an American tanto?

The traditional Japanese tantō is a curved short blade with a continuous tip and gentle belly, from samurai-era weaponry. The American tanto has two distinct edges meeting at an angular vertex — a 1980s Western reinterpretation, not a recreation.

What is a reverse tanto?

A reverse tanto has the angular cut on the spine rather than the edge, leaving a single continuous cutting edge with mild belly. Geometrically much closer to a wharncliffe than to an American tanto. The Benchmade 940 Osborne is the iconic example.

Are tanto knives good for EDC?

American tantos are a niche EDC choice — fine for utility tasks but weak at slicing and food work. Reverse tantos are excellent EDC blades and outperform American tantos for daily carry in almost every dimension.

Are tanto knives hard to sharpen?

No, but they are harder to sharpen intuitively. The trick is to treat the primary and secondary edges as two separate operations rather than one continuous curve. A Spyderco Sharpmaker handles this naturally.

Is a tanto knife good for self-defense?

The tanto’s tip resists breakage under impact, which is meaningful in stabbing motions. It is not magically better than other point shapes, and legal carry rules vary by state. Always check local law.

Are tanto knives illegal?

Knife legality in the US is governed mainly by blade length, locking mechanism, and concealed-carry rules — not blade shape. Some states have nuanced rules around “dirk and dagger” classifications that can apply to certain tantos. Check the AKTI state knife laws database before carrying.

Why is it called a tanto?

The word comes from the Japanese tantō (短刀), literally “short blade.” The modern American tanto borrows the name from the historical Japanese weapon despite differing significantly in geometry.

What steel is best for a tanto?

For hard-use and tactical applications, CPM-3V and CPM-MagnaCut lead — both prioritize toughness, which matters more on a tanto than on a slicer. For EDC, MagnaCut, S35VN, or 14C28N are excellent.

The Bottom Line

The tanto is neither the magical super-knife the 1980s marketing implied nor the useless fashion shape the snobs dismiss. It’s a specialized tool. Buy one because you actually need a tip that won’t snap, you cut a lot of hard materials, or you specifically want the silhouette — not because it looked cool in a video game. Match the variant (American, reverse, or traditional) to the job, pick a steel that prioritizes the right property for your use, and sharpen it with the correct mental model.

For the bigger picture, return to our knife blade types pillar. For the closest functional alternative, compare against the drop point knife. For the under-appreciated cousin, read the reverse tanto guide.

What Is a Clip Point Knife? Uses, Pros, Cons & Buying Guide

A clip point knife is a fixed or folding blade with a section of the spine cut away near the tip straight or concave creating a sharp, thin, precise point with a working belly behind it. It’s the geometry behind the Bowie knife and most traditional pocket knives, well-suited for EDC, piercing, fine detail work, and tactical carry.

This guide covers what a clip point is, what it’s used for, how it compares to other knife blade types and shapes, the best steels and sizes, common buying mistakes, and how to choose the right one.

Quick Answer: A clip point knife has a “clipped” spine that creates a sharp tip backed by a curved cutting belly. Best for EDC, piercing, fine detail cutting, tactical use, and Bowie-style hunting.

What Is a Clip Point Knife?

Labeled diagram of a clip point knife showing the clipped spine, sharp tip, and cutting belly.

A clip point is defined by one feature: a section of the spine is removed near the tip  in a straight or concave cut  raising and thinning the point.

That single design choice creates three working advantages:

  • A sharp, fast-piercing tip with minimal drag during insertion
  • Excellent control for detail work and precision cuts
  • A retained belly for slicing and general utility

The clipped tip pierces faster and cuts finer than a drop point. That’s why it remains the dominant profile in EDC folders, traditional pocket knives, and the entire Bowie family.

Best For / Not Best For

Comparison chart of what a clip point knife is best for versus tasks it is not suited for.
Best ForNot Best For
EDC and pocket knivesHeavy prying or batoning
Tactical and self-defenseHard-use bushcraft
Fine detail and precision cuttingPrimary skinning of large game
Caping and small-game huntingUsers needing maximum tip strength
Bowie-style fixed bladesHard-target metal piercing
Traditional and collector knivesBeginners who’ll pry with the tip

If your priority is heavy utility or maximum tip strength, a drop point or tanto will fit better.

Clip Point vs Other Blade Shapes

Four folding knives side by side comparing clip point, drop point, tanto, and spear point blade shapes.
Blade ShapeBest ForMain Weakness
Clip PointEDC, piercing, detail, BowieThinner, more fragile tip
Drop PointHunting, EDC, skinningSlower piercing
TantoHard-target piercingLimited slicing belly
Spear PointThrusting, symmetric workOften double-edged, more legal restrictions

Clip Point vs Drop Point

A drop point lowers the tip and adds steel mass for strength. A clip point thins and raises the tip for piercing speed and detail work. Pick the clip point for piercing, fine work, and tactical or traditional carry. Pick the drop point for hunting, skinning, and general utility. See our drop point vs clip point comparison.

Clip Point vs Tanto

The tanto trades belly for an angular reinforced tip built for hard-target piercing. The clip point keeps a usable belly while still piercing faster than a drop point. See our tanto vs drop point comparison.

Clip Point vs Spear Point

A spear point is symmetric and often double-edged, which raises legal concerns. A clip point is asymmetric and single-edged, easier to classify as a working knife. See our spear point vs drop point vs dagger guide.

Is a Clip Point a Bowie Knife?

Bowie clip point knife next to a smaller EDC clip point folder showing the same blade geometry at different sizes.
The clip point profile scales both ways: a 7.5-inch bowie for heavy field work and a 3-inch folder for everyday carry. The geometry doesn’t change, but the job does.

Most Bowies have clip point blades, but not every clip point is a Bowie. A Bowie is a specific large-format clip point — typically 6 inches or longer, with a long dramatic clip and often a sharpened false edge. A small EDC folder shares the geometry but not the heritage. See our Bowie knife guide.

Pros and Cons

ProsCons
Sharp, fast-piercing tipTip is thinner and more fragile than drop point
Excellent control for detail workNot suited for prying or batoning
Retained belly for slicingRisk of puncturing hide when skinning
Iconic Bowie heritage and aestheticsCurved clip section is harder to sharpen
Strong fit for EDC, tactical, traditionalDrop point outperforms it for heavy utility

Anatomy of a Clip Point Blade

Anatomy diagram of a clip point knife labeling the tip, clip, false edge, spine, plunge line, belly, cutting edge, choil, and tang.

Nine working parts. Knowing them is the difference between buying a knife and buying the right knife.

  1. Spine. Unsharpened top edge. Runs straight from the handle, then transitions into the clip near the tip. EDC folders run 2.5–3.5mm thick; Bowie-style fixed blades 4–6mm.
  2. Clip. The section of spine removed near the tip. Short clip = high clip (more belly, stronger tip). Long clip = low clip (sharper tip, more piercing speed).
  3. False Edge / Swedge. The unsharpened bevel along the clip. Sometimes sharpened into a true secondary edge — common on Bowies. Otherwise it’s a swedge and is left alone.
  4. Belly. The curved cutting edge near the tip. Shorter than a drop point’s belly but still functional for slicing.
  5. Tip. Where spine and edge meet. Always thinner than a drop point tip — the trade-off for piercing speed.
  6. Plunge Line. The transition from unsharpened ricasso to sharpened edge. A clean vertical plunge line is a sign of quality grinding.
  7. Cutting Edge. Heel, flat working section, and the belly to the point.
  8. Choil. A small unsharpened notch between edge and handle. Lets you sharpen the full edge without rounding the heel.
  9. Tang. Steel extending into the handle. Full tang is non-negotiable on serious fixed-blade clip points.

A Brief History

Timeline display showing the evolution of the clip point knife from ancient stone blade to frontier bowie, classic folder, and modern damascus folder.

Knapped flint clip points have been unearthed at the estuary of the Drim river, dating back to Macedonian times of the Eneolithic period — one of the oldest functional blade designs in human history.

The modern American clip point was popularized by Rezin Bowie’s design for his brother Jim Bowie in the 1830s. The Sandbar Fight of 1827 made the geometry famous, and the “Bowie knife” became the defining profile of the American frontier.

In the 20th century, makers like Bo Randall and William Scagel refined the clip point using high-carbon tool steels. The American Bladesmith Society maintains a record of the makers who carried that tradition forward. The Buck 110 Folding Hunter (1964) brought the clip point into the modern folder market.

That hand-forging tradition survives today in custom shops producing true Damascus clip points and Bowies, where the clip line showcases the layered pattern more dramatically than any other blade geometry.

Clip Point Variations

“Clip point” isn’t one shape; it’s a family.

  • Standard Clip Point. Moderate concave clip with balanced belly. The default on EDC and traditional folders.
  • California Clip. Extended, gentle clip running nearly the full back of the blade. Long sweeping false edge.
  • Turkish Clip. Extreme recurve — almost trailing-point in feel. Aggressive, less common in production.
  • High Clip Point. Short clip with the tip closer to the spine line. Stronger tip, more belly, slightly slower piercing.
  • Low Clip Point (Bowie-Style). Long, dramatic concave clip with the tip well below the spine line. Maximum piercing speed and tip control.
  • Modified Clip. Production tweaks — recurved edge, sharpened swedge, or aggressive belly. Common on tactical folders.
Modified clip point folding knife with labels for sharpened swedge, recurved edge, and aggressive belly.
The modified clip point pushes the classic profile further: a sharpened swedge, a recurved cutting edge, and a deeper belly built for aggressive slicing.

Grind Variations

The grind matters as much as the profile, especially on a thin tip.

  • Scandi. Easy to sharpen, traditional, but thins the tip aggressively.
  • Hollow. Razor-thin edge, fragile under prying — risky on clip point tips.
  • Flat. Balanced — the most common on quality clip points.
  • Convex. Strongest geometry, hardest to sharpen freehand. Best for hard use.

What Is a Clip Point Used For?

A clip point handles EDC, fine detail cutting, piercing, caping, tactical work, traditional pocket-knife tasks, and Bowie-style heavy field use. The thin precise tip and retained belly make it the go-to profile when piercing speed and control matter more than tip strength.

  • EDC. Opens packages, slices food, cuts cordage, handles fine work — opening seams, picking out splinters, detail carving — better than drop points.
  • Hunting (Caping & Detail). The thin tip excels at caping and detail work around joints.
  • Tactical and Self-Defense. Faster piercing than drop point, controllable tip, traditional fighting-knife geometry.
  • Traditional & Collector. The dominant profile in slip-joints, stockmen, trappers, and Bowies.
  • Bowie / Heavy Field Use. Large-format clip points (6″+) handle camp tasks, brush clearing, and heavy field work.

Honest exception: for clean primary skinning, batoning, or prying, a drop point or tanto outperforms.

Clip Point Knife by Use Case

EDC

Look for a 2.8–3.5 inch blade, a strong lock (frame, liner, or AXIS), and steel that resharpens easily — D2, 154CM, 14C28N, or S30V. The clip point dominates modern pocket knives because the thin tip handles tasks a drop point struggles with.

Hunting (Caping & Detail)

Look for a 3.5–4.5 inch blade on a full tang, with a tough steel — MagnaCut, S30V, CPM 3V, or hand-forged 1095 + 15N20 Damascus. Caveat: clip points aren’t optimal for primary skinning — a drop point is usually better.

Tactical

Look for a 4–5 inch blade (or longer for fixed-blade Bowies), a strong lock or full tang, and high-toughness steel — CPM 3V, S35VN, or MagnaCut. The clip point is the historically preferred tactical profile because it pierces faster than any other working blade. See our tactical fixed blade roundup.

Bowie & Heritage

True Bowies use clip points 6″+ with full tangs, thick spines, and often a sharpened false edge. 1095 high-carbon and hand-forged Damascus are the traditional picks. See our Bowie knife guide.

Self-Defense

The clip point is historically the preferred defensive geometry — faster piercing, traditional fighting-knife heritage. That said, blade shape matters far less than legal carry rules and training. A consistently carried legal knife beats a “better” knife left at home. See our best blade shape for hunting, EDC, and self-defense guide.

Best Steel for a Clip Point Knife

Steel matters more than profile — and even more on a clip point. The thin tip concentrates stress at the point: soft steel rounds off, brittle steel chips. Prioritize toughness first, edge retention second, corrosion third.

SteelEdge RetentionToughnessCorrosionSharpeningBest ForTier
1095 (carbon)GoodExcellentPoorEasyBowie, traditional$
D2Very goodModerateModerateModerateEDC$$
154CMGoodGoodGoodEasyEDC, all-around$$
S30VExcellentGoodExcellentHardPremium EDC$$$
CPM 3VVery goodOutstandingModerateModerateHard-use clip points$$$
MagnaCutExcellentExcellentExcellentModeratePremium tactical/EDC$$$$
Damascus (1095 + 15N20)Very goodExcellentModerateModerateHand-forged Bowies$$$
420HC / 3Cr13FairGoodExcellentVery easyBudget EDC$

1095 is the working standard for Bowies and traditional carry. Tough, sharpens to a razor, patinas naturally.

MagnaCut pairs high edge retention with the toughness a thin tip needs. For the metallurgy, see Larrin Thomas at Knife Steel Nerds — he designed the steel.

CPM 3V is the safest pick if you want a clip point that survives hard use without chipping. Outstanding toughness — exactly what a thin-tip geometry needs.

Damascus. True pattern-welded Damascus (1095 + 15N20) combines high-carbon performance with layered toughness — and the clip line is where the pattern shines. See our Damascus knife guide. Watch out for fakes:

  • Real Damascus shows pattern on both sides and into the bevel, has visible layers under magnification, and rusts without care.
  • Fake Damascus has pattern only on the flat surface and never rusts (chemically etched stainless).

Best Steel by User Type


User Type
Best Steel Choice
Beginner420HC / 3Cr13 — forgiving, low maintenance
EDC UserD2 / 154CM — balance of edge and ease
Hunter (caping/detail)S30V / MagnaCut — retention and toughness
Tactical / Hard UseCPM 3V / MagnaCut — outstanding toughness
Traditional / Bowie1095 — heritage steel, easy to sharpen
CollectorDamascus — pattern, character, tradition

Best Clip Point Knife by Use Case

Use CaseBest Blade LengthBest Steel
EDC2.8 – 3.5 inD2, 154CM, S30V
Hunting (caping/detail)3.5 – 4.5 inS30V, MagnaCut, Damascus
Tactical4 – 5 inCPM 3V, S35VN, MagnaCut
Bowie / Heritage6 – 10 in1095, Damascus
Traditional Folder2.5 – 3.5 in1095, 154CM, D2

How to Choose Your Clip Point Knife

Seven questions, in order:

  1. Primary use case? EDC, tactical, hunting (caping/detail), Bowie/heritage, or collector.
  2. Fixed or folding? Fixed for Bowies, tactical, and serious field work. Folding for EDC and traditional carry.
  3. Blade length? EDC: 2.8–3.5″. Hunting/tactical: 3.5–5″. Bowie: 6″+ (with the legal caveat below).
  4. What steel? Carbon (1095) if you’ll oil it. Stainless (S30V, MagnaCut) for low maintenance. Damascus for hand-forged character. Prioritize toughness — soft or brittle steels chip the thin tip.
  5. Budget tier? Under $50: budget production. $50–$150: mid-range or entry hand-forged. $150–$400: premium production. $400+: custom shop.
  6. Hand-forged or production? Production = consistency, warranty. Hand-forged = unique craftsmanship, more care required.
  7. Is it legal where you’ll carry? Bowie lengths and sharpened swedges are the two clip-point traps.

Common Buying Mistakes

  1. Choosing too long a blade. Bowie-style clip points feel like overkill in real carry. Many states cap legal length at 4–5″. Most users are better served by 3.5–4.5 inches.
  2. Buying a clip point for primary skinning. The thin tip risks puncturing hide. Get a drop point instead.
  3. Buying fake Damascus. Cheap “Damascus” on big marketplaces is usually chemically etched stainless. Look for layers in the bevel and confirm the steel makeup.
  4. Ignoring the false edge. A sharpened swedge changes how you sharpen and can reclassify the knife as a dagger in stricter jurisdictions.
  5. Ignoring local knife laws. Bowie length limits and dagger reclassification trip up clip point buyers more than buyers of any other blade type.

How to Sharpen a Clip Point Knife

The curved belly, thin tip, and (sometimes) sharpened false edge need a different approach than a straight-edged blade. Skip this and you’ll round the tip — the most-broken part of any clip point.

  1. Set your angle. 17–22 degrees per side. Tactical and EDC clips lean toward 20°. When unsure, 20° is safe.
  2. Sharpen the flat section first. Hold your angle and pull the edge from heel to where the belly begins to curve. Match strokes on each side.
  3. Roll into the belly. As you reach the curve, lift the handle slightly and rotate to keep the angle consistent. The belly is shorter than a drop point’s, so the roll is tighter.
  4. Sharpen the false edge — only if it was designed sharp. If your clip has a true sharpened false edge, treat it as a separate edge. Never sharpen an unsharpened swedge — you’ll change the geometry permanently.
  5. Finish the tip carefully. The thin tip rounds faster than any other geometry. Light pressure, fewer passes, more rotation as the belly tightens.
  6. Strop to finish. Leather strop with polishing compound, five to ten passes per side.

For carbon and Damascus blades: wipe dry, then apply a thin coat of food-safe mineral oil or camellia oil. See our knife care guide.

Knife law varies significantly by state, county, and city. The clip point shape itself is rarely the legal issue — blade length, lock type, opening mechanism, sharpened false edge, and how you carry are what matters.

The American Knife & Tool Institute (AKTI) maintains a state-by-state breakdown worth checking before you carry.

Three clip-point-specific legal traps:

  • Bowie length limits. Many states cap legal carry at 4–5″. Most full-size Bowies exceed this.
  • Sharpened false edge = dagger. A sharpened swedge can reclassify a single-edged clip point as a double-edged dagger in stricter jurisdictions.
  • Concealed carry. Bowie-style clip points are usually too large to legally conceal.

This is not legal advice. Check your local laws before carrying any knife.

Caring for Your Clip Point Knife

  • Clean after use. Wipe with a dry cloth. After cutting food, blood, or anything acidic, clean with warm water and dry immediately.
  • Oil carbon and Damascus blades. Thin film of food-safe mineral oil or camellia oil. Once a week for EDC; after every use for hunting.
  • Strop between sharpenings. A weekly strop extends time between full resharpenings significantly.
  • Store properly. Don’t leave a knife in a leather sheath long-term — leather retains moisture. Use kydex, a knife roll, or wall display.
  • Avoid lateral pressure on the tip. The single most-broken part of any clip point. Don’t pry, twist, or throw.

For a complete maintenance routine, see our knife care guide.

Frequently Asked Questions (FAQs)

What is a clip point knife used for?

EDC, fine detail cutting, piercing, caping, tactical work, traditional pocket-knife tasks, and Bowie-style heavy field use.

What is the benefit of a clip point blade?

Three main benefits: piercing speed, tip control for detail work, and aesthetic heritage. The thin clipped tip enters materials with less drag than any other working profile.

Are clip point knives good?

Yes, for EDC, piercing tasks, tactical use, and traditional carry. Not the best choice for primary skinning, prying, or batoning.

Is a clip point a Bowie knife?

Most Bowies have clip point blades, but not every clip point is a Bowie. A Bowie is a specific large-format clip point — typically 6 inches or longer with a long dramatic clip and often a sharpened false edge.

Why is the clip point weak?

The “weakness” is geometric. Removing material from the spine to thin the tip trades tip strength for piercing speed. Buy quality steel and avoid prying with the tip.

Which is better, clip point or drop point?

Neither universally. Clip points pierce faster and allow finer detail work. Drop points are stronger and slice better. See our drop point vs clip point comparison.

Is a clip point good for hunting?

For caping and detail work, yes. For primary skinning, the thin tip risks puncturing hide — a drop point is usually better.

Is a clip point good for self-defense?

Historically the preferred defensive geometry, but blade shape matters far less than legal carry rules and training.

Can you baton wood with a clip point?

Not recommended. The thin tip is the weakest part of the blade.

What’s the best steel for a clip point knife?

For most users: CPM 3V or MagnaCut (toughness handles the thin tip). For traditional carbon: 1095. For hand-forged: real pattern-welded 1095 + 15N20 Damascus.

Are Damascus clip point knives worth it?

Real pattern-welded Damascus (not etched stainless) is worth it for collectors and traditional carriers who’ll maintain their blades.

How long should a clip point hunting knife be?

3.5 to 4.5 inches covers most caping and detail work. Larger (5″+) moves into Bowie territory and runs into legal limits.

Is a clip point knife legal to carry?

In most U.S. jurisdictions, yes — but it depends on blade length, lock type, sharpened false edge, and carry method.

Conclusion

The clip point isn’t the strongest blade shape, and it isn’t the most utility-focused. It’s the most traditional, precise, and historically defining profile in American knife-making — which is why EDC carriers, tactical users, traditional pocket-knife fans, and Bowie collectors keep choosing it.

What Is a Drop Point Knife? Uses, Pros, Cons & Buying Guide

A drop point knife is a fixed or folding blade with a convex spine that curves gently downward from handle to tip, lowering the point below the spine line. The result is a strong tip and a wide cutting belly — well-suited for hunting, EDC, skinning, camping, and general utility.

This guide covers what a drop point is, what it’s used for, how it compares to other knife blade types and shapes, the best steels and sizes, common buying mistakes, and how to choose the right one.
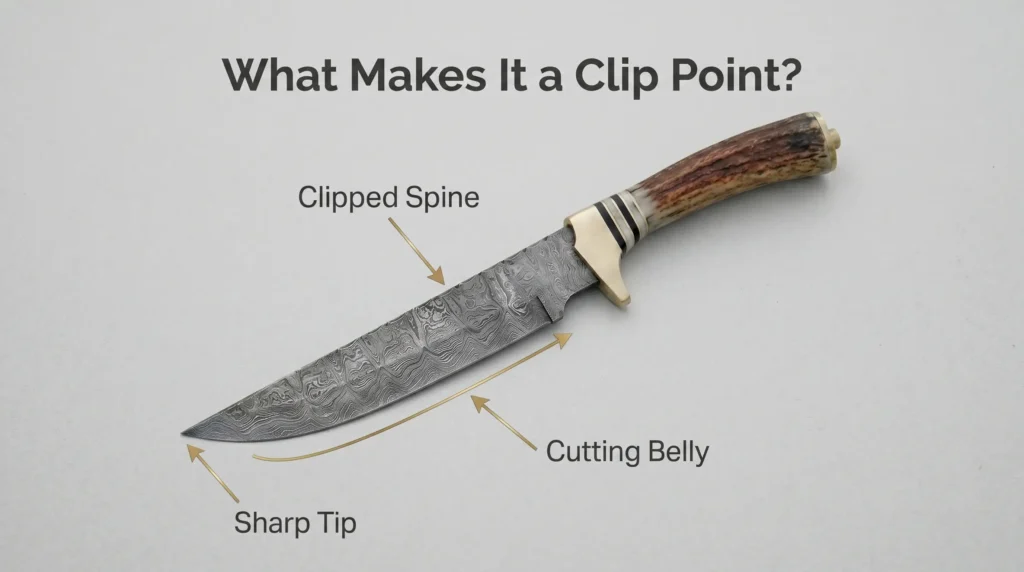
Quick Answer: A drop point knife has a spine that slopes downward toward the tip, creating a strong point and curved belly. It is best for hunting, EDC, skinning, camping, and general utility because it balances slicing control, durability, and everyday versatility.

What Is a Drop Point Knife?

Labeled diagram of a drop point knife showing the convex spine, lowered tip, and wide cutting belly.

A drop point knife is defined by one feature: the spine drops in a smooth convex curve from the handle to the tip, placing the point lower than the top of the blade.

That single design choice creates three working advantages:

  • A strong tip with more steel mass behind it
  • A wide cutting belly for slicing and skinning
  • A controllable profile that’s easy to guide through detailed work

The lowered tip is more resistant to tip stress than a clip point, which is one reason hunters and EDC users have made it one of the most popular working profiles in the modern knife market.

Best For / Not Best For


Best For

Not Best For
HuntingHard-target piercing
SkinningDedicated defensive use
EDC tasksPrying
CampingUsers who want a fine piercing tip
BushcraftDetail tip work on tight cuts
Field food prepCutting through hard sheet materials

The drop point is a generalist. If your priority is fast piercing or fine tip work, a clip point, tanto, or
spear point will fit your needs better.

Drop Point vs Other Blade Shapes

Side-by-side comparison of drop point, clip point, tanto, and spear point blade shapes with their best-use labels.

Most readers come to a guide like this with one question: how does it compare to the alternatives? Here’s the short version, followed by the details.

Blade ShapeBest ForMain Weakness
Drop PointHunting, EDC, skinning, slicingSlower piercing
Clip PointPiercing, detail workThinner, more fragile tip
TantoHard-target piercingLimited slicing belly
Spear PointThrusting, symmetric workOften double-edged, more legal restrictions

Drop Point vs Clip Point

A clip point has a concave spine that “clips” away material toward the tip, raising the point and thinning it. It pierces faster and works better for fine tip detail.

A drop point has a convex spine that lowers the tip and adds steel behind it. It slices better, controls better, and resists tip stress better.

Pick the drop point for hunting, EDC, and general work. Pick the clip point when piercing speed or fine tip work is the priority. For a full breakdown, see our drop point vs clip point comparison.

Drop Point vs Tanto

The tanto has an angular tip with a strong reinforced point, built for piercing hard targets. It has little to no belly, so slicing performance is limited.

The drop point’s curved belly is the opposite design: optimized for long, controlled cuts.

Pick the drop point for utility, hunting, food prep, and EDC. Pick the tanto for tactical hard-target use.

For a side-by-side breakdown, see our tanto vs drop point comparison.

Drop Point vs Spear Point

A spear point is symmetric, with the tip on the centerline. It’s often double-edged, which raises legal concerns in many jurisdictions.

A drop point is single-edged and asymmetric — built for working tasks, not thrusting.For a deeper comparison including daggers, see our spear point vs drop point vs dagger guide.

Is a Drop Point a Dagger?

No. A dagger is symmetric and double-edged with the tip on centerline. A drop point is single-edged with an asymmetric working belly. They are different geometries and have different legal classifications in most regions. For more on dagger laws and definitions, see our dagger vs knife guide.

Pros and Cons

ProsCons
Strong tip, more resistant to stressSlower to pierce than clip point
Deep slicing bellyNot ideal for hard-target tactical work
Versatile across hunting, EDC, bushcraftLess piercing speed than spear point
Single-edged, simpler to classify legallyTip can round if sharpened incorrectly
Easy to control for field-dressingTanto outperforms it on hard surfaces

Anatomy of a Drop Point Blade

Anatomy diagram of a drop point blade labeling the spine, belly, tip, cutting edge, and choil.

There are eight working parts on a drop point. Knowing them is the difference between buying a knife and buying the right knife.

  • Spine. The unsharpened top edge. On a drop point, it curves convexly from handle to tip. Hunting drop points typically run 3–4mm thick.
  • Drop. The downward curve of the spine. Subtle drop = high drop point (better piercing). Pronounced drop = low drop point (better skinning control).
  • Belly. The curved section of the cutting edge near the tip. The drop point’s deep belly is what makes it perform well for slicing and skinning.
  • Tip. Where spine and edge meet. It sits below the spine line and is more resistant to stress than a clip-point tip.
  • Plunge Line. The transition from unsharpened ricasso to sharpened edge. A clean, vertical plunge line is a quiet sign of quality grinding.
  • Cutting Edge. The full length of sharpened steel: flat working section + the deep belly leading to the tip.
  • Choil. A small unsharpened notch between edge and handle. Lets you sharpen the full edge without rounding the heel.
  • Tang. The blade steel extending into the handle. A full tang (steel running the full length and width of the handle) is strongly recommended on any serious fixed-blade hunting knife.

A Brief History

Bob Loveless is widely credited with shaping the modern drop point hunter. In the late 1960s and 1970s, he redesigned the hunting knife around a working belly and lowered tip. Within a decade, his geometry became the template for nearly every serious American hunting blade. The American Bladesmith Society maintains a strong record of the makers who carried that tradition forward.

The underlying idea predates Loveless by centuries. Pattern-welded blades from Persia and the Indian subcontinent were forging drop-shaped working knives long before American custom makers picked up the profile. That hand-forging tradition survives today in custom shops producing true damascus drop points.

Drop Point Variations

Five drop point knife variations side by side: standard, high, low, modified, and deep-belly skinner profiles.

“Drop point” isn’t one shape; it’s a family.

  • Standard Drop Point. Moderate spine drop, balanced belly, tip roughly centered on the handle. The safe default.
  • High Drop Point. Subtle spine curve with the tip closer to the spine line. Better piercing, less belly. Common on EDC folders.
  • Low Drop Point. Pronounced drop, tip well below the spine. Excellent belly, safer for field-dressing. Less piercing speed.
  • Modified Drop Point. Production tweaks — recurved edge, spine swedge, or more aggressive belly.
  • Deep-Belly (Skinner-Style) Drop Point. The belly is the dominant feature, wide and sweeping, paired with a low drop. Built for skinning.

Grind Variations

The profile is only half the story. The grind matters just as much.

  • Scandi. Easy to sharpen, great for bushcraft.
  • Hollow. Razor-thin edge, fragile under prying.
  • Flat. Balanced — the most common on quality hunters.
  • Convex. Strongest geometry, hardest to sharpen freehand.

What Is a Drop Point Used For?

Gloved hand using a drop point folding knife to slice through rope outdoors.

A drop point handles hunting, field-dressing, skinning, EDC, bushcraft, food prep, and general utility cutting. The strong tip and wide belly make it one of the most versatile blade profiles for tasks that prioritize control and slicing over raw piercing speed.

  • Hunting. The lowered tip lets you open a hide without puncturing the gut cavity — the single biggest mistake new hunters make with a clip point.
  • EDC. Opens packages, slices food, cuts cordage. The strong tip handles daily contact with concrete, metal, and bone.
  • Skinning. The continuous belly curve stays in contact with the hide through the full draw, with no repositioning needed.
  • Bushcraft and Camping. Handles batoning, feathersticks, notching, and food prep in one tool.
  • Tactical. More resistant to tip stress than clip points, but still not designed for prying.

Honest exception: if your sole task is piercing hard targets like sheet metal or armor, a clip point or tanto will outperform the drop point.

Drop Point Knife by Use Case

Hunting

For most game, look for a 3.5 to 4.5 inch blade on a full tang, with a steel that holds an edge through a full field-dressing session. MagnaCut, S30V, 1095 high-carbon, and hand-forged 1095 + 15N20 damascus are all proven choices. For a deeper look at picking the right shape for the field, see our guide on the best blade shape for hunting, or browse our hunting knife collection for real-world examples.

Key requirements:

  • Enough belly to skin without repositioning
  • Enough tip control to open a hide cleanly
  • Spine thickness to handle bone contact
  • A handle that grips when wet

Skinning

Skinning is a belly-of-the-edge job, not a tip job. A deep-belly drop point keeps the cutting edge in continuous contact with the hide. Hand-forged options tend to carry a slightly more aggressive micro-edge from the forge finish.

EDC

For everyday carry, look for:

  • 2.8 to 3.5 inch blade (legal in most jurisdictions)
  • A strong lock (frame lock, liner lock, or AXIS)
  • Steel that resharpens easily — D2, 154CM, or S30V if budget allows

Self-Defense

The drop point is not the optimal blade shape for self-defense. Clip points, spear points, and daggers all pierce faster. A consistently carried sharp knife is more useful than a “better” knife left at home, but legal restrictions on carry usually matter more than blade geometry. For dedicated tactical fixed blades, see our tactical fixed blade roundup.

Best Steel for a Drop Point Knife

Steel matters more than profile. A perfect drop point in soft stainless will lose its edge fast; a capable profile in good steel will outlast the trip.

SteelEdge RetentionToughnessCorrosionSharpeningBest ForTier
1095 (carbon)GoodExcellentPoorEasyBushcraft, hunting$
D2Very goodGoodModerateModerateHunting, EDC$$
154CMGoodGoodGoodEasyEDC, all-around$$
S30VExcellentGoodExcellentHardPremium EDC$$$
MagnaCutExcellentExcellentExcellentModeratePremium hunting$$$$
Damascus (1095 + 15N20)Very goodExcellentModerateModerateHand-forged hunting$$$
420 / 3Cr13FairGoodExcellentVery easyBudget EDC$

1095 is the working standard for carbon steel. Tough, sharpens to a razor, and tells you when it needs maintenance (it patinas). Oiled regularly, it can last for years with care.

MagnaCut is one of the strongest premium options for hunters who want edge retention, toughness, and corrosion resistance without compromise. For an in-depth look at the metallurgy, see Larrin Thomas’s MagnaCut writeup at Knife Steel Nerds — he designed the steel.

Damascus: True pattern-welded damascus (1095 + 15N20) combines high-carbon performance with layered toughness. For a deeper look, see our damascus knife guide. Watch out for fakes:

Close-up of a true damascus drop point blade showing 1095 and 15N20 pattern-welded layers.
Real pattern-welded damascus shows its layers across the bevel and into the edge — the visible signature of forged 1095 and 15N20 steel.
  • Real damascus shows pattern on both sides and into the bevel, has visible layers under magnification, and will rust without care.
  • Fake damascus has pattern only on the flat surface and never rusts (it’s chemically etched stainless).

Best Steel by User Type

User TypeBest Steel Choice
Beginner420HC / 3Cr13 — forgiving and low maintenance
EDC UserD2 / 154CM — balance of edge and ease
HunterS30V / MagnaCut — retention and toughness
Bushcrafter1095 / 3V — tough and field-sharpenable
CollectorDamascus — character, uniqueness, tradition

Best Drop Point Knife by Use Case

Use CaseBest Blade LengthBest Steel

EDC
2.8 to 3.5 inD2, 154CM, S30V
Hunting3.5 to 4.5 in1095, S30V, MagnaCut, Damascus
Bushcraft4 to 5 in1095, 3V, MagnaCut
Skinning3.5 to 4.5 in1095, Damascus, S30V
Tactical3.5 to 5 inS35VN, MagnaCut

How to Choose Your Drop Point Knife

Seven questions get you to the right knife. Answer them in order.

  1. Primary use case? Hunting, EDC, skinning, bushcraft, or tactical. Be honest — most people overestimate how often they’ll do bushcraft.
  2. Fixed or folding? Fixed for hunting, serious work, and bushcraft. Folding for EDC and carry convenience.
  3. Blade length? EDC: 2.8–3.5″. Hunting: 3.5–4.5″. Bushcraft: 4–5″. Tactical: 5″+ (anything over 5″ moves into bowie knife territory).
  4. What steel suits your habits? Carbon (1095) if you’ll oil it. Stainless (S30V, MagnaCut) for lower maintenance. Damascus for hand-forged character with working performance.
  5. Budget tier? Under $50: budget production. $50–$150: mid-range or entry hand-forged. $150–$400: premium production. $400+: custom shop.
  6. Hand-forged or production? Production = consistency, warranty, easy replacement. Hand-forged = unique craftsmanship and character, more care required.
  7. Is it legal where you’ll carry? Check blade length, lock type, opening style, and carry method rules in every jurisdiction you’ll travel through.

Common Buying Mistakes

Avoiding these five mistakes will save more money than picking any one “best” knife.

  1. Choosing too large a blade. A 7-inch blade looks impressive online and feels like overkill the first time you actually field-dress an animal or open a package. Most users are better served by 3.5–4.5 inches.
  2. Ignoring steel maintenance. Buying a 1095 or damascus blade and never oiling it is a fast way to ruin it. If you won’t maintain a carbon blade, buy stainless. See our knife care guide for a simple maintenance routine.
  3. Buying fake damascus. Cheap “damascus” knives on big marketplaces are usually chemically etched stainless. The pattern washes off the bevel during sharpening. Look for visible layers in the bevel and the seller’s willingness to confirm the steel makeup.
  4. Choosing looks over handle grip. A beautiful handle that slips when wet is worse than a plain handle that doesn’t. Test grip with wet hands if you can, or read reviews specifically about wet-hand performance.
  5. Ignoring local knife laws. Blade length, lock type, opening mechanism, carry method, and even location (school zones, federal buildings, airports) all matter. The blade shape is rarely the legal issue.

How to Sharpen a Drop Point Knife

Drop point knife being sharpened on a wet whetstone with labels showing correct angle and light pressure.

The curved belly and lowered tip need a slightly different approach than a straight-edged blade. Skip this and you’ll round the tip.

  1. Set your angle. Most drop points run 17–22 degrees per side. Hunting and bushcraft: 17–20. EDC folders: ~20. When unsure, 20° is safe.
  2. Sharpen the flat section first. Hold your angle and pull the edge from heel to where the belly begins to curve. Match strokes on each side.
  3. Roll into the belly. As you reach the curve, lift the handle slightly and rotate so your angle stays consistent against the stone. Smooth roll, not a separate motion.
  4. Finish the tip carefully. As the belly tightens, keep rotating, lift slightly more, and reduce pressure. Heavy pressure here is what rounds the tip off.
  5. Strop to finish. A leather strop with polishing compound aligns the edge and removes the burr. Five to ten passes per side.

For carbon and damascus blades: wipe dry, then apply a thin coat of food-safe mineral oil or camellia oil. These steels rust without it. Our full knife care guide covers oiling schedules and storage.

Knife law in the United States varies significantly by state, county, and city, and the drop point shape itself is rarely the legal issue. Blade length, lock type, opening mechanism, and how you carry are usually what matters.

Many U.S. jurisdictions are more permissive with common utility knives, but rules vary by state, city, blade length, lock type, opening mechanism, concealment, and intent. The American Knife & Tool Institute (AKTI) maintains a state-by-state breakdown that’s worth checking before you carry. Cities like NYC and parts of California have stricter rules than surrounding state law.

Drop points are often easier to classify as a working knife, since they’re single-edged and clearly utility-shaped. But length, lock type, and carry method still apply.

This is not legal advice. Check your local laws before carrying any knife.

Caring for Your Drop Point Knife

  • Clean after use. Wipe with a dry cloth. After cutting food, blood, or anything acidic, clean with warm water and dry immediately. Never put a quality knife in the dishwasher.
  • Oil carbon and damascus blades. Thin film of food-safe mineral oil or camellia oil. Once a week for EDC; after every use for hunting.
  • Strop between sharpenings. A weekly strop can extend the time between full resharpenings significantly.
  • Store properly. Don’t leave a knife in a leather sheath long-term — leather retains moisture. Use a kydex sheath, knife roll, or wall display.

For a complete maintenance routine including oiling schedules, storage, and rust prevention, see our knife care guide.

Frequently Asked Questions (FAQs)

What is a drop point knife used for?

Hunting, field-dressing, skinning, EDC, bushcraft, food prep, and general utility cutting. Its strong tip and wide belly make it one of the most versatile working blade profiles available.

Is drop point better than clip point?

For most users, yes. Drop points are stronger, slice better, and resist tip damage more effectively. Clip points are better only when piercing speed or fine tip work is the priority. See our full drop point vs clip point comparison for the side-by-side breakdown.

Is a drop point knife good for beginners?

Yes. The strong tip is forgiving of beginner mistakes, the wide belly makes basic cutting tasks easier, and the shape is widely accepted legally. Pair it with an easy-to-sharpen steel like 420HC, D2, or 154CM.

What is the best drop point knife size?

EDC: 2.8–3.5 inches.
Hunting: 3.5–4.5 inches.
Bushcraft: 4–5 inches.
Four inches is a reliable sweet spot for North American hunters.

Is drop point good for camping?

Yes. The combination of a strong tip, deep belly, and full-tang construction handles food prep, batoning kindling, cutting cordage, and general camp tasks in one tool.

Is drop point good for self-defense?

It’s not the optimal shape for self-defense. Clip points, spear points, and daggers pierce faster. That said, blade shape matters far less than legal carry rules and personal training.

What’s the best steel for a drop point knife?

For most users: MagnaCut or S30V (stainless, low maintenance). For carbon: 1095 (tough, easy to sharpen, needs oiling). For hand-forged: real pattern-welded 1095 + 15N20 damascus.

Are damascus drop point knives worth it?

Real pattern-welded damascus (not etched stainless) is worth it for hunters and collectors who will maintain their blades. They require regular oiling.

Can you baton wood with a drop point knife?

Yes — if it’s a full-tang fixed blade with a spine of 4mm or more. Folders and thin-spine drop points are not suitable for batoning.

Is a drop point knife legal to carry?

In most jurisdictions, yes, but it depends on blade length, lock type, opening mechanism, and how you carry. Check local law before carrying any knife.

Conclusion

The drop point isn’t the flashiest blade shape, and it isn’t the fastest piercer. It’s the most useful one for the widest range of tasks, which is why hunters, EDC carriers, and bushcrafters keep choosing it.

If you’re buying your first one, focus on three things: a blade length that matches your real use (not your wishlist), a steel that fits how much maintenance you’ll actually do, and a handle that grips when wet. Get those right and the knife will serve you well for years.

Knife Blade Types: What Actually Works in the Field (and What’s Just Marketing)

A friend of mine spent $340 on a “premium skinning knife” with a deep trailing point because three buying guides told him it was the “best blade shape for big game.” Two seasons later, that knife has dressed exactly one mule deer and badly. He now does the same job with a $90 fixed-blade drop point and laughs about it.

That story isn’t unusual. It’s the rule.

Most of the internet’s writing on knife blade types is recycled brand copy, repeated by sites that have never field-dressed an animal, broken down 300 boxes a shift at a warehouse, or had to cut a jammed seatbelt in the dark. The result is predictable: people buy the wrong shape for the work they actually do, then blame the steel.

This guide isn’t a glossary. You can find a glossary anywhere. It’s what blade shapes actually do under load, where the standard advice falls apart, and one strong opinion that contradicts almost every other knife blog you’ve read. I’ll get to it about halfway down. If you only remember one thing from this article, it’ll be that section.

The fast answer (if you don’t have ten minutes)

Side-by-side comparison of drop point vs Americanized tanto knife blade shapes showing key features and best uses
Organic vs geometric — drop point handles field work, tanto dominates tactical tasks. Same knife category, completely different jobs.

If you want a knife and you don’t want to think about it, get a drop point for hunting and bushcraft, and ignore tantos unless you specifically like how they look. That covers most real-world use.

There is one blade shape most guides completely ignore that is actually better for modern everyday carry, but it contradicts almost everything you will read in standard knife advice. I will get to it about halfway down.

The rest of this article is for the 10% of people doing something specific enough that blade shape genuinely matters, or for anyone about to spend serious money and wants to spend it correctly.

Drop point: the default that earns its reputation (mostly)

Annotated diagram of a drop point knife blade shape showing strong tip, controlled belly for slicing, and balanced edge geometry

The drop point has a convex spine that curves down to meet a controlled belly. The tip sits below the spine, which makes it strong, and the belly is long enough to slice without being so deep that you lose tip control.In real use, field-dressing whitetail, breaking down camp food, cutting cordage, light carving, the drop point is genuinely hard to beat. The tip won’t snap when you hit a rib. The belly rolls through hide. You can choke up on it for detail work. This is one of the few cases where the marketing and the performance line up. Browse our hunting knives if this is the use case you’re shopping for.

When NOT to use it: opening 200 Amazon boxes a day in a warehouse. The tip is fine enough to puncture whatever’s inside the box, and the belly geometry isn’t doing anything for you on a straight pull cut. A drop point is overkill for cardboard, and the tip is the part that breaks first when you pry, which warehouse workers always end up doing, no matter how many times the safety video says not to.

The clip point, found on Bowie knives, traditional pocket knives, and classic hunters, has a “clipped” section taken out of the spine, leaving a fine, often upswept tip.

Here’s the problem: the clip point is marketed as a do everything traditional blade. In practice, that fine tip is the weakest part of the shape. Snapped clip point tips show up more often than any other blade type, usually after sideways pressure from everyday misuse such as prying staples, opening blister packs, or twisting the tip into something it was not designed to handle. Tasks a drop point would tolerate are exactly where clip points tend to fail.

Clip point knife blade shape with Damascus steel and green resin handle showing fine tip weaknesses and best use cases
The clip point looks great — but that fine tip has a price. Know exactly what it can and can’t handle before you buy.

A clip point excels at one specific thing: piercing soft material with precision. Field-dressing where you need to slip the tip under hide without nicking the gut sack. Detail work in leather. Fine slicing in food prep, if the steel is good. Our Shadow Vanguard fixed blade hunting knife is a clip point built for exactly this kind of disciplined, controlled work.

When NOT to use it: anywhere there’s a chance you’ll lever the knife sideways. Anywhere the tip might catch in something hard. If your “EDC” includes opening anything stapled, taped, or industrially packaged, a clip point will eventually disappoint you. Torn between this shape and the safer alternative? See the drop point vs clip point knife comparison.

Tanto: mostly theater

I’m going to be direct here, because the marketing on this one is genuinely misleading.

The Americanized tanto, the angular, two-bevel point you see on every “tactical” folder from the early 2000s onward, is sold on a story about armor piercing and tip strength. The story is partly true and largely irrelevant. Yes, the geometry concentrates force at the secondary point, and yes, the tip is stronger than a needle-fine clip point. But it’s not stronger than a properly ground drop point, and the chances that you, personally, need to pierce a car door or body armor are functionally zero.

Hand using a Damascus tanto EDC knife to cut a cardboard box, highlighting low-set tip and straight edge blade shape features

What the tanto gives up to get that strength is everything that makes a knife useful day-to-day. The angled secondary edge means there’s no continuous belly. Slicing anything, an apple, a length of rope, a piece of cardboard, becomes a two-stage motion where the blade catches at the angle. Sharpening it correctly requires maintaining two distinct edge geometries, which most people don’t do, so they end up with a tanto that’s dull on one section and sharp on the other.

When NOT to use it: anything that involves slicing. Which is most knife work. For the head-to-head, See tanto vs drop point knife comparison .

The original Japanese tanto, by the way, didn’t have this geometry. It’s a modern American interpretation, and “tactical” is doing a lot of marketing work in that sentence.

When it actually makes sense: if you specifically need to break or pierce a hard barrier, auto extrication, certain rescue scenarios, and you’ve trained on it. That’s a narrow use case. If that’s not you, the tanto is a knife shape you bought because it looked cool, and that’s a perfectly fine reason to own one. Just don’t pretend it’s a better tool than it is.

Sheepsfoot and wharncliffe: the contrarian section

Here’s the strong opinion. The one I said you’d remember.

For most people doing modern EDC, a sheepsfoot or wharncliffe is a meaningfully better tool than a drop point, and the entire knife industry is quietly steering you away from them because they don’t sell the “do anything, go anywhere” fantasy that drives margins.

A sheepsfoot has a straight edge that runs horizontal, with a curved spine that drops to meet it. No real point, just a rounded nose. A wharncliffe is similar but with a straight edge and a straight spine that angles down sharply to a fine, low-set tip. Both share the same useful property: a long, perfectly straight cutting edge with no belly to speak of.

Now think about what modern EDC actually looks like. You’re cutting:

  • Tape on packages
  • Cardboard boxes
  • Zip ties
  • Plastic clamshell packaging
  • Loose threads on clothing
  • Maybe an apple at lunch
Side-by-side comparison of Wharncliffe vs Sheepsfoot knife blade shapes showing tip profile, spine shape, and best use cases

Every single one of those is a push cut or a draw cut along a straight line. A straight edge transmits force cleanly and predictably. A bellied drop point, on the same task, rolls through the cut at a varying angle, which is fine but never optimal. And on the ones where the cut is right against your hand or against something you don’t want to puncture (the contents of the box, the table, the steering wheel), the lack of a forward-projecting tip is a feature, not a bug.

I’ve watched warehouse pickers, electricians, and ER nurses converge independently on Wharncliffe-style blades for exactly this reason. They figured it out by doing the work, not by reading buying guides. Browse our folding knives if you’re shopping for an EDC folder.

When NOT to use a sheepsfoot or wharncliffe: anything involving a stab, pierce, or fine tip work. You can’t field-dress a deer with one, you can’t drill a starting hole in wood, and you can’t slip the tip into a clamshell seam from above. They are not hunting knives. Outside the EDC use case, they fall off hard.

But for the use case the average modern adult knife-buyer actually has? They quietly outperform drop points. The reason you don’t read this in most blade guides is that “the drop point is best” is a safer recommendation that doesn’t risk a return. Choosing between the two? See sheepsfoot vs wharncliffe blade comparison.

Trailing point: oversold for big game

The trailing point, where the tip rises above the spine in a long, deep belly, is the blade shape every buying guide calls “the best skinner.”

For deer, elk, and most big game, drop points outperform trailing points in actual field use, and if you want a specialized tool, a knife with a small gut hook handles the job more cleanly.

The trailing point’s deep belly is genuinely useful for one thing: working a large amount of hide off smaller animals, fish, rabbits, squirrels, or detailed caping work.

Damascus steel trailing point skinning knife with stag handle showing upswept tip and extended belly blade shape features

For breaking down a 200-pound deer in the field, that extra belly becomes unnecessary, and the raised tip is easier to drive into the body cavity compared to the controlled tip of a drop point.

The trailing point earned its reputation in the era of fur trapping, where you were processing a lot of small hides per day. Modern big-game hunting isn’t that work. The advice has lagged behind reality by about a hundred years. For big-game work, Browse hunting knives for big game.

When NOT to use it: big game field dressing if you don’t already know what you’re doing. Anything where tip control matters more than belly length. EDC of any kind.

Spear point: niche, but excellent at the niche

A spear point is symmetrical. The tip sits in line with the centerline of the blade, with belly on both sides (or a sharpened false edge). Daggers, throwing knives, some boot knives.

The advantage is straightforward: maximum piercing efficiency along the centerline. The disadvantage: you’ve built a knife optimized for stabbing, which is a use case civilians almost never encounter legally. A symmetrical grind also means there’s less efficient cutting geometry on either side compared to an asymmetric grind of the same width. Our Damascus Boot Dagger is a spear point in this geometry.

When NOT to use it: as a general utility knife. The shape is optimized for one motion, and that motion isn’t “open a package.” (For comparisons, see spear point vs drop point vs dagger.)

Hawkbill: the underrated utility shape

Gloved hand using a rainbow titanium hawkbill knife to cut rope, highlighting concave edge and constant engagement blade geometry
The hawkbill doesn’t push — it pulls. Concave edge traps material, zero-slip engagement does the rest. One blade shape, one job, zero compromise.

A hawkbill curves downward. The tip points toward the ground, and the entire edge is concave. This is the curved blade knife people are usually asking about when they search “what is a curved knife called.” (Karambits and kukris are also curved, but they’re curved in different directions and for different reasons; we’ll get there.)

Hawkbills are excellent, and I mean excellent, at one specific job: pulling a cut through material that wants to slip away. Roofing felt. Carpet. Linoleum. Insulation. Vines. Fishing line wrapped around a prop. Any time you’re hooking the blade into something and pulling, the hawkbill geometry concentrates force at the curve and stays engaged.

If you’re a tradesperson, a gardener, or someone who works around cordage and rope, a hawkbill in your kit is genuinely useful. The reason most people don’t have one is that the shape looks aggressive and intimidating, and the marketing has historically leaned into that, which is a shame, because it’s one of the most utilitarian shapes ever designed.

When NOT to use it: food prep, fine work, anything that benefits from a forward-projecting tip, anywhere it might be misread as a weapon (it photographs aggressive even when it isn’t).

Recurve: pretty, marginal, high-maintenance

A recurve has a wave in the edge. The belly sweeps forward, the section near the handle curves back inward. It looks aggressive, and it cuts aggressively.

The marketing claim is that recurves “increase cutting performance” by drawing material into the curve as you slice. This is technically true and practically marginal. You’ll cut maybe 10 to 15% more efficiently on certain draw cuts, and you’ll pay for it every time you sharpen the knife, because most standard sharpening systems don’t accommodate the inward curve. You either learn to sharpen freehand, buy specialized equipment, or send the knife out.

For a working knife you’ll actually use in the field, that maintenance burden is rarely worth the marginal cutting gain. For a collection piece or a knife you sharpen ritually, fine.

When NOT to use it: anywhere you’ll need to sharpen the knife with whatever’s available. Bushcraft. Long backcountry trips. Workplaces without a dedicated sharpening setup.

Reverse tanto: an actual improvement

The reverse tanto puts the angular break on the spine instead of the edge. The cutting edge stays continuous with a normal belly; the spine has a strong, beefy tip. You get tip strength without sacrificing slicing geometry.

This is one of the few “modern” blade shapes that’s genuinely better than the older shapes it competes with. The Benchmade 940 is the famous example, and the reason that knife sells decade after decade is that the geometry just works. If you find yourself drawn to the tanto aesthetic but you actually want a usable knife, the reverse tanto is what you’re looking for. (See how it stacks up: reverse tanto vs drop point vs wharncliffe.)

Karambit and kukri: curved blade knives that aren’t EDC

Side-by-side comparison of kukri and karambit curved knife blade shapes showing camp vs tactical specialization and best uses
Two curved blade shapes, two completely different worlds. The kukri owns the campsite. The karambit owns tactical work. Neither belongs in your daily pocket.

Both come up in searches for curved blade knives, both deserve a paragraph, and neither belongs in most readers’ pockets.

The karambit is a small, deeply curved knife with a finger ring. Originally an agricultural tool from Southeast Asia, now sold mostly as a tactical/martial arts piece. The curve and the ring make it excellent for the specific cutting motions it was designed for. Outside that context it’s an awkward EDC choice and tends to read as confrontational in any social situation.

The kukri is a heavy, forward-angled chopping blade from Nepal. Essentially a knife that wants to be a small machete. For chopping firewood, clearing brush, or processing game in camp, a kukri is genuinely useful. For everything else it’s too much knife. Our Damascus Kukri is the version we forge.

Both of these answer the “what is a curved knife called” question, but neither answers “what knife should I carry,” and they get conflated in articles that should know better.

How to actually choose: the decision framework

Three knife blade shapes matched to their best use — drop point for hunting, Wharncliffe for warehouse work, and hawkbill for tradesman pull-cuts
Wrong blade shape for the job costs you time and edge life. Drop point for the field, Wharncliffe for the warehouse, hawkbill for the trades — match the shape to the work.

Forget the shape names for a second. Ask:

What’s the most common cut you make? If it’s pull-and-slice on flat material, you want a straight edge (sheepsfoot, wharncliffe). If it’s roll-and-slice through irregular material, you want a belly (drop point).

Will the tip ever take side load? If yes, avoid clip points and trailing points. Drop points and reverse tantos handle accidental side load better than anything else.

Will you sharpen it yourself in non-ideal conditions? If yes, no recurves.

Is fine tip control a feature you’ll actually use, or are you imagining a use case? Be honest. Most people don’t need a fine tip. They’ve just been told they do. Answer those four questions and the shape picks itself, regardless of what any blog tells you. Once you’ve narrowed it down, browse our full knife catalog or see our guide to the best blade shape for hunting, EDC, and self-defense.

A note on knives in general (the one product bridge)

The blade shape matters, but it’s downstream of build quality. A poorly-heat-treated drop point will lose its edge faster than a well-made tanto, and an excellent steel ground into the wrong shape for your use case will still disappoint you. If you’re shopping with this guide in mind, prioritize shape-for-task first, then steel and heat treatment, then handle ergonomics, then everything else. Brand name comes last. The right blade shape from a small maker beats the wrong blade shape from a big-name brand every time. If you’re looking at custom or hand-forged options, our Damascus knives are forged with this principle in mind.

Resolving the open loop

Back to the friend with the $340 trailing point. He didn’t make a stupid choice. He made the choice the buying guides told him to make, based on a use case (high-volume small-game processing) that didn’t match what he actually does (one or two big-game animals a season). The shape was optimized for someone else’s work.

That’s the whole pattern. The standard blade shape advice was written for the work people used to do, then re-written by content sites that copied each other, and now most of it is calibrated for a knife user who doesn’t really exist anymore. Match the shape to the work you actually do, not the work you imagine doing, and you’ll spend less money on knives, and the knives you do buy will work better.

Frequently Asked Questions (FAQ):

What is a curved knife called?

“Curved knife” usually refers to one of three shapes: a hawkbill (concave edge curving toward the ground, used for utility cuts on cordage, carpet, and roofing material), a karambit (deeply curved blade with a finger ring, originally agricultural, now mostly tactical/martial), or a kukri (forward-angled chopping blade from Nepal). All three are “curved knives” but they’re optimized for completely different tasks. If someone says “curved blade knife” with no other context, they usually mean a hawkbill.

What are different knife shapes for?

At the highest level, blade shapes optimize for three trade-offs: how much belly the edge has (which controls slicing vs. straight cutting), where the tip sits relative to the spine (which controls piercing and tip strength), and whether the edge curves up, down, or stays flat (which controls what kind of pull cut works best). Drop points optimize for general utility. Wharncliffes and sheepsfoots optimize for straight-line cutting. Trailing points optimize for hide work. Tantos optimize for tip strength at the cost of slicing. Hawkbills optimize for pulling cuts on tough material. There’s no “best” shape, only best-for-the-job.

Is a drop point really the best EDC blade?

For traditional outdoor EDC, yes. For modern urban EDC, boxes, tape, packaging, light office tasks, a sheepsfoot or wharncliffe is arguably better, even though the buying guides rarely say so. The drop point is the safest recommendation, not always the best one.
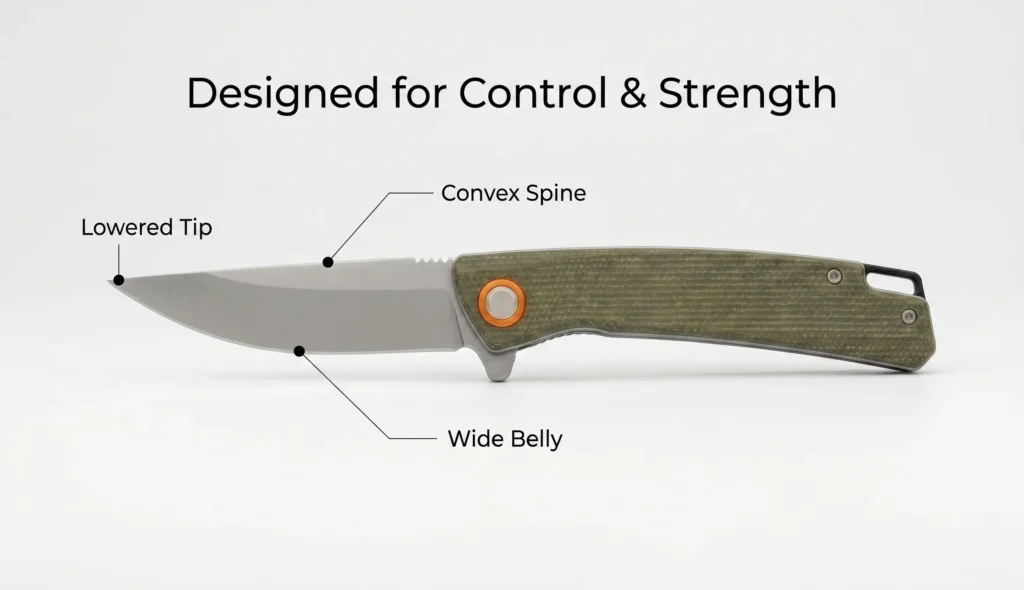
Are tanto blades good for self-defense?

This is a question with a marketing answer and a real answer. The marketing answer is yes, because of tip strength and “armor piercing” geometry. The real answer is that self-defense with a knife is something you should be training for under qualified instruction, not selecting a blade shape for. The tanto’s strengths are real but narrow, and they come at the cost of general usability. (See the best blade shape for self-defense for context.)

What blade shape should I get for hunting?

Drop point for almost everyone. Trailing point if you specifically process a lot of small game or fish. Avoid clip points unless you specifically want a fine tip and you’re disciplined about side load.Browse drop point hunting knives.

The Complete Guide to Damascus Steel Knives in 2026: Kitchen, Hunting, and EDC Explained

Walk into any knife shop in America right now and you will see hundreds of blades labeled “Damascus steel.” Some cost $20 on Amazon. Some cost $400 from boutique makers. Most of them look similar at first glance those flowing, hypnotic patterns swirling across the blade are hard to look away from.

But here is the part no one tells you upfront: a huge portion of those “Damascus steel knife” options on the market today are fakes. The pattern is acid-etched onto ordinary stainless steel and fades with use. You pay Damascus prices. You get a surface treatment.

This guide exists to fix that. We cover what real Damascus steel actually is, how to spot the difference, and which Damascus steel knife fits your actual needs, whether you cook every night, hunt deer in the fall, or carry a pocket knife every day.

Every knife in our Texas workshop is built from real 1095 high-carbon steel and 15N20 nickel steel billets. The pattern goes all the way through the blade. This is our honest guide to knives not a sales pitch.

What Is a Damascus Steel Knife, Really?

A Damascus steel knife is a blade made by forge-welding alternating layers of two different steel alloys typically a high-carbon steel and a nickel-alloy steel then folding, drawing, and grinding the billet to reveal a flowing pattern in the steel itself.

Infographic illustrating the forging process of Damascus steel by layering high-carbon and nickel steel into a blade.

If you’re paying for real Damascus steel, you need to know exactly what you’re getting.

The original Damascus steel from the ancient world was a type of crucible steel called Wootz, made in India and the Middle East. That process is essentially a lost art. What we call Damascus steel today is pattern-welded steel: alternating layers of high-carbon and softer steel forge-welded under heat and hammer, folded to multiply the layers, then acid-etched so the different steels react and reveal the contrast pattern.

We use 1095 high-carbon steel paired with 15N20 nickel steel. The 1095 provides a razor-sharp cutting edge and exceptional toughness. The 15N20 creates the bright contrast that makes the pattern pop. Each billet is forged, drawn, and finished by hand in our Texas workshop no laser cutters, no assembly lines.

The result is not just a beautiful Damascus blade. The layered construction genuinely improves performance. The hard carbon layers give outstanding edge retention. The softer nickel layers provide flexibility that resists chipping. A well-made hand-forged Damascus knife performs better than single-alloy alternatives and lasts decades when cared for properly.

How to Tell Real Damascus from Fake — The Honest Test

This is the most important section in this guide. Every year, millions of Americans spend money on so-called “Damascus” blades that are nothing more than stainless steel with a decorative pattern printed on the surface.

Side-by-side comparison of real Damascus steel vs fake acid-etched patterns showing grain detail on the blade edge.

Here is exactly how to tell the difference.

Look at the edge of the blade. On a genuine Damascus steel knife, the pattern continues right down to the cutting bevel , you can see the layers where the two sides of the edge meet. On a fake Damascus knife, the pattern stops or fades before it reaches the sharpened edge. The coating was only applied to the flat face.

Look at the spine. On real Damascus, the layers are visible on the spine too, not just the face. A fake Damascus blade shows a plain steel spine with no layering.

Run your fingertip across the flat of the blade. Real Damascus, after acid etching, has subtle 3D texture a faint but real ridged feel from one steel type reacting more to the acid than the other. A fake blade feels completely flat and smooth because the pattern is surface-only.

Check the price. A genuine hand-forged Damascus knife takes real time and skill to make. A Damascus kitchen knife selling for $15 is almost certainly a fake Damascus knife. Real Damascus steel commands higher prices because it requires real labor.

The sand test. This is the definitive test. Lightly sand a small area of the flat of the blade until the pattern disappears from that spot. Then apply a few drops of lemon juice or diluted acid to the sanded area. On real Damascus, the layers re-emerge because the pattern is structural it is in the steel, not on it. On a fake, the sanded area stays uniform with no pattern.

Damascus Knife Comparison: Kitchen vs. Hunting vs. EDC

Before diving into each use case, here is a side-by-side breakdown to help you find your match quickly.

FeatureDamascus Kitchen KnifeDamascus Hunting KnifeEDC Folding Damascus Knife
Typical blade length8–10.5 inches7–12 inches2.5–3.5 inches
Blade styleChef, bread, boning, paringDrop point, clip point, gut hookDrop point, tanto, clip point
ConstructionFixed blade, full-tang recommendedFull-tang fixed blade (non-negotiable)Folding, liner lock or frame lock
Steel care neededHigh — hand wash only, oil weeklyHigh — rinse and dry after field useModerate — wipe clean, occasional oil
Best forHome cooks, professional kitchensField dressing, skinning, camp tasksDaily carry, utility, emergencies
Handle materialsMicarta, pakkawood, stabilized woodStag antler, dyed wood, syntheticG10, carbon fiber, titanium
Comes with sheath?Leather chef’s roll (for sets)Leather knife sheath (standard)Pocket clip (sheath optional)
Price range$50–$170$35–$90$17–$60
Legal carry?Kitchen use, no restrictionsField/outdoor carry, check local lawsMost US states under 3 inches

Choosing the Right Damascus Steel Knife for Your Needs

Here is the truth that most knife content skips: the best Damascus blade is not the one with the prettiest pattern. It is the one that fits how you actually use it. A beautiful chef’s knife in the wrong size makes dinner prep harder. A hunting knife with the wrong blade profile costs you precision in the field.

Damascus Kitchen Knives: What Home Cooks Actually Need

Most American home cooks own three or four knives they never fully use. They have a cheap chef’s knife that feels unbalanced, a bread knife that tears instead of slices, and a paring knife they use for everything else. The result is a kitchen experience that feels harder than it should.

Professional Damascus steel kitchen knife set with wooden handles arranged on a dark stone surface near a leather roll.

A hand-forged Damascus chef knife changes that entirely. Not as a luxury , as a functional upgrade.

The 1095 high-carbon core in a Damascus kitchen knife holds a sharper edge than mass-produced stainless steel knives. When you sharpen it on a whetstone at 15 to 17 degrees per side, you get a cutting edge that glides through onions, tomatoes, and herbs with zero resistance. And it stays sharp longer.

For most home cooks, a single 8 to 10.5-inch chef’s knife handles 80% of everything you do in the kitchen. Chopping vegetables, slicing proteins, mincing herbs, dicing onions one good blade does it all. Our 10.5-inch Hammered Damascus Chef Knife at $59.99 is the ideal first Damascus kitchen knife. It is hand-forged from real Damascus, includes a leather sheath, and outperforms mass-produced alternatives at two to three times the price.

For serious home cooks who want a complete kitchen knife set, our 5-Piece and 6-Piece Damascus sets include a chef’s knife, bread knife, boning knife, utility knife, and paring knife all in a leather chef’s roll. The 5-piece set starts at $152.99. The 6-piece set with Saddlewood Micarta handles runs $169.99.

What most knife sellers don’t mention: Damascus kitchen knives need specific care. Never put them in the dishwasher. The heat and detergent attack both the high-carbon layers and the handle material. Hand wash and dry immediately after use. Apply a thin coat of food-safe mineral oil to the blade weekly if you use it regularly. A light patina forming on the dark layers is normal and protective do not sand it off.

Damascus Hunting Knives: What Actually Matters in the Field

Fall hunting season puts real demands on a blade that no kitchen will ever match. You are field dressing a deer in cold weather with wet hands, potentially hours from your truck. The hunting knife needs to hold an edge through a full field dressing job, survive rough handling, and clean up without rust destroying the blade overnight.

Damascus steel hunting knife with a bone handle and leather sheath resting on autumn leaves in a sunlit forest.

Here is what matters and what does not.

Full-tang construction is non-negotiable. A full-tang fixed blade knife has the steel running the full length of the handle. When you apply lateral force during skinning, or use the knife for camp tasks, there is no weak joint to fail. If a hunting knife does not explicitly say full tang, assume it is not.

Blade profile matters more than most buyers realize. The drop point profile where the spine curves gently down to a controlled tip is the best all-around hunting blade shape. It gives you controlled entry for gutting without puncturing organs, and a strong belly for skinning.

If you prefer to open the abdominal cavity with a gut hook skinner, a 9-inch Damascus gut hook skinner adds a sharpened hook on the spine specifically for that task. You zip open the hide and abdominal cavity cleanly without using the tip of the blade reducing the risk of puncturing the gut. Experienced hunters who field dress multiple animals per season find this feature genuinely useful.

Every serious hunting knife should ship with a fitted leather knife sheath. It protects the blade edge, protects you from accidental cuts, and makes safe belt carry possible in the field. That is not a minor detail it is a basic requirement.

Our Damascus knife for deer hunting lineup includes options at multiple price points. The Blue Rhino Hunter at $47.99 is our go-to recommendation for a reliable field blade. For a premium upgrade with a genuine stag antler handle, the Whitetail Stag Skinner at $85.99 is the most-purchased hunting knife among experienced buyers. Our Damascus Gut Hook Skinner at $87.99 covers both functions — drop-point main blade plus a gut hook on the spine.

Damascus EDC Folding Knives: Why What You Carry Every Day Should Mean Something

Most people carry a folding knife they never think about. A stamped factory blade in a plastic handle, bought at a gas station or grabbed off an Amazon listing. It opens packages. It gets the job done. And it means absolutely nothing.

Damascus folding knife on wooden table with everyday carry items like rope and package box in background

A hand-forged Damascus folding knife changes that relationship entirely.

When you pull a Damascus folder out of your pocket, you are carrying something made with real craft. Layers of high-carbon steel folded and forged by hand, acid-etched to reveal a pattern that no two blades share. It cuts better than the gas station knife. It holds that edge longer. And it starts more conversations than you expect.

For everyday carry, blade length is worth knowing. Most US states allow a blade under 3 inches without restriction. Our Damascus EDC line is built around that reality.

If you want Damascus steel that disappears on your keychain, the Damascus Toothpick Knife at $20.99 is the answer. A 4.25-inch overall Texas Toothpick pattern with a genuine stag handle and brass bolsters slim, sharp, and always there.

For a more capable pocket carry, the Ram Horn Damascus Folder at $53.99 steps up with a 3-inch Damascus blade, authentic ram horn scales, hand-filed spine work, and a lockback mechanism built for daily use. It comes with a leather belt sheath. This is the one you reach for at the end of every day and think about keeping forever.

For something with a little more character, the Emberlock Red Bone Damascus Folder at $35.99 pairs a Damascus blade with jigged red bone handle scales and brass bolsters traditional American pocket knife DNA with hand-forged steel.

The best EDC knife is the one you actually have with you. Make it one worth carrying.

The Steel Behind Every Damascus Blade: 1095 and 15N20

Steel specifications fill entire forums with debate. Most of it is theoretical. Here is what actually matters in practice.

Every Damascus blade we forge is built from 1095 high-carbon steel and 15N20 nickel steel. The 1095 is a classic American knife steel tough, easy to sharpen in the field with a simple whetstone, and capable of holding a genuinely sharp edge. The 15N20 adds nickel, which creates the bright contrast layer in the Damascus pattern and contributes flexibility.

The combined billet, heat-treated to 57–59 HRC, gives outstanding edge retention without the brittleness that comes with harder steels. You can field-sharpen a 1095-core blade with a basic whetstone. You cannot say that about all premium steels.

One note that often gets skipped: 1095 high-carbon steel is not stainless. It requires care. Rinse and dry after use. Apply a thin oil coat if you will not use the blade for a week or more. This is a worthwhile trade-off the edge performance and sharpening response of high-carbon Damascus steel is genuinely superior to comparable stainless options.

Caring for Your Damascus Steel Knife: The Simple Routine

Most Damascus knives are under-cared for simply because no one explains the routine in plain terms.

After every use: Rinse the blade under water. Dry it completely with a cloth before putting it away. Never let water sit on a Damascus blade , the 1095 layers will begin to rust within hours in humid conditions.

Weekly (if you use it regularly): Apply a thin coat of food-safe mineral oil or camellia oil to the blade with a cloth. This takes 30 seconds and prevents oxidation.

Every few months: Sharpen on a whetstone. For Damascus kitchen knives, use a 1000-grit stone to set the edge bevel at 15–17 degrees per side, then finish on a 6000-grit stone to refine and polish. This sharpening angle produces a very keen edge that the high-carbon core holds well.

Never: Put a Damascus knife in the dishwasher. The heat, detergent, and steam damage both the carbon layers and handle materials. Never use a pull-through sharpener the aggressive carbide teeth remove too much material and destroy the thin Damascus layers over time.

A dark patina forming on the blade face is not rust. It is a protective iron oxide layer that actually helps the blade resist further oxidation. Leave it alone. It is a sign the knife is aging correctly.

Three-step infographic showing how to apply food-safe oil to a Damascus steel knife to protect and enhance the blade.

Knife Laws in the USA: What You Need to Know Before You Carry

The United States has no single federal knife law. Regulations are set at the state, county, and city level and they vary significantly. Here is the practical overview.

Blades under 3 inches are legal to carry in most US states without restriction. This is why a good EDC folding knife line is designed around this length. Once you exceed 3 inches, check your specific state.

Texas has some of the most permissive knife laws in the country. Arizona is similarly permissive. Florida allows concealed carry of most folding knives statewide.

California bans automatic-opening knives and restricts concealed carry of most fixed blades. New York is significantly more restrictive, especially in New York City. Colorado limits concealed carry to blades under 3.5 inches.

For hunting knives and fixed blades: in most US states, carrying a fixed blade in a leather knife sheath on a belt is fully legal in outdoor and field settings. Always check your specific city ordinances separately from state laws urban restrictions are often much stricter.

For the most current state-by-state information, the American Knife and Tool Institute at akti.org maintains updated legal resources.

Laws change frequently — always verify with your state legislature’s official website before carrying.

Educational infographic simplifying U.S. knife laws, covering federal basics, state rules, and carry restrictions.

FAQ: Frequently Asked Questions

What is a Damascus steel knife?

A Damascus steel knife is a blade made by forge-welding alternating layers of two different steel alloys typically high-carbon steel and nickel steel then folding and grinding the billet to reveal the flowing layered pattern that runs all the way through the blade.

How do I know if my Damascus knife is real?

Check whether the pattern continues down to the cutting edge bevel. On real Damascus, the layers are visible at the edge itself. On a fake Damascus knife, the pattern stops before the bevel. You can also run your fingernail lightly across the flat of the blade , real Damascus has a subtle textured feel from the acid etch; a fake blade is perfectly smooth.

What is the best knife for deer hunting?

For most deer hunters, a full-tang drop-point Damascus skinner in the 8-inch range is the ideal choice. Drop-point blades give you control during gutting without risking organ puncture, and a good belly for skinning. If you prefer a gut hook for opening the abdominal cavity, look for a gut hook skinner specifically designed for that task.

What is an EDC knife?

An EDC knife — everyday carry knife — is a folding blade carried in the pocket daily for common cutting tasks. The best everyday carry knives have a blade under 3 inches, a pocket clip for tip-up carry, a reliable lock mechanism, and weigh under 3 ounces.

How do I sharpen a Damascus kitchen knife?

Use a whetstone, not a pull-through sharpener. Start with a 1000-grit stone to establish the bevel at 15–17 degrees per side, then move to 6000-grit to polish. Work in sets of 10–15 strokes per side at a consistent angle. Finish on a leather strop. Most Damascus kitchen knives go from dull to shaving sharp in under 15 minutes with practice.

Do Damascus knives come with a sheath?

Quality Damascus hunting knives and fixed blades should always include a fitted leather knife sheath. Sets should include a leather chef’s roll. Never buy a hunting blade that does not include blade protection it is a basic sign of a quality purchase.

Which Damascus Knife Is Right for You? Quick Decision Guide

You cook regularly and want one great kitchen knife: Start with an 8 to 10.5-inch hand-forged Damascus chef knife. It handles 80% of everything you do in the kitchen and outperforms mass-produced alternatives at twice the price.

You want a complete kitchen upgrade: A 5 or 6-piece Damascus kitchen knife set with a leather roll covers every kitchen task chef’s knife, bread knife, boning knife, utility knife, and paring knife, ready to use from day one.
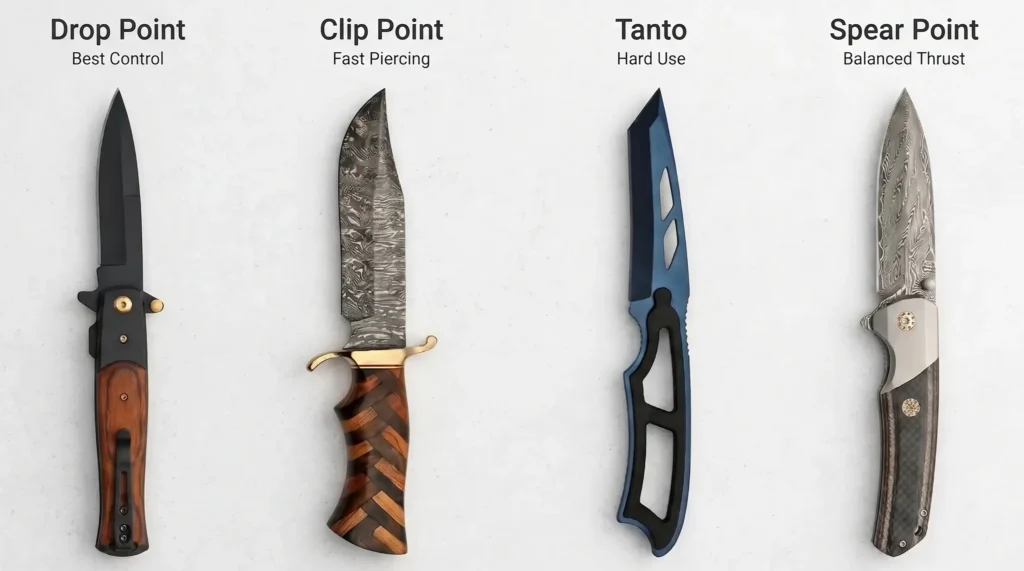
You are hunting deer this fall and want a reliable Damascus field knife: A full-tang drop-point Damascus blade with a dyed wood handle and leather sheath is the go-to recommendation. For a premium upgrade, step up to a genuine stag antler handle version.

You want a gut hook for field dressing: A dedicated Damascus gut hook skinner combines a drop-point main blade with a hook on the spine two functions in one knife.
You need a dependable daily carry knife: The most capable EDC option in most lineups is a G10 carbon fiber folding knife with a half-serrated blade. For lightweight keychain carry, a small carabiner folder clips directly to your gear.
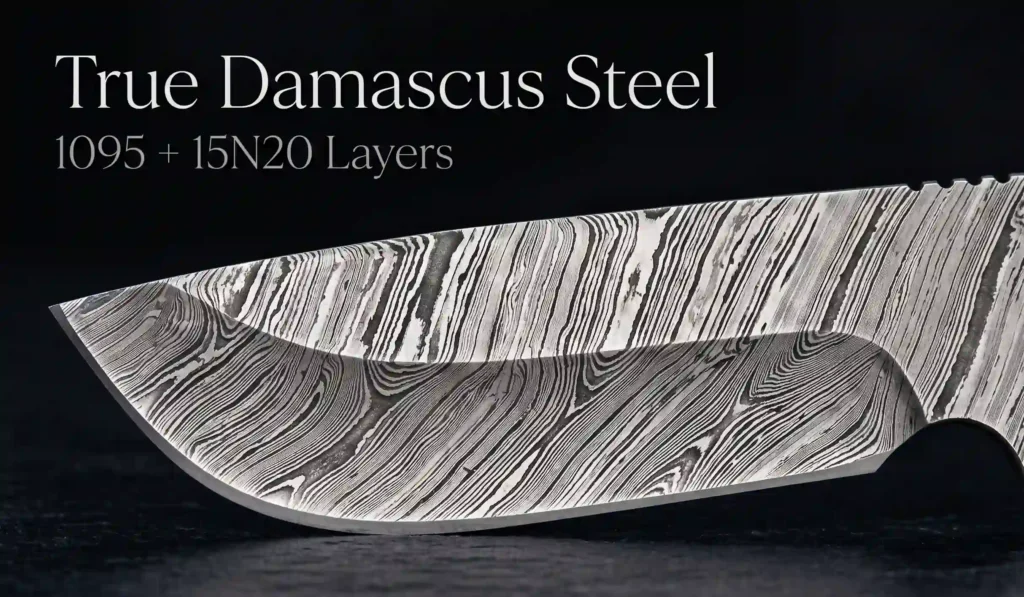
You need a hard-use camp and trail knife: A Damascus kukri in the 13–14 inch range is built for batoning wood, clearing brush, and heavy outdoor chopping. A stacked leather handle and recurved blade multiply forward chopping force significantly.

Why Hand-Forged Matters — and Why It Does Not Always Cost More

The price-to-performance relationship in the knife market is not linear. A $60 hand-forged Damascus knife from a dedicated craft forge , where the money goes into steel and labor outperforms a $60 mass-produced branded knife where most of the price goes into marketing, packaging, and retail margin.

Our pricing is transparent. A 10.5-inch hand-forged Damascus chef knife at $59.99 covers steel, time, heat treatment, hand finishing, and a leather sheath. No factory shortcuts.

Every order includes free domestic USA shipping and delivery insurance. Returns are accepted on eligible items.

The knife you carry, cook with, or hunt with every day should be worthy of that use. That is why we forge every blade by hand and stand behind every piece we make.

Bladesmith forging glowing hot steel with a hammer on an anvil in a traditional blacksmith workshop.

Shop the full collection at axevarknives.com/knives/

Fast USA domestic shipping on every order. Delivery insurance included. Leather sheath or chef’s roll with every knife.

© Axevar Knives — Texas, USA | Domestic Shipping Available

About Axevar

Customer Support

Get the latest news
and offers.

Customer service

  • +1 (347) 238-8968

We will respond as quickly as we can

Copyright © 2026 Axevar Knives. All Rights Reserved.

Add to cart